Documentary legend Ken Burns made zooming and panning across still images into an art form—and these techniques have become essential tools in modern video editing.
Knowing how to zoom in DaVinci Resolve opens up a world of possibilities, whether you’re creating dramatic reveals, transitioning between scenes, or fixing framing issues.
Let’s dive into two powerful ways to control zoom effects: the Transform tool for quick adjustments, and Dynamic Zoom for those smooth, cinematic movements.
How to zoom in DaVinci Resolve
Zooming is a useful way to create dynamic effects or draw attention to specific areas of your footage. It’s one of the basic DaVinci Resolve skills for both corrective adjustments and creative editing—and luckily, it’s easy to do.
Zoom using the Transform tool
1. Select your clip
Begin by selecting the clip you want to zoom in your timeline, then open the Inspector panel on the right side of your interface.
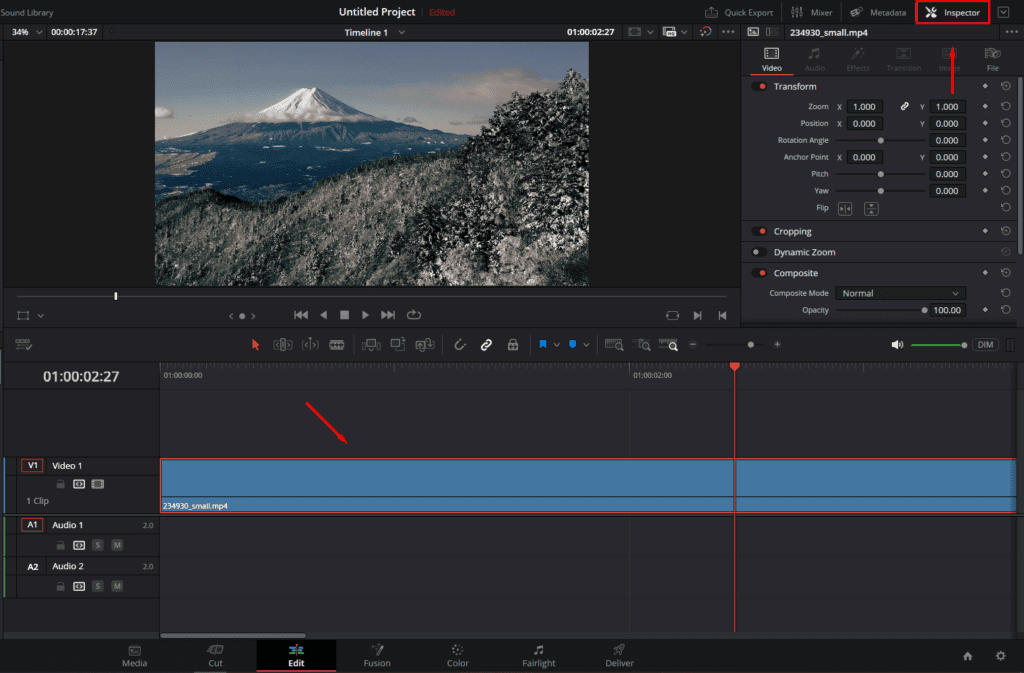
2. Access transform controls
In the Inspector panel, locate the Transform section where you’ll find the Zoom control.
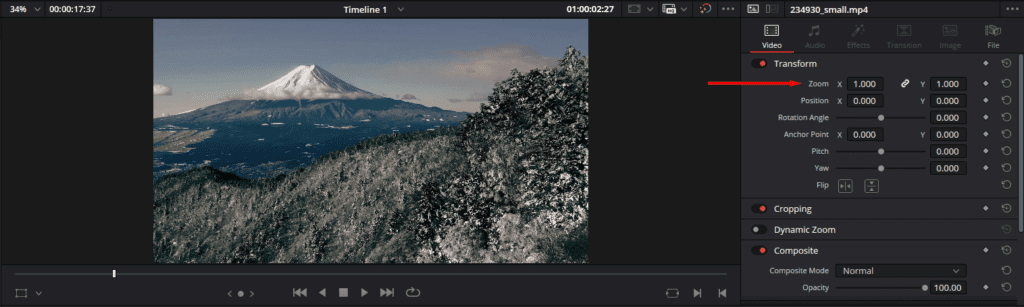
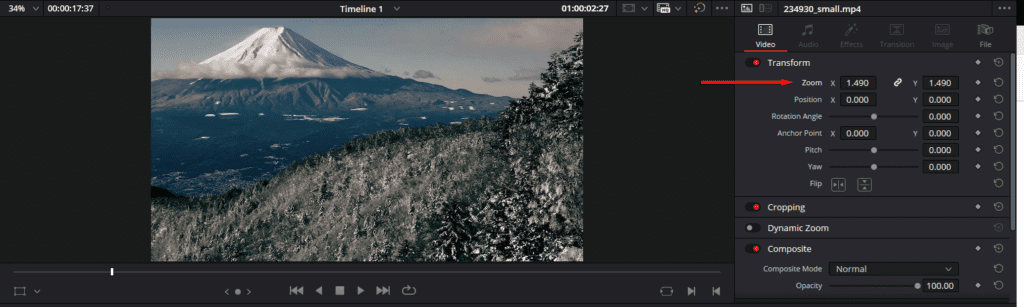
3. Adjust the zoom level
Modify the Zoom parameter by dragging the slider or typing in a value. The default is 1.000 and higher numbers zoom closer.
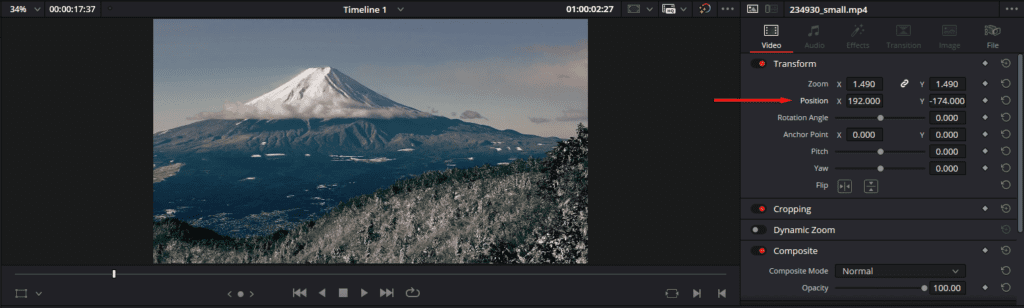
4. Position your frame
Adjust the Position X and Y values to fine-tune your framing. For example, you could center your subject or create a specific composition within the zoomed-in view. Depending on how you’re using your zoom in your project or story, adding a sound effect can help enhance the effect.
5. Add keyframes (optional)
To animate your zooms, you can create keyframes by clicking the diamond icon next to the Zoom option. Then, set different zoom values at different points to create a smooth transition.
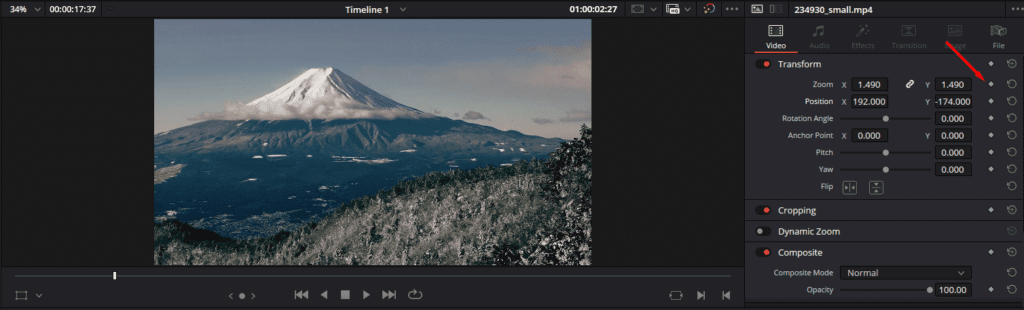
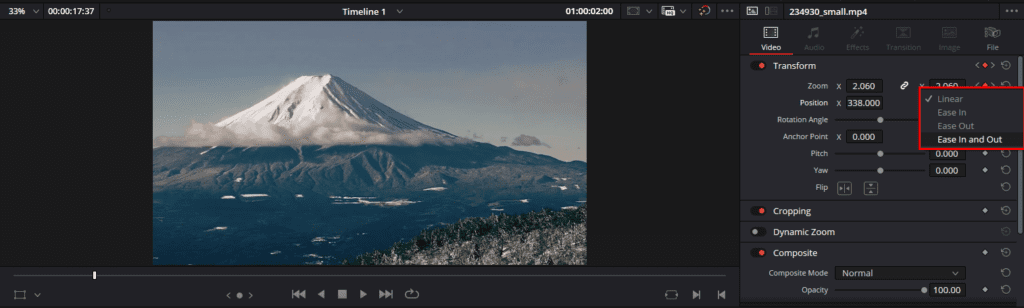
Right-click on any keyframe to select your preferred animation style:
- Linear: Creates a constant-speed zoom with no acceleration.
- Ease In: Starts abruptly and gradually slows down.
- Ease Out: Starts slowly and ends abruptly.
- Ease In and Out: Smooth acceleration at the start and deceleration at the end.
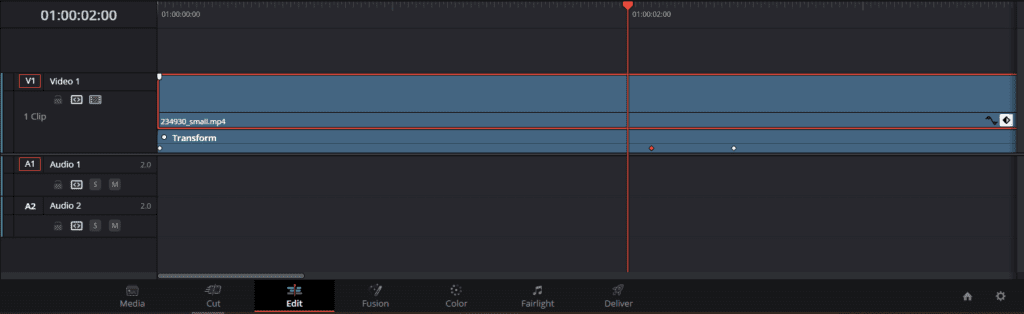
Drag keyframes left or right in the timeline to adjust when zoom changes occur. You can also adjust the curve between keyframes by dragging the Bezier handles that appear when you select a keyframe. Use the keyboard shortcut or the [ and ] keys to move to the next/previous keyframes and speed up editing.
Zooming out in DaVinci Resolve
Wondering how to zoom out in DaVinci Resolve? Zooming out follows the same process as zooming in—just use values below 100 in the Transform tool (like 80 for a slight zoom out, or 50 for a more dramatic effect).
If you’re planning a zoom-out from the start of your shoot, it’s worth capturing your footage at a higher resolution than your delivery format (like shooting in 4K for a 1080p timeline). This gives you more flexibility to zoom out while maintaining image quality.
Using the Dynamic Zoom tool
1. Select DaVinci Resolve’s dynamic zoom effect
Select your clip, then open the Inspector panel. Toggle on Dynamic Zoom. By default, your clip will now slowly zoom in until it ends.
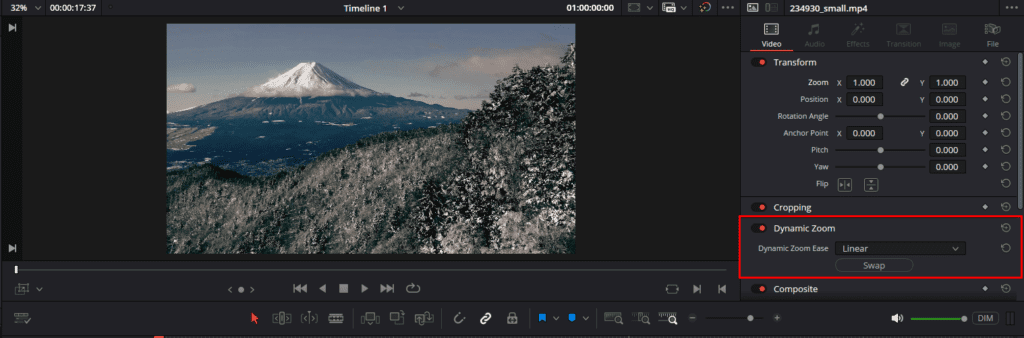
2. Customize the Dynamic Zoom
To change the way your Dynamic Zoom works, you’ll need to enter the editing mode. Select the drop-down menu at the bottom-right corner of your viewer, then choose Dynamic Zoom.
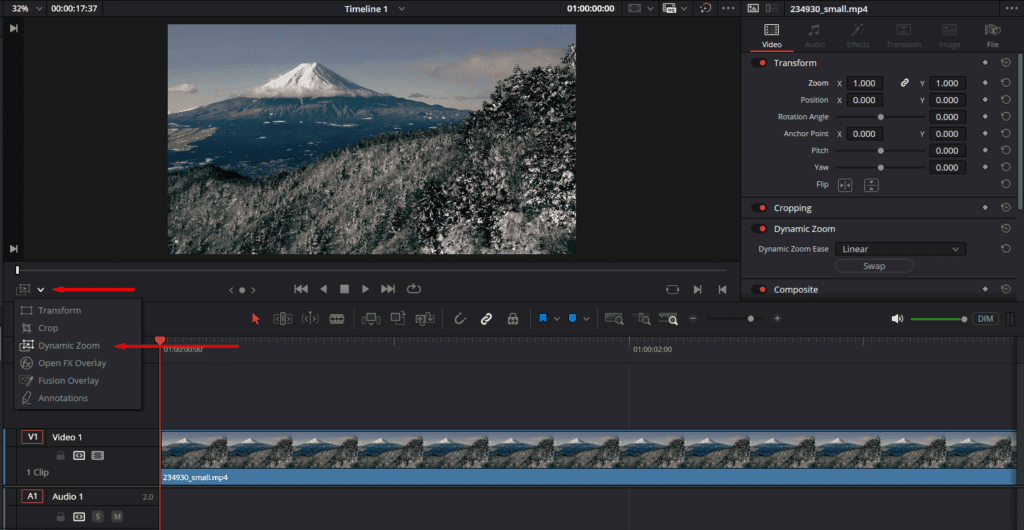
3. Change the start and end position
When the green box appears, adjust its size and position to frame your desired starting composition. This box shows where the zoom effect will begin. Next, move the red box to establish your ending frame. This box shows where your zoom effect will finish.
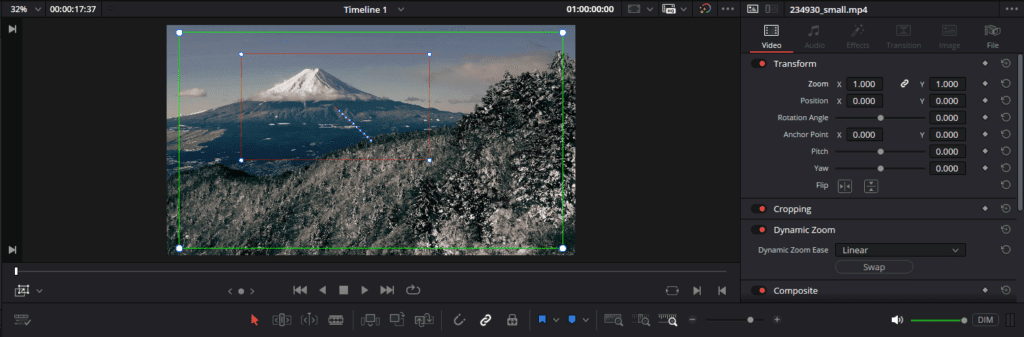
4. Refine the zoom motion (optional)
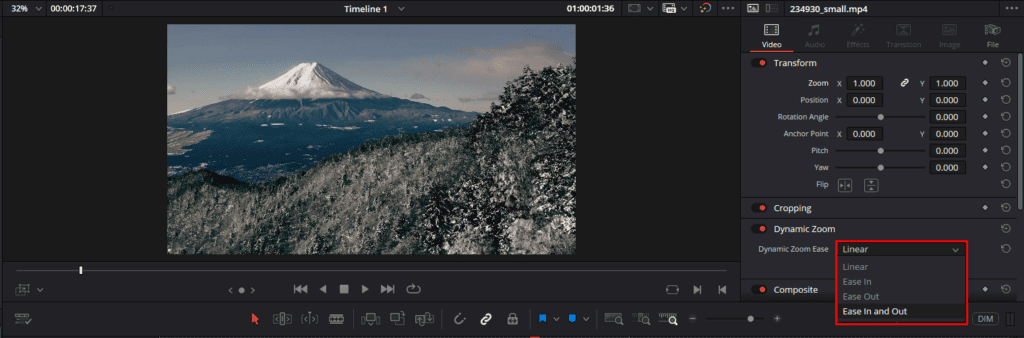
You can refine the zoom even further using the Dynamic Zoom settings in Inspector. Head to the Inspector tab and change Dynamic Zoom Ease to Linear, Ease In, Ease Out, or Ease In and Out, which we covered the last section.
Learn how to do even more in DaVinci Resolve
Learning DaVinci Resolve zoom techniques will take your projects to the next level. While the Transform tool is great for quick adjustments, Dynamic Zoom really shines when you want those smooth, cinematic movements.
For more DaVinci Resolve tutorials, check out our guides on how to add text or advanced transitions. Need high-quality footage to practice these techniques? Explore Storyblocks’ vast library of royalty-free stock footage, templates, and effects. Sign up for Storyblocks today to access a library of 10 million high-quality assets to add a professional touch to your next video.