Rotoscoping and DaVinci Resolve are not necessarily two phrases that often go together. Because while DaVinci Resolve is many things, when it comes to traditional animation rotoscoping, it’s not at the forefront of software choices.
That’s because Resolve doesn’t offer traditional frame-by-frame rotoscoping like other software. So while you can get similar results to rotoscope tools using Power Windows and Magic Mask, it’s not exactly a 1-1 solution. But if you’re in a pinch, keep reading to learn how to use these features in DaVinci Resolve to get rotoscope-like results and what they work best for.
Table of contents
What is rotoscoping?
Rotoscoping was initially conceived as a means of creating animation by hand-tracing or painting every frame of a film sequence from a live-action example, resulting in a final animation with realistic movement.
If you’re not too familiar with the concept of rotoscoping, we have a wide variety of videos and blog articles on the process.
Today, rotoscoping is more commonly used by visual effects artists to create mattes, which are used to extract a subject from a background.
However, as many visual effects veterans will tell you, creating mattes by hand rotoscoping is extremely tedious. In our recent tutorial on rotoscoping inside of After Effects, you can see just how long a simple sequence can take to rotoscope. Even with AI-powered tools, traditional rotoscoping is still time-intensive.
Can you rotoscope in DaVinci Resolve?
So, is the rotoscoping process possible within Resolve? Sort of.
You can get a similar outcome to rotoscoping using Power Windows or Magic Mask in DaVinci Resolve, but it has limitations compared to tools like After Effects.
Rotoscoping with a Power Window
If you’re familiar with Resolve, you might say, “Lewis, in the Color Page, there’s the option to create a Power Window with the pen tool, which can be used to create a mask by adding an Alpha Output. Is this just not a way to create a rotoscope?”
Well, yes, I agree with that – but it has limitations. Let’s have a look at this feature first.
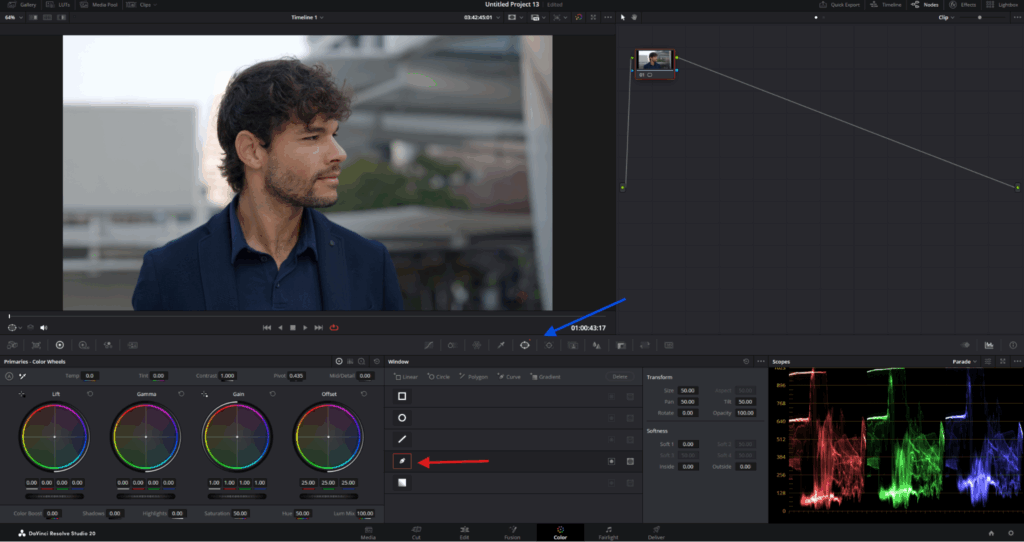
1. Select the Pen Tool from the Power Window panel and isolate your subject
To start, go into the Color Page, go to the Power Window panel (blue arrow), and select the Pen Tool (red arrow).
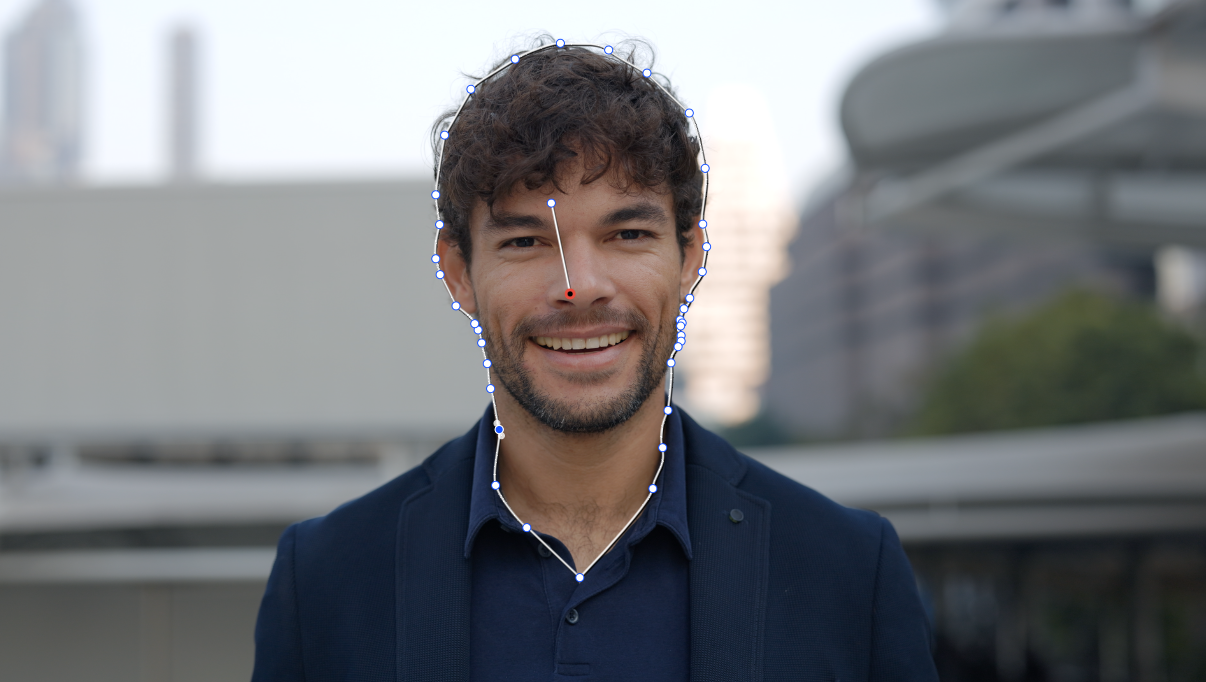
We can indeed create an isolated region around our subject, such as their head or even their entire torso, in a traditional method that you would likely use if you were using it in After Effects.
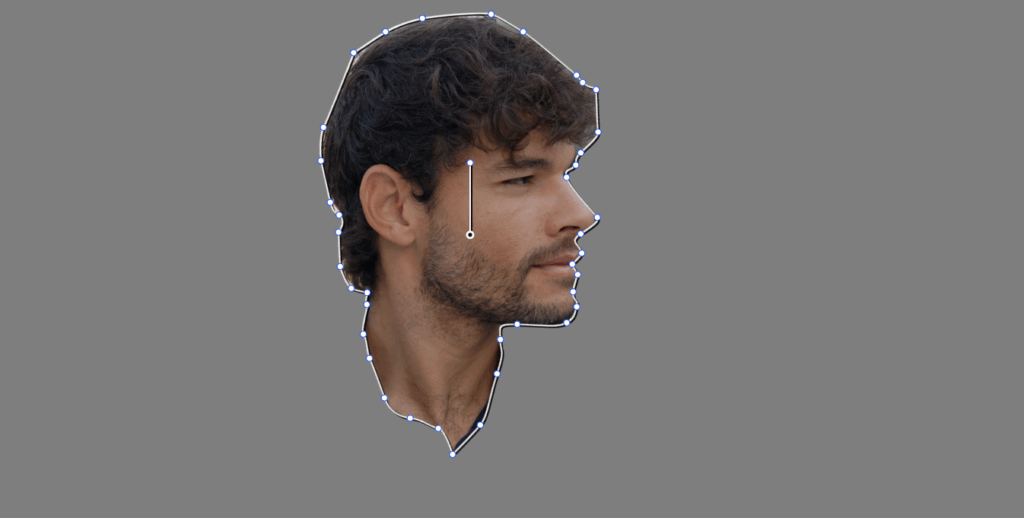
However, unlike After Effects, if I wanted to add a secondary mask to this node, I couldn’t do so.
I would need to create a Parallel Node structure to apply multiple rotoscopes to a single video clip, and even then, it rarely behaves as you’d expect. Additionally, the keyframe menu is built around animating color properties, which makes navigating the keyframe graph feel clumsy.
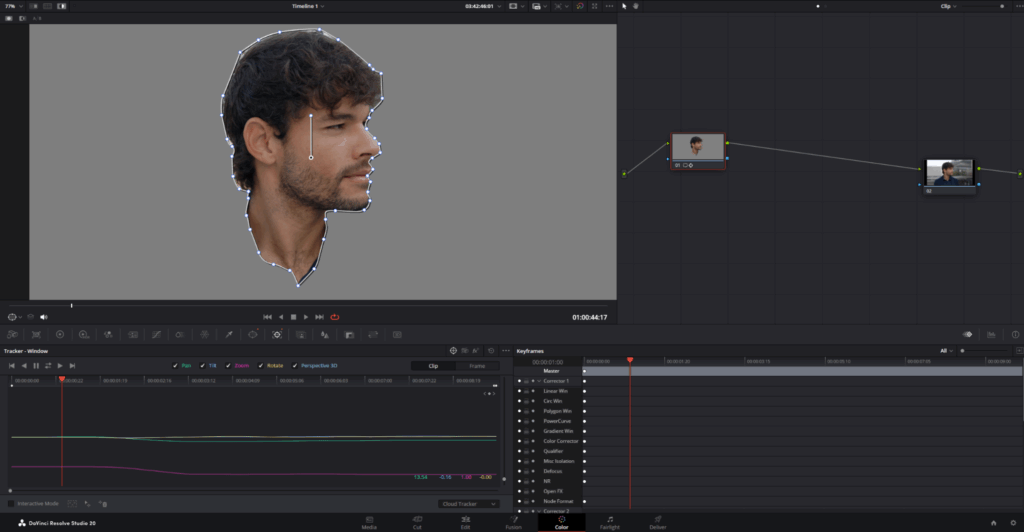
Typically, when you create a mask as I have, the next stage is to track the power window onto the subject. This is done by opening the Tracker window and selecting Track Forward and Reverse (red arrow).
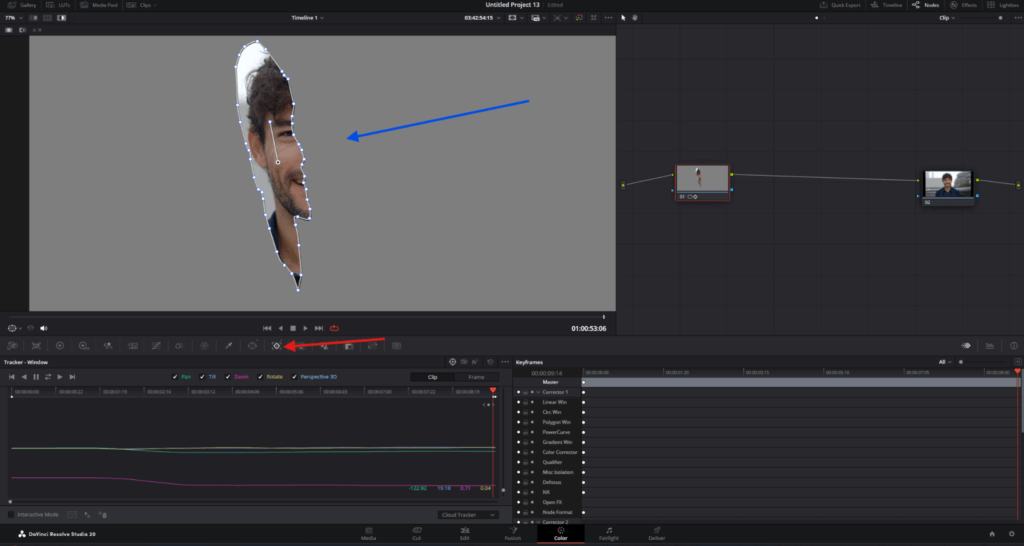
However, look at what happens when we do this: The mask cleverly locks onto the subject’s face with no tracking points, but it retains its original shape and doesn’t conform to the subject’s new head shape.
Again, this is because we’re creating a Power Window, which isolates a specific region to color correct it, not to make a matte for animation or to extract the subject from the background (even though this is possible with an alpha output). And this, really, is the limitation you will face when trying to rotoscope in After Effects.
2. Select Frame from the tracking panel and adjust your mask’s outline
However, there is a way to get a somewhat halfway-in-between good result. In your tracking panel, let’s switch from Clip to Frame.
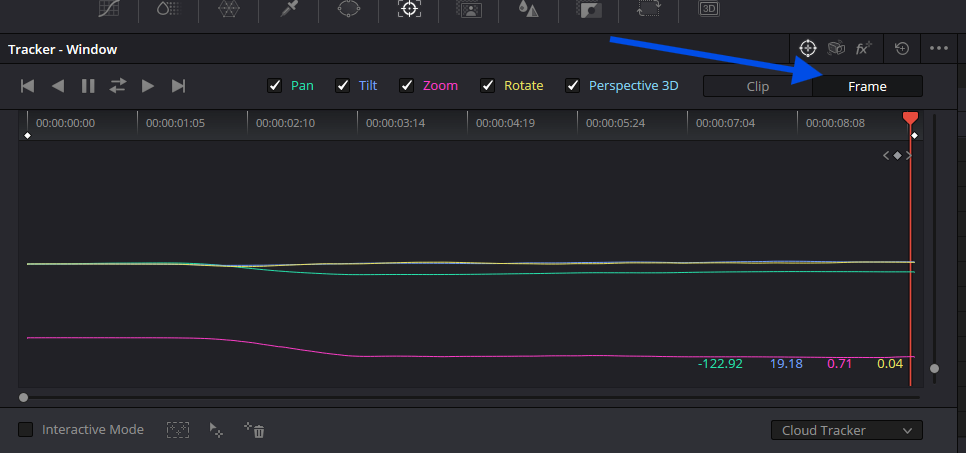
Then position the playhead to the end where the tracking has fallen apart. Then, while in Frame mode, grab the mask outline and roughly put it back where it should have been if this tracking had actually stayed on the subject’s outline.
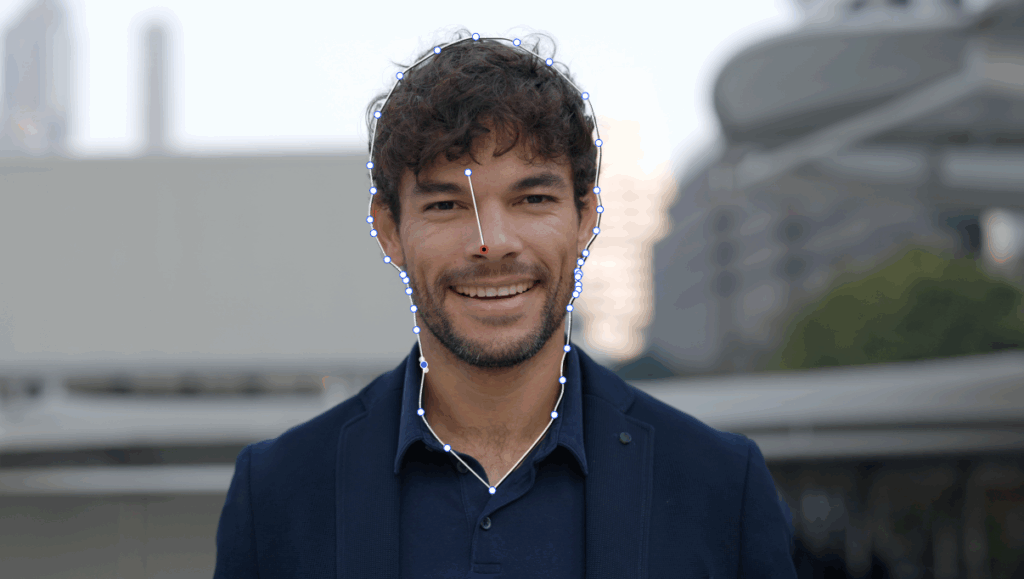
Next, we will move my playhead over to the middle of this footage and again, refine the mask outline so it correctly sits around the subject.
Now you’ll see when you play through that mask follows a lot more closely to what it was supposed to do. Of course, here, through still images, the picture isn’t fully painted, so check out this YouTube short from Resolve expert Daniel Batal to see it in action.
Rotoscoping with Magic Mask
Now, let’s talk about rotoscoping using the AI Magic Mask 2. If you want to learn how to use the legacy version, check out our 101 on masks in DaVinci Resolve that covers it.
Now, the thing is, with AI Magic Mask 2, there’s not too much of a tutorial to give because the tool is both brilliant and simple.
1. Click the eyedropper in the AI Magic Mask window and add it to your subject
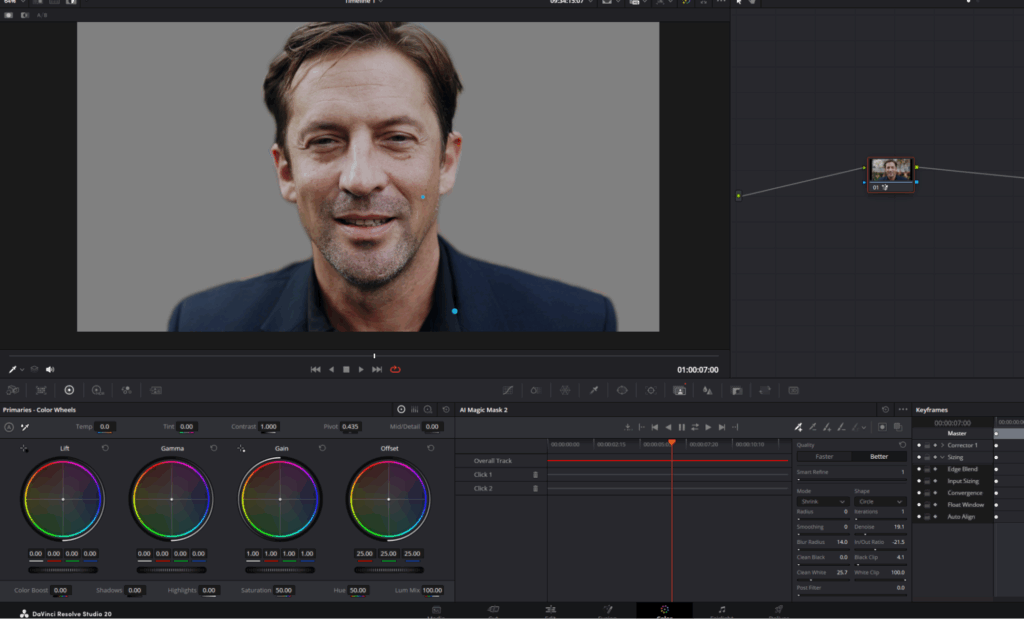
To get to it, we need to be on the Color Page and head to the AI Magic Mask window (blue arrow). In this panel, there are a variety of parameters, but to get started, click the eyedropper + (red arrow) and add it to our subject.
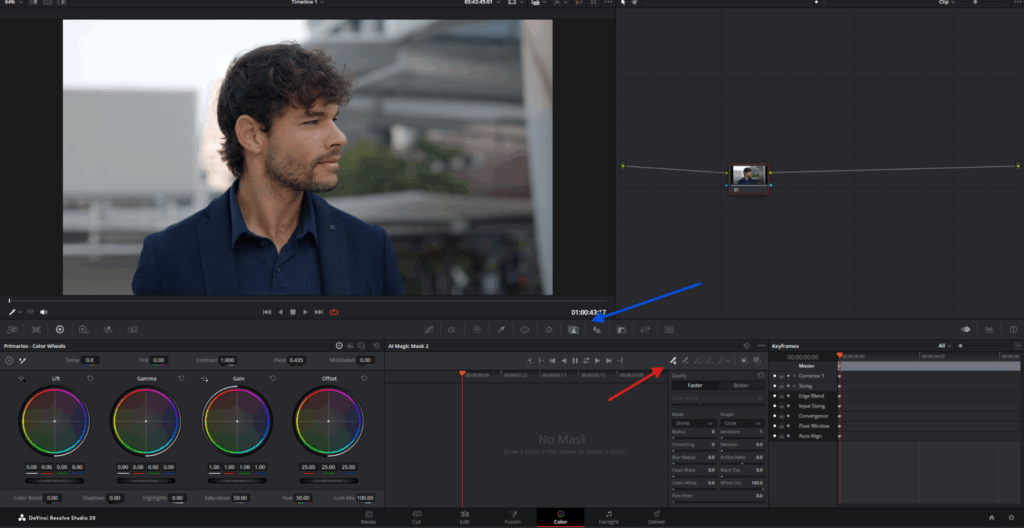
In most instances, if you add it to a subject’s torso, it will initially mask only the clothing, so we will also need to add another click to the skin.
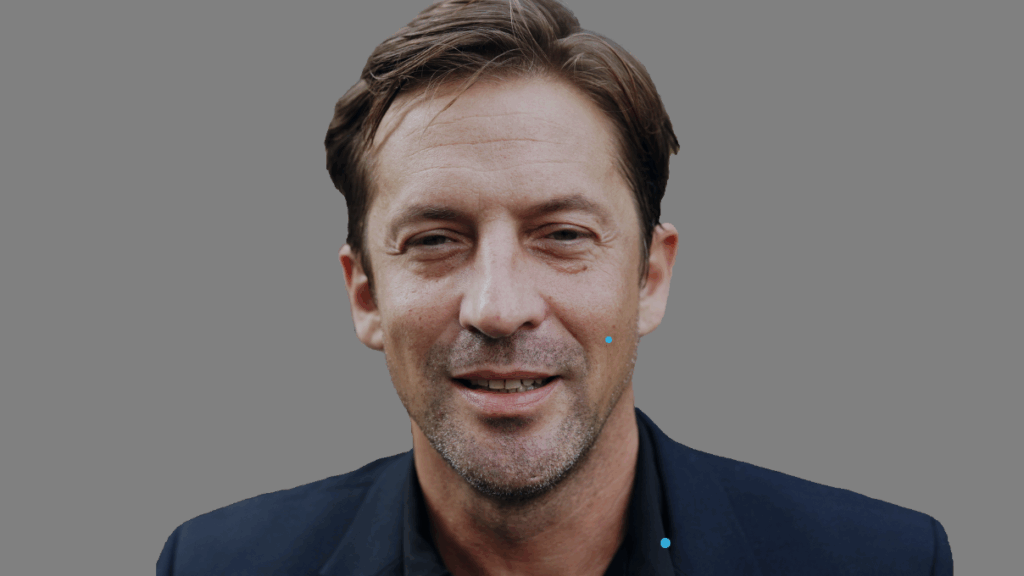
2. Adjust your mask using the tool settings
With this new iteration of Magic Mask, two clicks will do a decent job at masking out the subject. Which, in essence, is a rotoscope.
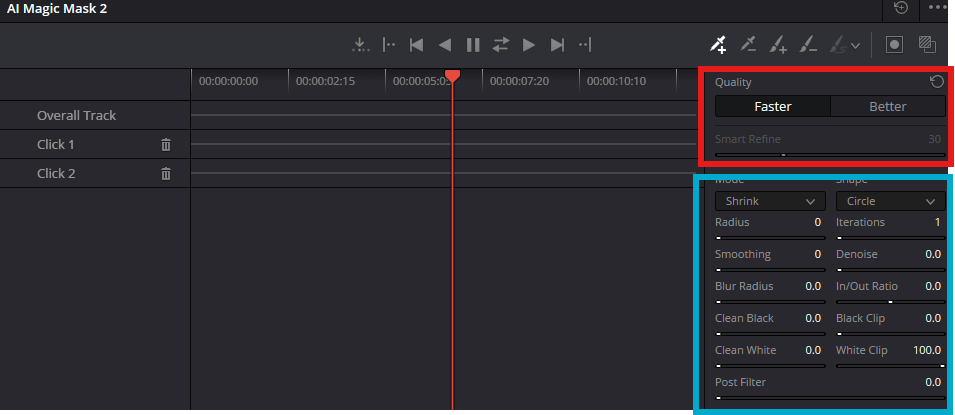
There are a variety of tools parameters that we can use to adjust the mask on the right-hand side.
For the tools, we have:
- Eyedropper (+): Click to add a specific point to your selection.
- Eyedropper (-): Click to remove a specific point from the selection.
- Brush (+): Paint a stroke to expand the area.
- Brush (-): Paint a stroke to remove a larger area.
- Circle/Square Icons: Toggles the red mask overlay visibility on or off.
What each parameter stands for is as follows:
Quality Settings
- Faster: Optimizes for speed. Use this for simple objects with clear edges to save time.
- Better: Optimizes for accuracy. Use this for complex details like hair, fur, or motion blur.
And underneath we have:
- Faster / Better: Chooses speed vs. accuracy.
- Smart Refine: Improves edge detail (hair/fur).
- Mode: Selects “Shrink” or “Grow” behavior.
- Shape: Geometry used for shrinking/growing.
- Radius: Distance to expand or contract.
- Iterations: Number of times to apply the radius.
- Smoothing: Fixes jagged contour lines.
- Denoise: Reduces mask flickering.
- Blur Radius: Softens the edges of the mask.
- In/Out Ratio: Shifts blur inside or outside.
- Clean Black: Removes specks from the background.
- Black Clip: Crushes dark greys to black.
- Clean White: Fills holes in the subject.
- White Clip: Pushes light greys to white.
- Post Filter: Smooths the final result.
You will need to play around with these to pull a mask clean enough for your liking. There is no “best” setting for this; it’s a case of going through each slider and adjusting them as you go to see what works for you.
3. Track Forward and Reverse to track your rotoscope
Once that is done, we can go to Track Forward and Reverse to track our rotoscope. And we now have a reasonably solid rotoscope, without the tedious, monotonous process of individually masking every frame and adjusting keyframes as needed.
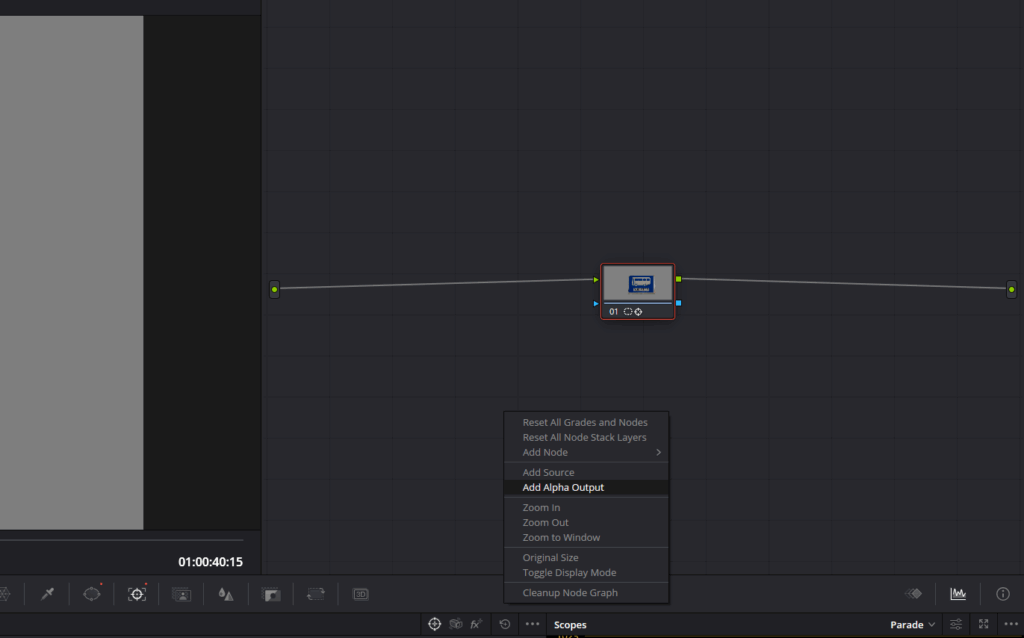
4. Right-click your node and select Add Alpha Output
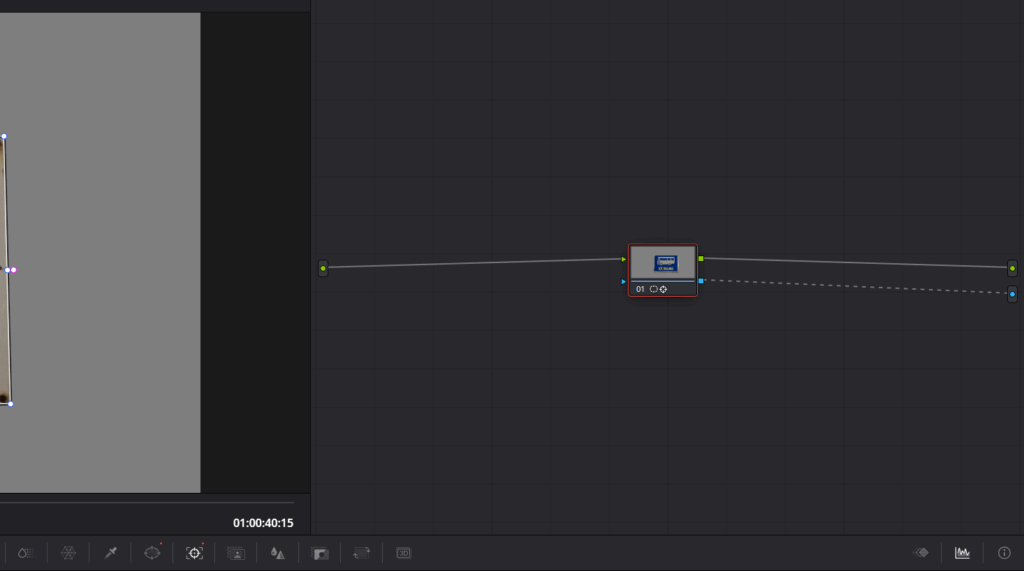
To bring this matte to the edit page, you will need to add an alpha output. You can do this by right-clicking in the node window and selecting “Add Alpha Output.”
Then connect the blue square of the node to the blue circle at the end of the graph.
While Resolve doesn’t offer traditional rotoscoping, there are ways to get similar results
Ultimately, rotoscoping inside of DaVinci Resolve isn’t necessarily ‘a thing.’ But using these two features in Resolve is going to be the closest that we can get to obtaining a good matte. If you want real rotoscoping on a technical level, you’re going to want to work within a designated compositor like After Effects.
No matter what software you use, Storyblocks has pre-made, customizable templates to help you edit faster and finish up post-production efficiently. With thousands of professionally made templates for DaVinci Resolve and After Effects, you can speed up your workflow without sacrificing quality. Sign up for Storyblocks today to get unlimited downloads of templates, 4K and HD footage, music, images, and more.