In the summer of 2024, audiences were reintroduced to the “Alien” universe with “Alien: Romulus“. Director Fede Alvarez aimed to bring the franchise back to its roots—a horror story where the cast faces an almost unbeatable enemy. Beyond reviving the horror elements, Alvarez and the studio leaned heavily on practical effects reminiscent of Ridley Scott’s original “Alien” rather than relying on the CGI that dominates so much of today’s film landscape. With the film’s $350 million box office return against an $80 million budget and an impressive 80% fresh rating on Rotten Tomatoes, it’s safe to say that this approach resonated with audiences.
This resurgence of practical effects has become a broader industry trend in recent years. Practical effects, however, pose unique challenges compared to digital effects. Practical effects often require hands-on expertise and can be more costly—which is part of the reason why so many filmmakers shifted to digital effects in the first place. But they don’t have to be! In this article, we’ll show you 6 different practical effects that you can easily create or do on a small budget.
With the continued rise of generative AI, the popularity of practical effects are part of a larger trend with video in 2025 where both content creators and filmmakers are looking to return to their roots. Many creatives are looking to move beyond AI and visual effects to deliver media created with genuine artistry, passion, and hands-on talent.
What are practical effects?
If you’re new to filmmaking or video creation, you might not understand the difference between practical and visual effects. Essentially, practical effects are created on set and captured in-camera—they happen when the director yells action, requiring minimal to no post-production work. Visual effects, on the other hand, are crafted on a computer by a separate team who often aren’t present on set.
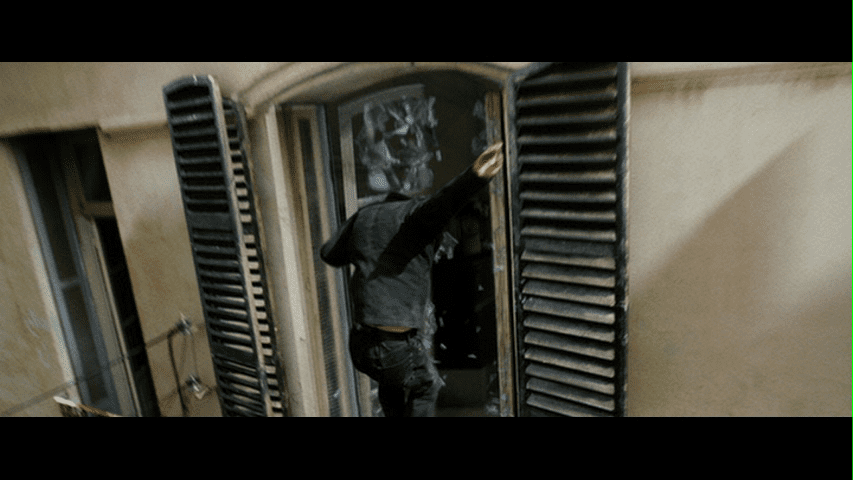
For example, let’s say an actor needs to jump through a window to escape the bad guys. If you went the practical effects route, you could use sugar glass, a brittle and transparent material that looks like real glass but breaks safely without jagged edges.
When an actor jumps through a sugar glass window, they’re interacting with a physical object. The environment reacts to the debris, the lighting reflects realistically, and the timing of the break aligns with the actor’s movements, enhancing authenticity.
Visual effects, on the other hand, wouldn’t involve any actual glass on set; instead, the glass is added later by a post-production specialist. This approach can streamline the on-set process since there’s no need to reset a glass panel or clean up debris for multiple takes, allowing faster scene setups and reducing production costs.
However, this convenience often comes at the expense of visual authenticity. For instance, the glass might not shatter realistically, or the actor might not react as though they’re encountering resistance or getting cut up by the broken shards when jumping through the window. These factors are crucial considerations for the producer when choosing between practical and visual effects.
6 practical effects you can try at home
Now, while practical effects bring a certain level of artistry—and often a higher cost—they aren’t entirely out of reach for no-budget or low-budget filmmakers. With a bit of ingenuity and resourcefulness, a quick trip to the supermarket and hardware store, filmmakers can achieve results that rival higher-budget films.
Here, we’ll cover a few budget-friendly practical effects that can be achieved by filmmakers at any skill level. Throughout this list of practical effects, we will be leaning toward the type of effects found throughout Alien Romulus!
How to make alien goop
In the recent “Alien: Romulus” behind-the-scenes featurettes, the filmmakers discussed the iconic slimy goo of the alien creatures. Like in the original Alien films, these creatures are known for their constant, viscous slime trail and acidic blood. The featurette highlights the type of goo used to make the aliens appear stretchy and slimy, with that distinct, unsettling texture (starts at 4:45).
If you’re new to practical effects and looking for a simple effect to start learning with, alien goop is a perfect choice. You can recreate a similar slime effect at home using just transparent glue, borax, and water (yes, exactly like the slime fad that was all over the internet years ago). This recipe is adjustable, allowing you to experiment with different thicknesses, colors, and textures based on the effect you’re aiming for.
1. Mix water and borax
In a large bowl, combine 1 cup of warm water with one teaspoon of borax powder. Stir until the borax dissolves completely. Set this mixture aside and let it cool to room temperature.
Note: If the water is too warm, it can cause the slime to become too thick or stiff. Which if you want a runny, goopy slime, isn’t ideal. But depending on what you’re using the goop for, you may want a firmer texture – experiment to see what works best for your project!
2. Create the slime base
Next, pour 1 cup of clear glue in another bowl. Gradually add the borax solution to the glue while stirring. This is where you can adjust the slime’s consistency. For a more watery slime, add extra water slowly. For a less sticky slime, incorporate more of the borax-water mixture.
Optional adjustments:
- Coloring: Add a few drops of food coloring to achieve your desired shade, but do this gradually to control the color intensity.
- Consistency Tweaks: Add more water for thinner slime or more borax solution for a thicker, stickier texture.
Safety Note: Since prolonged exposure to borax can irritate your skin, you can use baking soda as an alternative ingredient. Just substitute the borax with baking soda and follow the same process.
With this recipe, you’ll have a versatile, homemade goo perfect for horror scenes or sci-fi creations—no Hollywood budget required!
Muzzle flash illuminations
Action shorts were everywhere in the early 2010s, whether inspired by popular video games or created by groups of friends heading to abandoned warehouses for shootout sequences. With the abundance of downloadable muzzle flashes—bursts of light from firearms, like those available in Storyblocks’ video overlay library—filmmakers could easily stage intense, cinematic gunfights.
However, while these muzzle flashes are often highly realistic (some even shot with real firearms), there’s a recurring critique: they don’t replicate the natural illumination a real muzzle flash would create on the person firing or the surrounding area. Typically achieved with blank ammunition on set, this effect adds a layer of authenticity that digital overlays often lack.
You can try simulating it in post-production, like using After Effects to duplicate the layer, mask it, and briefly increase the subject’s brightness and environment. But even with this trick, it’s rarely as convincing. This is often a gripe of YouTube VFX legends Corridor Crew.
Now, back in 2010, the technology that could aid this didn’t necessarily exist. In 2024, it’s a different story. Filmmakers have practical tools that they can easily buy to enhance the realism of muzzle flashes in action scenes, like the Aputure MC, which is a compact and portable LED light and can be controlled portably via the Sidus Link app.
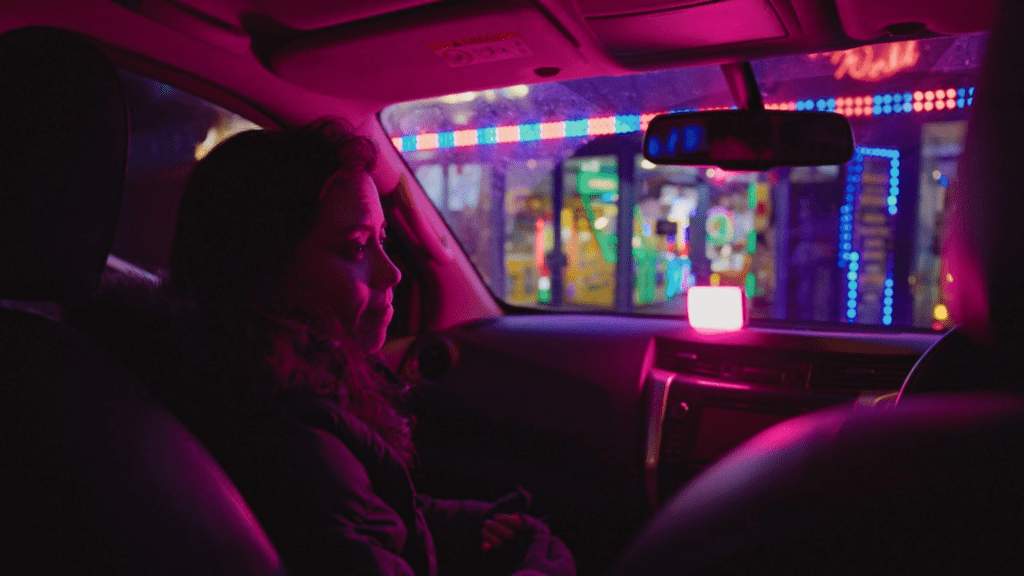
This app allows users to adjust color and intensity and toggle the light on and off remotely, which is arguably the most crucial element for this effect. By placing the LED light near the actor and using Bluetooth communication, filmmakers can achieve a more authentic illumination effect by double-tapping the on-off button on their mobile device.
Forced perspective with miniatures
Forced perspective is one of the oldest practical effects in Hollywood’s history. A cinematography technique that manipulates the audience’s perception of an object’s size, it’s often used to enlarge mystical characters or to make miniatures appear abnormally huge.
Forced perspective is created by shifting an object or character along the z-axis and positioning the camera at an angle where both characters or objects are side by side. When two actors are in a forced perspective scene—such as Ian McKellen and Elijah Wood as Gandalf the Wizard and Frodo Baggins in “The Lord of the Rings”—the realism and skill come from the actors maintaining eye-line, even though they are several feet apart.
In Alien and Aliens, several vehicles and landscapes were created with miniatures.

Benefits of using miniatures
Filmmakers often turn to miniatures for the authentic textures, shadows, and lighting they provide, naturally interacting with the environment in-camera, something computer graphics often lack. There’s also the benefit of real-world physics. While miniatures are often filmed in slow motion to smooth out scale-related inconsistencies, they also allow for natural weight shifts, subtle movements, and even realistic collisions. As a result, they end up feeling more grounded and visually satisfying than a digital approximation.
However, miniatures genuinely come to life when combined with forced perspective. Miniatures, by definition, are small-scale versions of actual objects. But with precise lighting, careful camera placement, and thorough preparation, they can appear convincingly full-scale on screen.
The cars in the image below? They are toy cars that can fit in the palm of your hand.
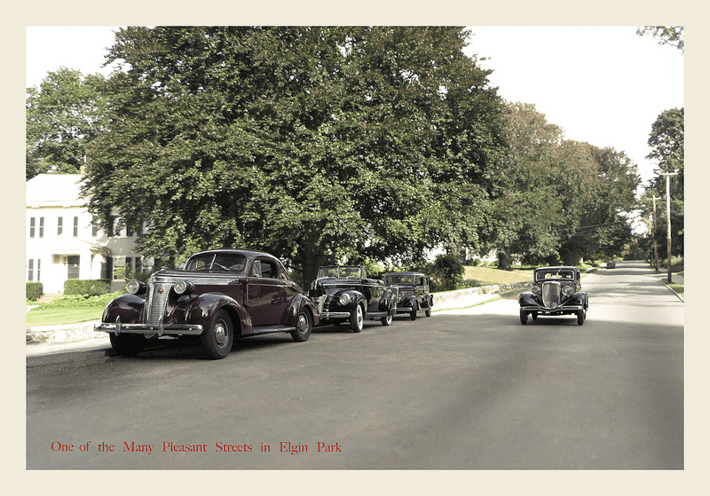
Miniatures and forced perspective can be great tools in filmmaking when you need to include specific vehicles, but hiring one is far beyond your budget. Acquiring a die-cast model of a police vehicle will be inherently cheaper than hiring a real police vehicle.
The technique relies heavily on compositional framing when filming miniatures with forced perspective. The goal is to carefully align the miniature in the foreground with background elements, such as trees, houses, or natural scenery. A great example is the image below from “Star Wars”.
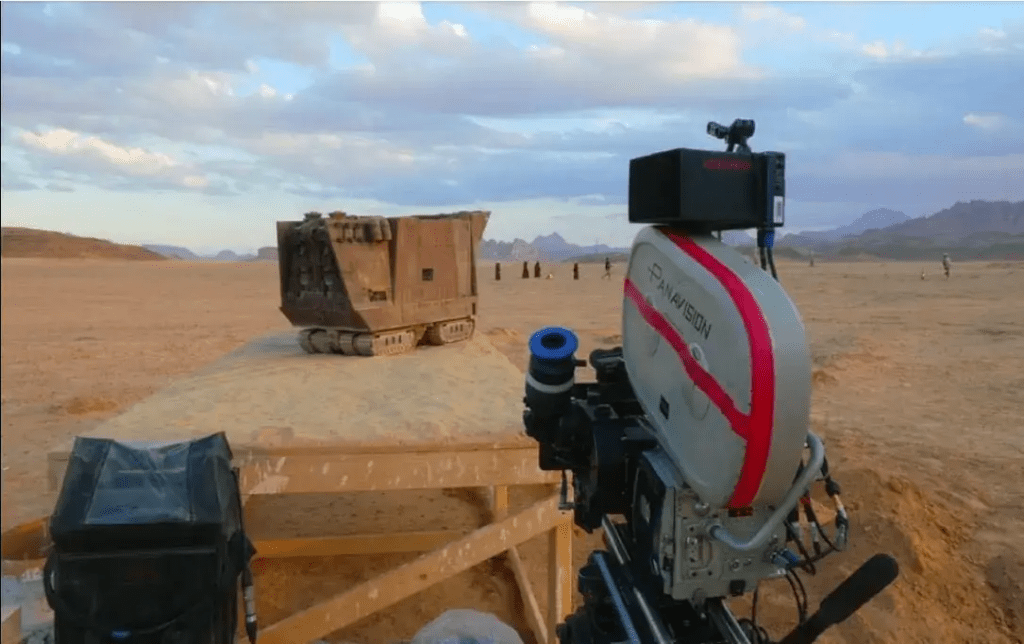
To successfully combine forced perspective and miniatures to create a realistic looking scene, there are a few key steps you need to follow.
Lock off your camera
Any movement quickly breaks the illusion of forced perspective.
Use deep focus
Avoid shallow depth of field. Ensure both the miniature and the background are sharply in focus to create a convincing plane of focus across the entire composition.
Apply proper lighting
Lighting plays a crucial role in seamlessly blending the miniature with the background. As seen in the example photos, natural light works best in most cases. Artificial lighting on the miniature can easily break the illusion.
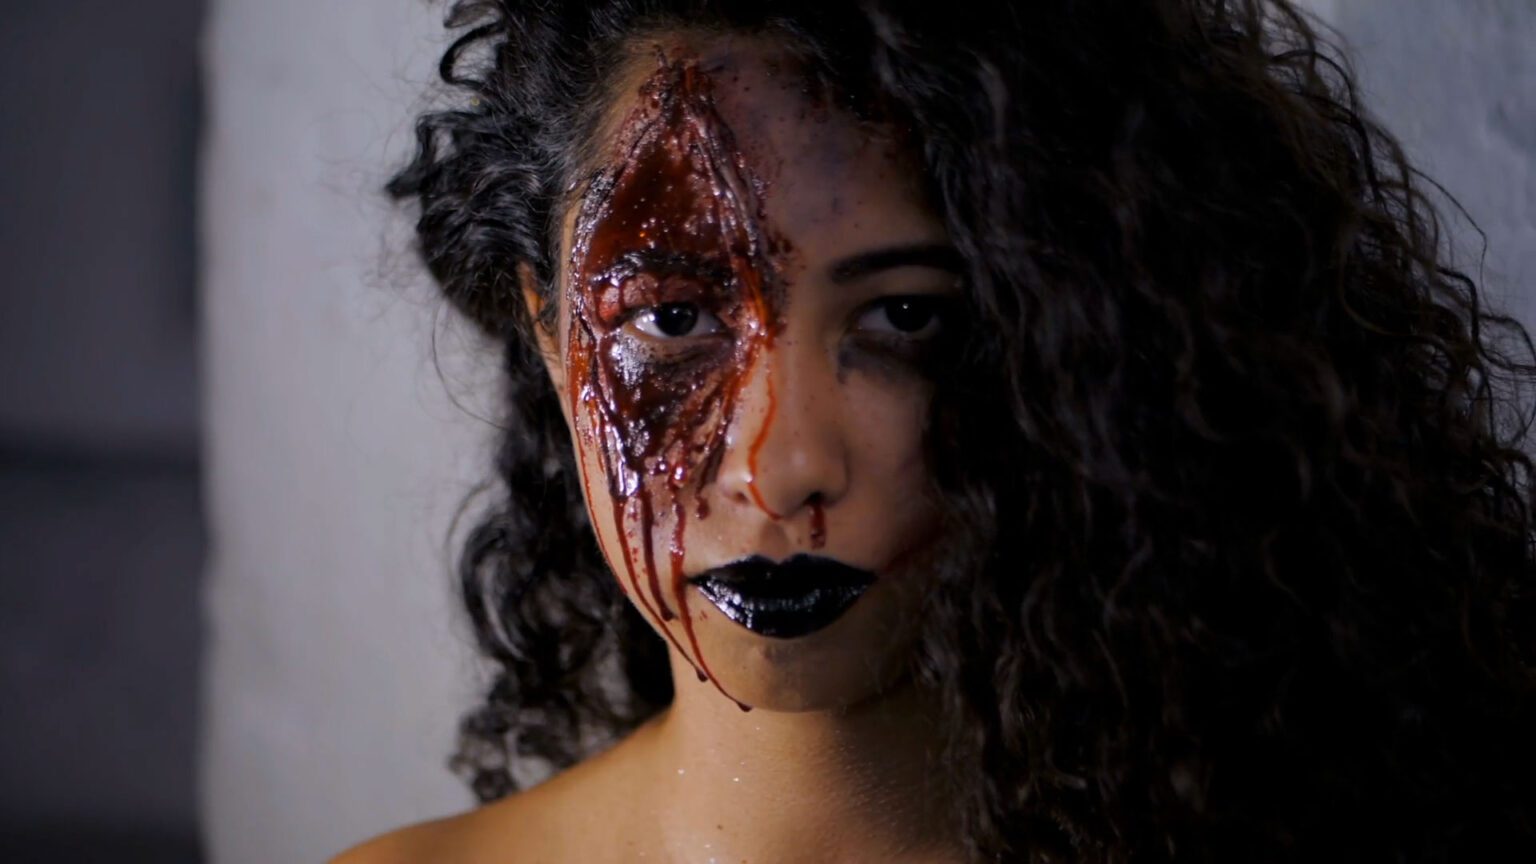
How to make fake blood
Our next practical effect is fake blood—a true cultural staple of early YouTube DIY filmmaking tutorials. In the late 2000s, the platform was flooded with videos showing how to create the perfect fake blood for short film projects.
Though fake blood is now more accessible (you can easily purchase a bottle on Amazon), making your own can still be more affordable. The good news is that you don’t need hard-to-find ingredients—everything can be bought at your local grocery store.
For a basic staining fake blood recipe, you’ll just need to mix up the following:
- 16 ounces of white corn syrup (you can also use carob syrup, golden syrup, or a sugar-water reduction heated to a syrupy consistency)
- 1 ounce of red food coloring
- 1 ounce of washing detergent
- 1 ounce of water
If your blood isn’t looking real enough, the secret ingredient is to add a few drops of blue food coloring. This deepens the red hue, preventing an overly saturated, unrealistic look.
Important Note: This mixture stains, so avoid using it on costumes that must be blood-free in later scenes.
For a non-staining recipe, go with:
- Two tablespoons of arrowroot
- Warm water
- Non-toxic children’s powder paint in red and brown
Mix the arrowroot in warm water until the consistency becomes gloopy (add more water if you want thinner blood for splattering). Then, add in the powder paint. The red powder paint provides the base color, and brown deepens the red for a more realistic look.
In the video below, the aptly named RealFakeBloodFilms dive into even more ways to mix the ingredients to produce different forms of fake blood.
Each approach has its place, whether you need a splatter effect or a detailed bloody costume.
How to make fake concrete
Tombstones, gravestones, and timeworn concrete slabs are classic elements in fantasy films and similar genres. While it’s often more straightforward to composite these into scenes digitally, especially given the challenges of sourcing and transporting large props, sometimes practical effects can provide unmatched realism.
In the case of our “Alien” references, LV-426, the planet on which the crew first lands in the 1979 film, is incredibly rocky. If you’re considering going practical and want to create rocky terrain or convincing gravestones, you can do so in minutes with just two ingredients.
1. Insulation foam
Start with a few slabs of insulation foam, ideally in a color close to concrete. A pack of three might only cost around $30, and this foam is easy to shape and carve if you want to add cracks, text, or weathered details.
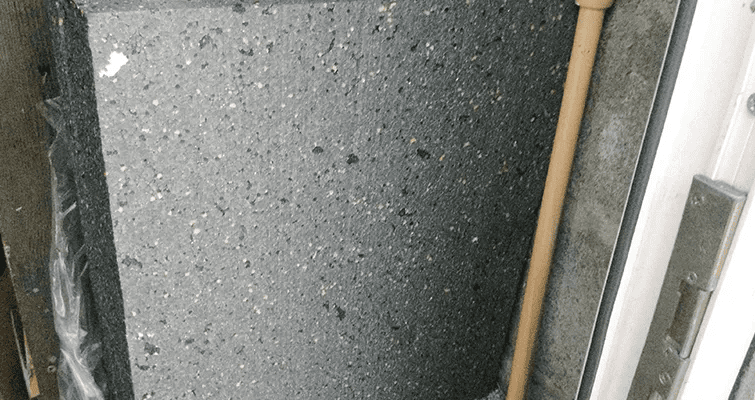
2. Stone spray paint
Stone spray paint is the magic ingredient here. It’s designed to create a textured, stone-like finish on surfaces, transforming anything from household items to garden statues into stone replicas. In our case, it’s perfect for giving the foam a realistic, weathered stone appearance.
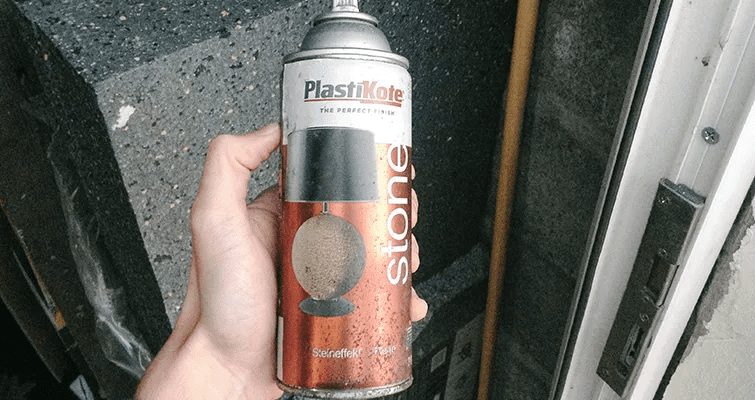
Once you spray and texturize your foam slabs, place them in a natural setting with dirt and foliage around the base for added realism. The combination of texture, color, and placement will make these DIY tombstones hard to distinguish from actual stone slabs, giving your scene a grounded, tangible look without the logistical hassle or budget strain of real concrete.
Creating mist with haze in a can
Atmospheric mist can add a haunting or chilly tone to any scene, boosting production value and heightening the mood. Traditionally, Haze is a powerful visual tool, symbolizing anything from a demonic threat to a bursting gas valve on a ship.
While modern software like Cinema 4D and Blender allows for incredibly realistic haze simulations that can be composited in After Effects, there are times when having on-set haze is essential—especially if you want the light to interact naturally with it.
Typically, this would mean renting a fog machine, which can get pricey. However, there’s a budget-friendly alternative: Haze in a Can. These aerosol sprays can quickly fill smaller spaces with haze, adding depth and dimension to your shots without heavy equipment or a dedicated effects crew.
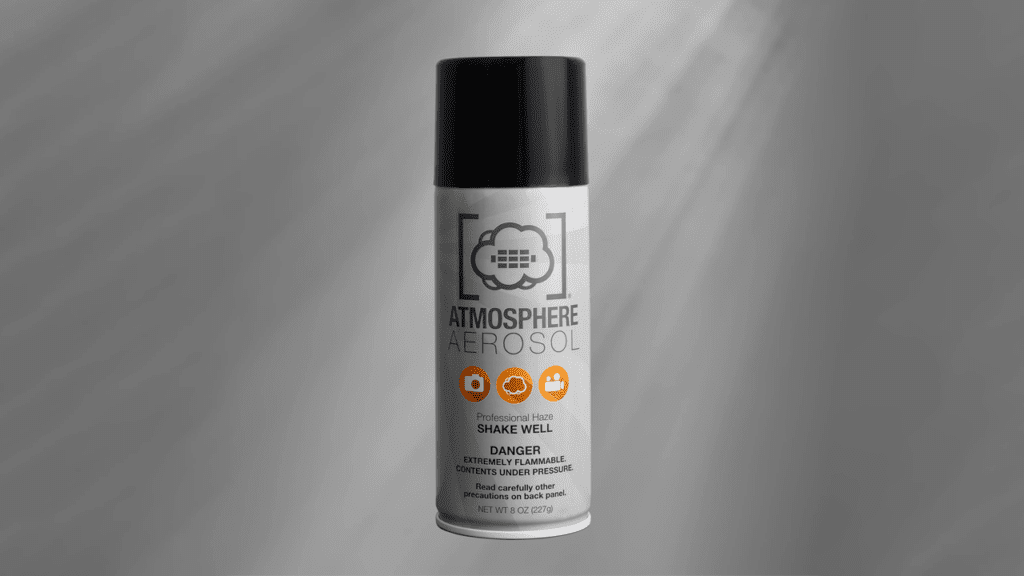
Here are a few important things to keep in mind before you run out to buy a can for your next project:
- Convenience: Aerosol sprays are quick and ideal for small spaces where full-scale fog machines might be overkill.
- Safety: While these sprays are non-toxic, it’s essential to check if any cast or crew members have respiratory issues before use and ensure proper ventilation.
- Fire: As noted on the front of the can, the contents are extremely flammable, and you should ensure all possible fire precautions are executed before releasing the mist on set.
These aerosol cans are perfect for creating an immersive mist effect, whether for a morgue scene or an eerie hallway shot. They’re also great for practical effects like simulating a gas leak, cryo chamber, decontamination room, or a steam valve leak; eliminating the need to rely on post-production effects!
Bring your projects to life with the Storyblocks library
With steam from cryo chambers, intergalactic gunfire, alien spaceships taking off, sequences of gore, and otherworldly textures, you can create all these elements in a camera without CGI. All you need in many cases is supplies you can find at your local hardware or grocery store. But if you’re looking for more content to bring your project to bring it to life, you can find it all in the Storyblocks library.
Elements like sound effects are a critical component that brings true realism to these scenes with practical effects. From the firepower behind your muzzle shots to the dripping of blood, our audio library has all the sound effects you need. Plus, you can add in some VFX and CGI elements with our pre-made templates to enhance your scenes. Sign up for a subscription today to start downloading instantly.