Freeze frames are a handy tool in video editing, allowing you to emphasize a specific scene or make your viewers sit with a visual pause in your story. If you’re looking to learn how to create a freeze frame in DaVinci Resolve, we’ve got you covered with our step-by-step tutorial with screenshots.
How to make a freeze frame in DaVinci Resolve
There are two different methods that you can use to create a freeze frame in Resolve. Follow the steps below to learn how, or watch the full video tutorial below.
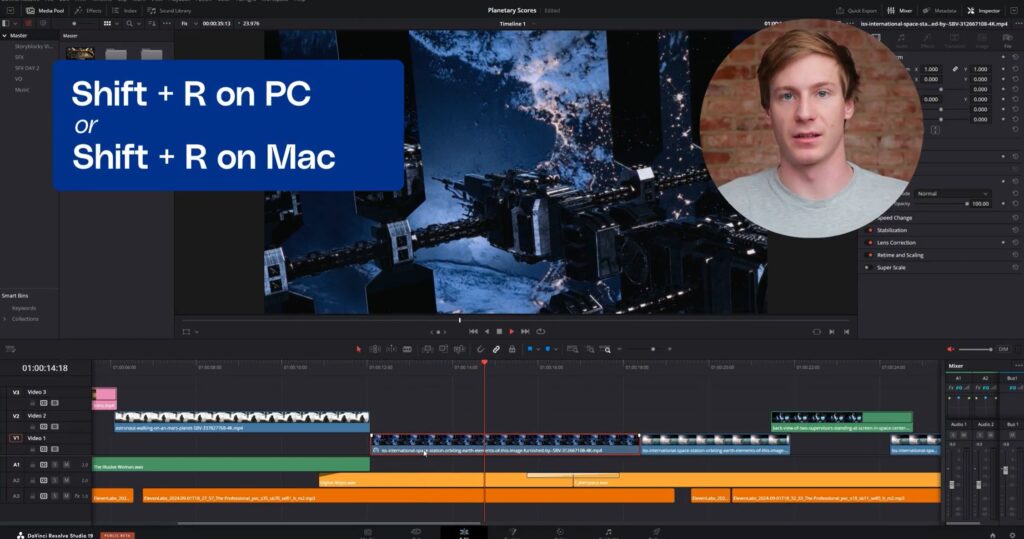
If you want to freeze an entire clip, you can press Shift + R. However, this will freeze the first frame in your clip by default. If you’re looking to freeze a specific frame, you can use the methods below to isolate a frame and freeze it.
By changing a frame’s clip speed
1. Isolate a single frame
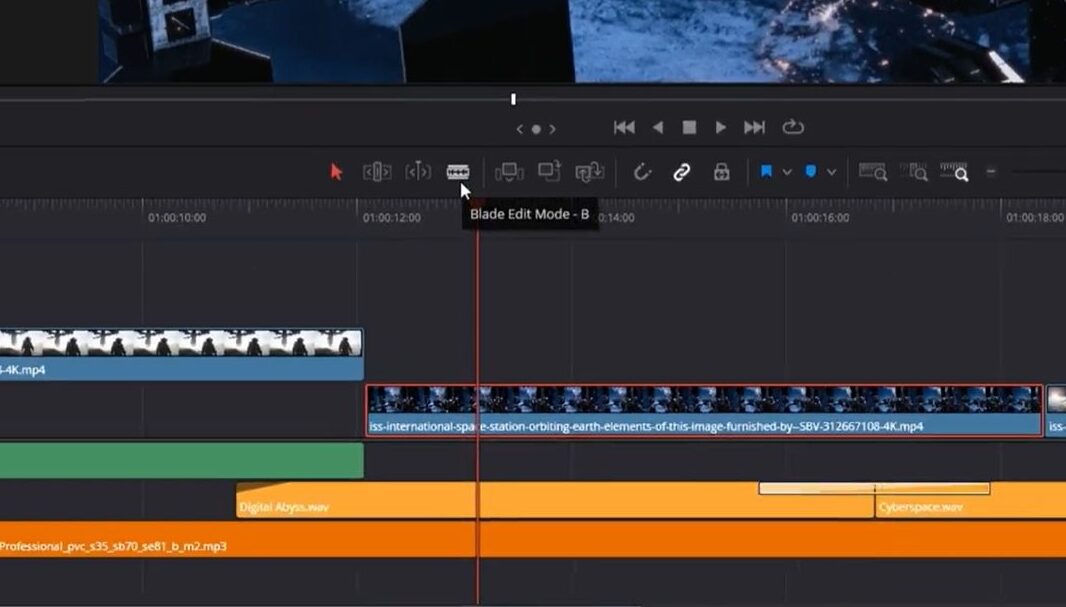
First, you’ll need to isolate the frame that you want to freeze. Position the playhead on your timeline to the frame, then select Blade Edit Mode from your toolbar and press B to make a cut.
2. Change clip speed to Freeze Frame
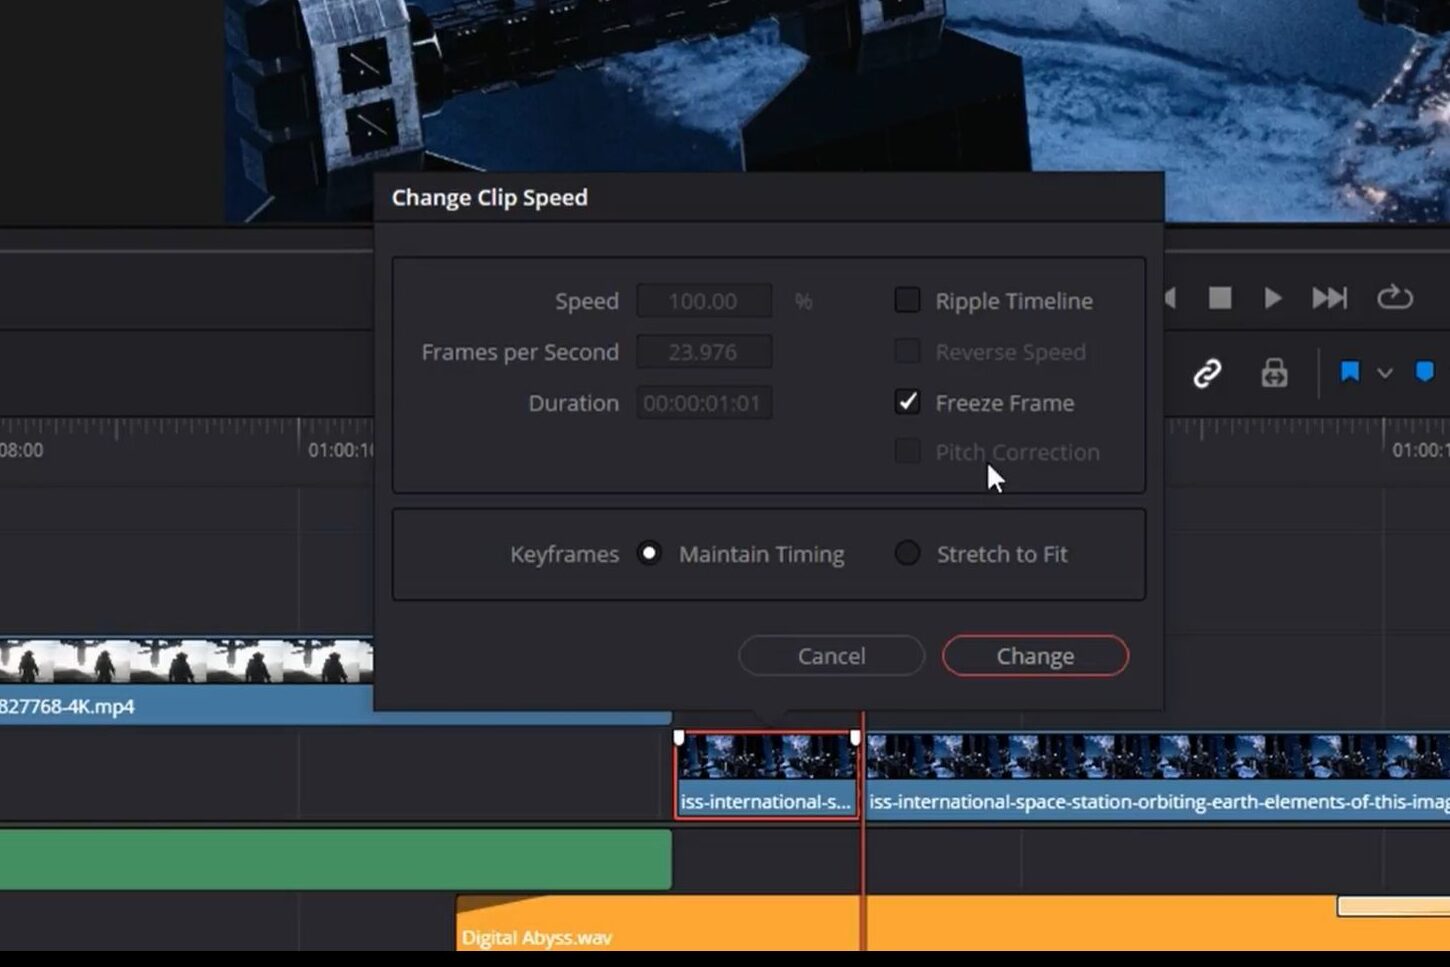
Now that your frame is isolated, you can freeze it by right-clicking on it, then selecting Change Clip Speed. In the new window, click the box next to Freeze Frame.
Using Retime Controls
Alternatively, you can also create a freeze frame through Retime Controls. This gives you precise control over creating different speed changes within a single clip.
1. Select your clip and activate Retime Controls
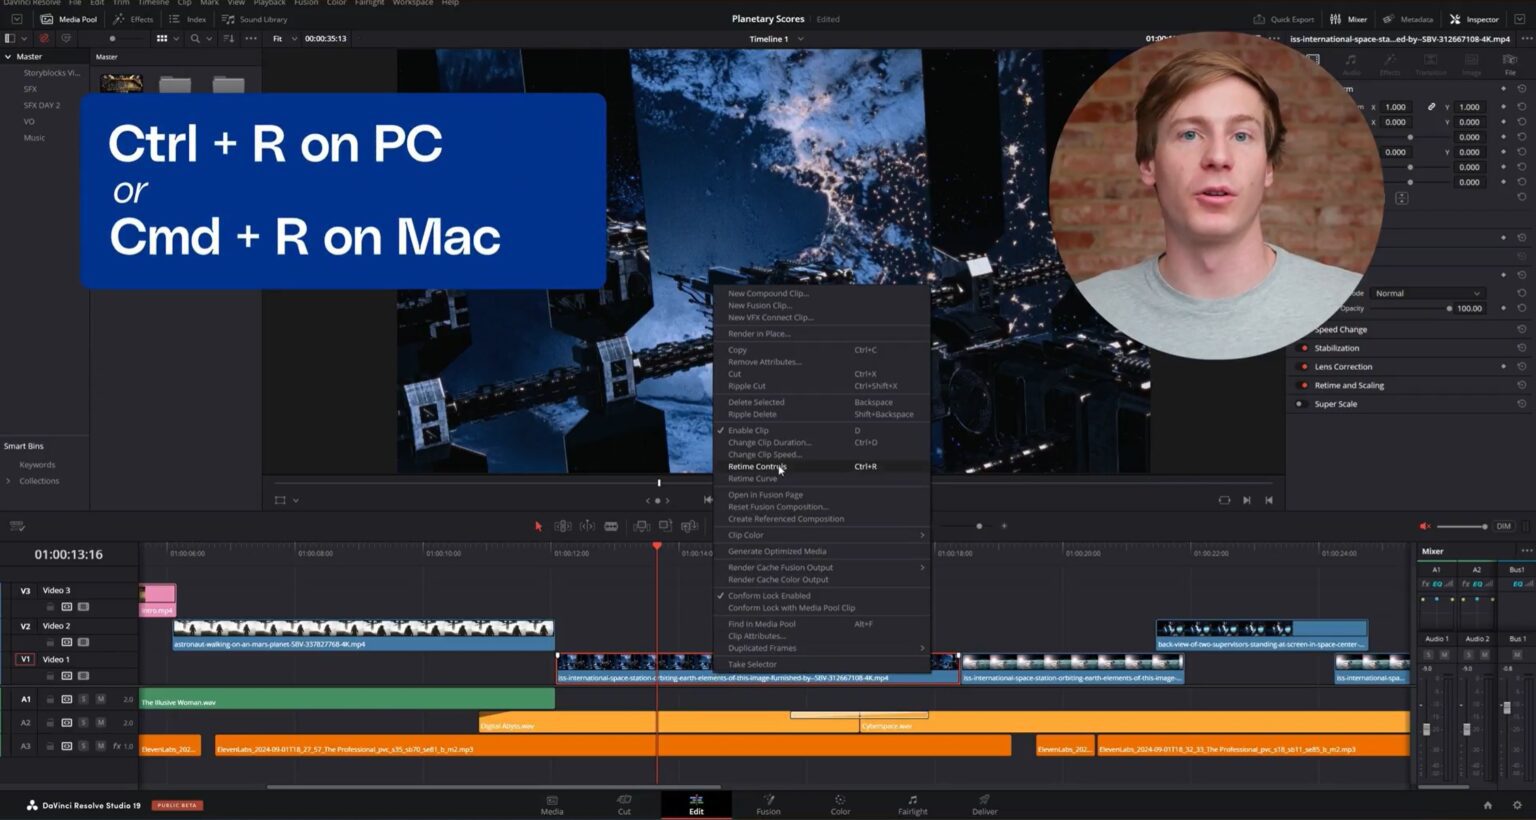
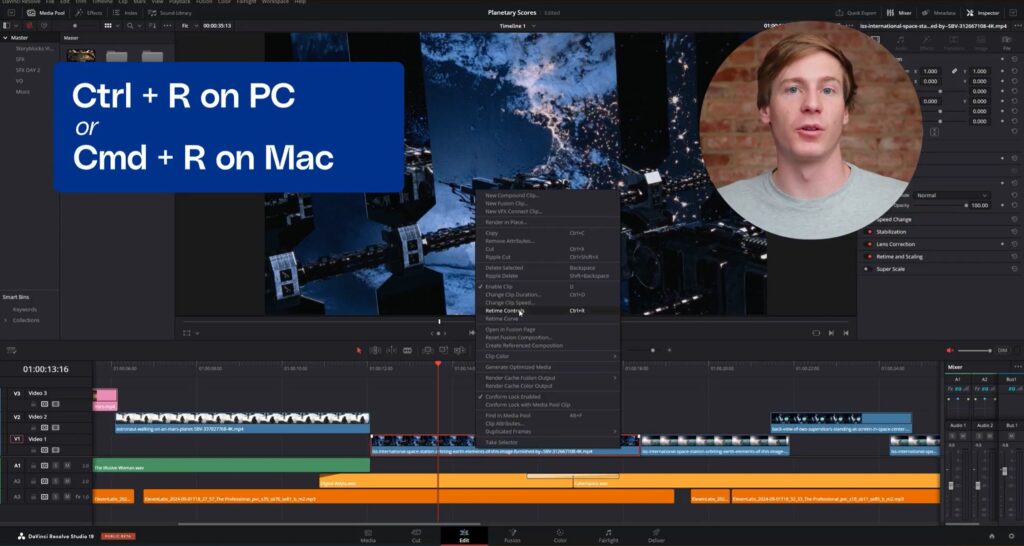
Select your clip on the timeline, then press the keyboard shortcut Ctrl or Command + R to activate Retime Controls.
2. Select Freeze Frame
Now, blue triangles should appear at the top of the clip, which shows that it’s playing at a normal speed. There’s also a percentage value at the bottom of the clip that controls the speed, with an inverted triangle next to it.
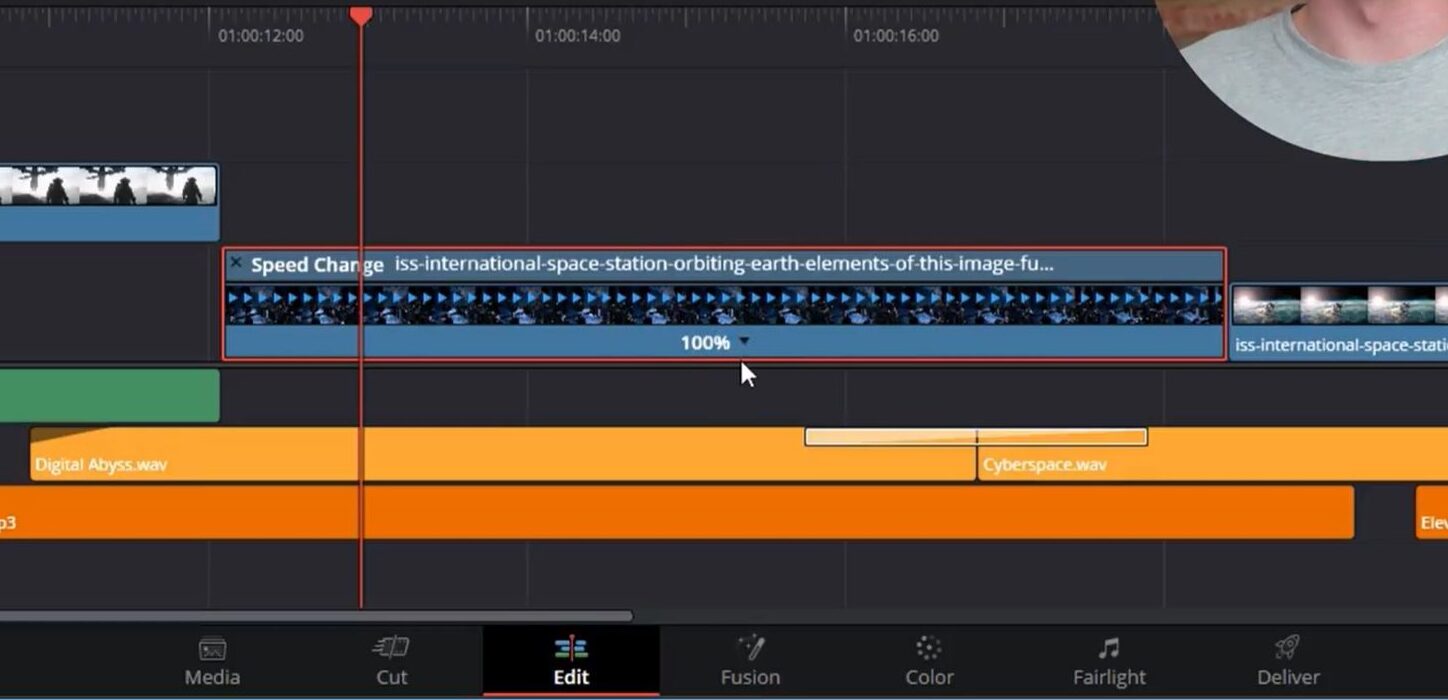
Make sure your playhead is positioned to where you want the freeze frame to start.
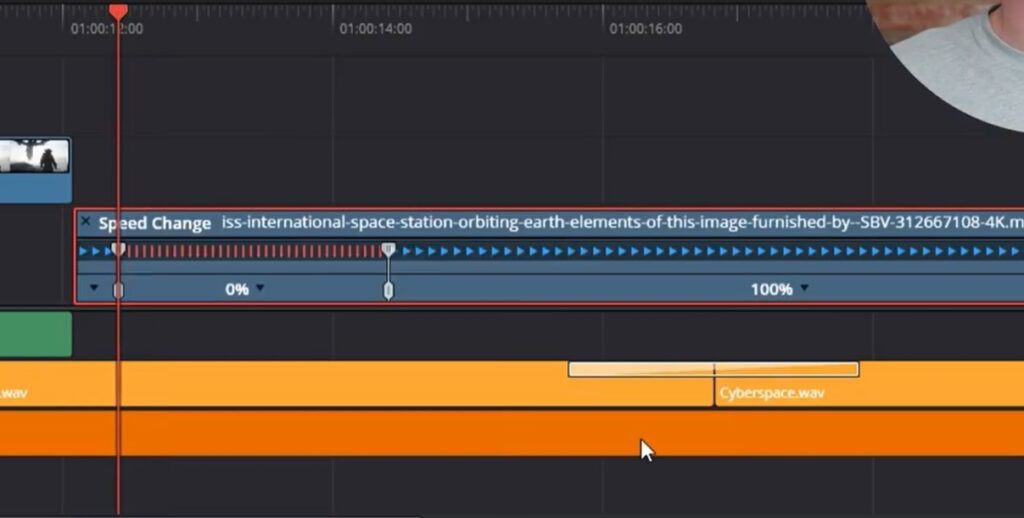
Then, click the inverted triangle and select Freeze Frame. Once you do, the blue triangles above your clip will turn into red lines, meaning it’s a frozen segment, and the percentage value will change to 0%.
3. Adjust the duration
Now, you can adjust the duration of your freeze by sliding the orange keyframe while keeping everything inside the primary clip on the timeline.
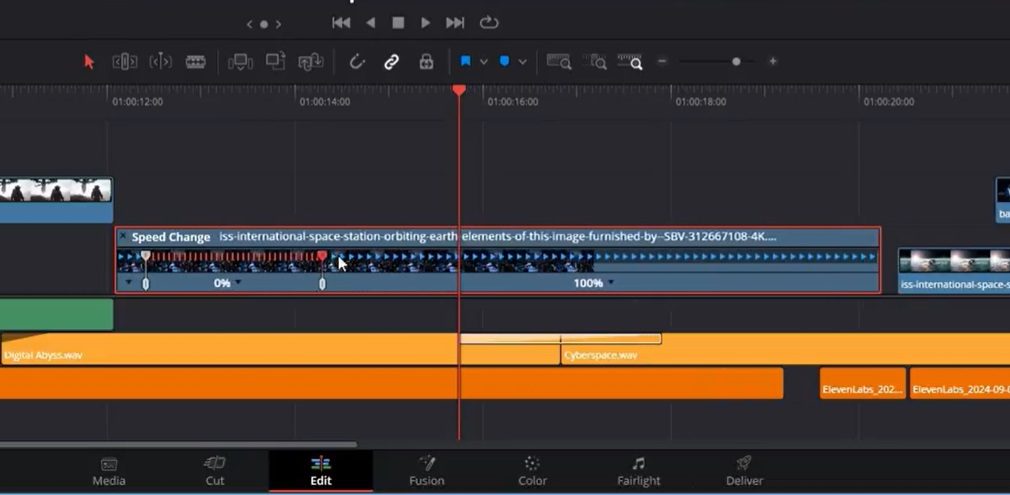
Note: I would only use this method for instances when you’re using Retime Controls to manipulate other parts of the clip, as it can become confusing.
For example, once you close Retime Controls (by pressing Ctrl + R again), there’s no way to see which part of the clip is frozen on the timeline. Whereas if you isolate a section from the primary media and then freeze it, a clock icon appears to indicate the speed change. You can also label that section with a specific color, making it easier to identify when looking at your timeline.
Learn how to do even more in DaVinci Resolve
Now that you’ve learned how to create a freeze frame in Resolve, learn how to do even more with our in-depth tutorials. Check out our posts on how to green screen, how to color grade, how to add subtitles, and more.
Once you’ve mastered the basics, you can easily add in advanced effects and motion graphics with DaVinci Resolve templates. Our library has thousands of pre-made, customizable templates for Resolve that can help you edit videos faster than ever.
With our all-in-one subscription, you’ll get unlimited downloads of over 10 million royalty free stock footage clips, music tracks, templates, sound effects, images, and more. Explore our plan options and sign up today to start downloading!