Working on a music video or something for your YouTube channel, and looking for ways to make your video stand out? Well, the Glow effect is a fantastic tool in Adobe After Effects, and you can often find it to be the missing ingredient that brings your visual impact or motion design to life.
For example, adding the glow effect here to my opening titles helps connect the text to the background. It becomes part of the scene rather than on-screen text.
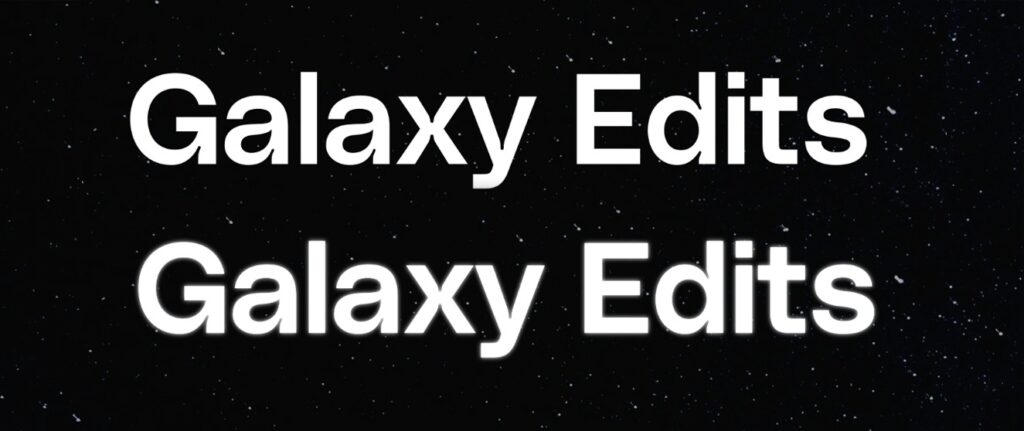
It’s subtle, but it just adds that missing connection. That said, in this article, we’re going to cover:
- How to animate a basic glow effect in order to give a light source a more convincing look
- How to create the fashionable animated glow lines you may see on social media and in music videos
However, if you are new to After Effects in general, then be sure to check out the Beginner’s Guide to Advanced Tools and Techniques for a primer on the techniques and tools we cover in this tutorial.
Table of contents
Animating a flickering glow effect
Let’s say that I’ve been tasked with creating a PlayStation-style end screen in which your character has lost against the boss, and you receive a “You Died” message similar to the classic end screen from Dark Souls.
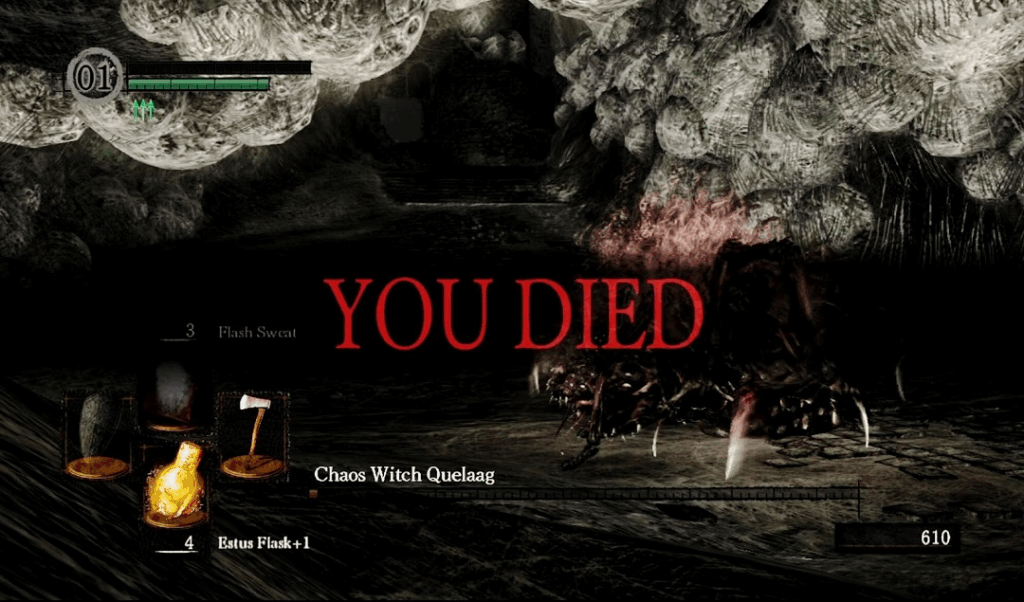
Easy peasy, right? Actually, it is – especially because the Storyblocks library offers a wide range of pre-made assets that I can use as a starting point, instead of having to create something from scratch.
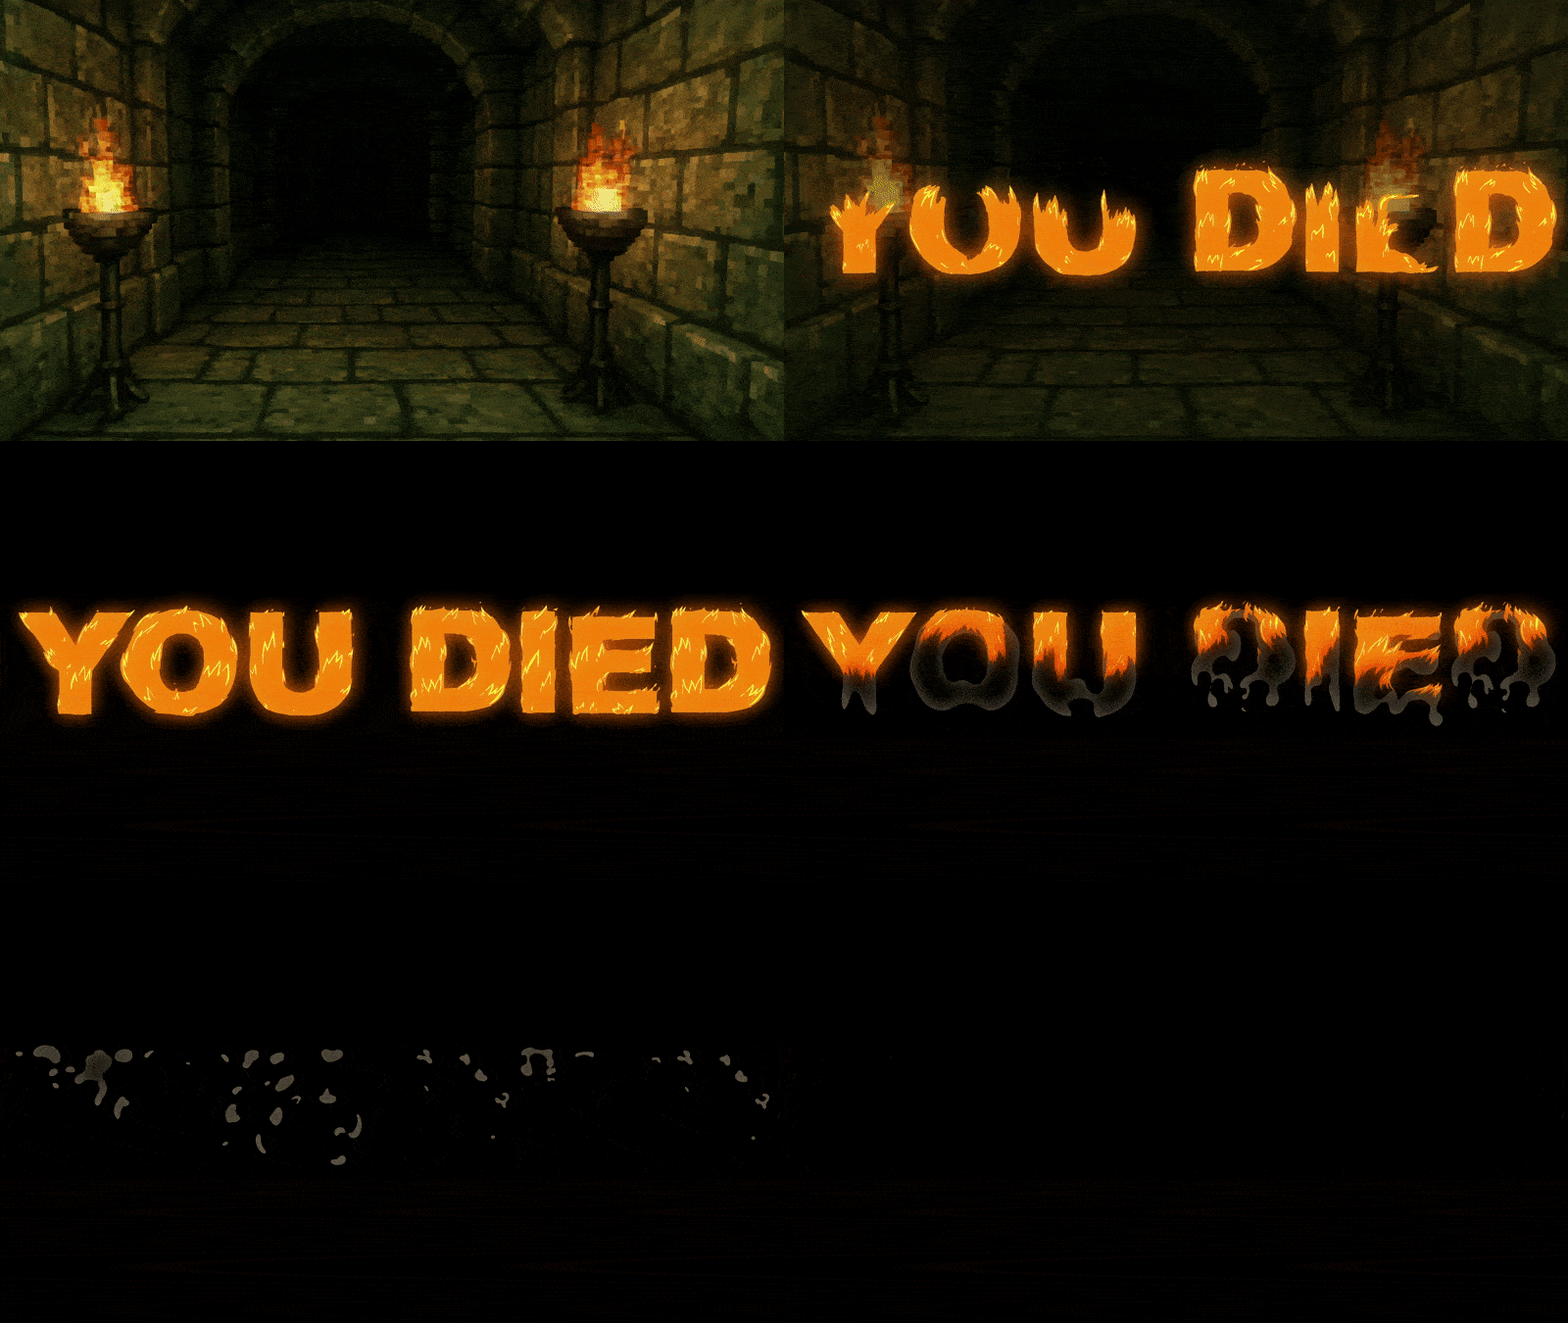
I found these Cartoon Fire Typefaces, which are downloadable After Effects template files in the Storyblocks library. After rearranging the letters, it looks very on-brand for the project.
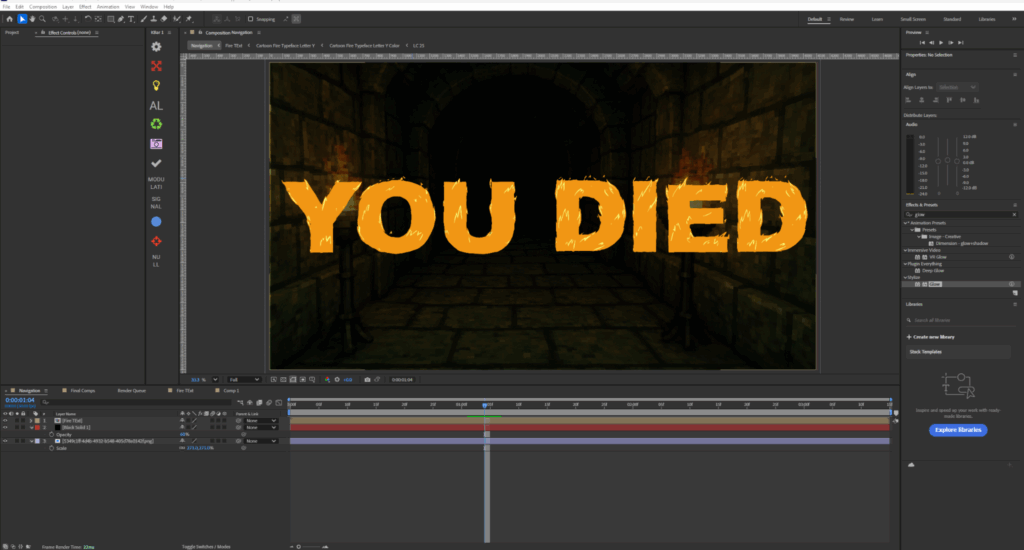
Especially since the pre-made template has an animated flame-on and smoke-out effect!

While this is a perfect starting point for my project, it’s missing that organic feel. I want the fire to feel hot. This is where we can apply a glow effect in After Effects to add that missing element.
1. Add an adjustment layer, then add a glow effect
To do this, I’m going to add an Adjustment Layer by pressing Ctrl + Alt + Y (Cmd + Option + Y on a Mac).
Next, I want to add Glow onto the Adjustment Layer. To do that, go to the Effects & Presets panel, type “Glow,” and drag it onto the Adjustment Layer.
Once we add a glow effect to this composition, we can see that it has distorted the animated letters.
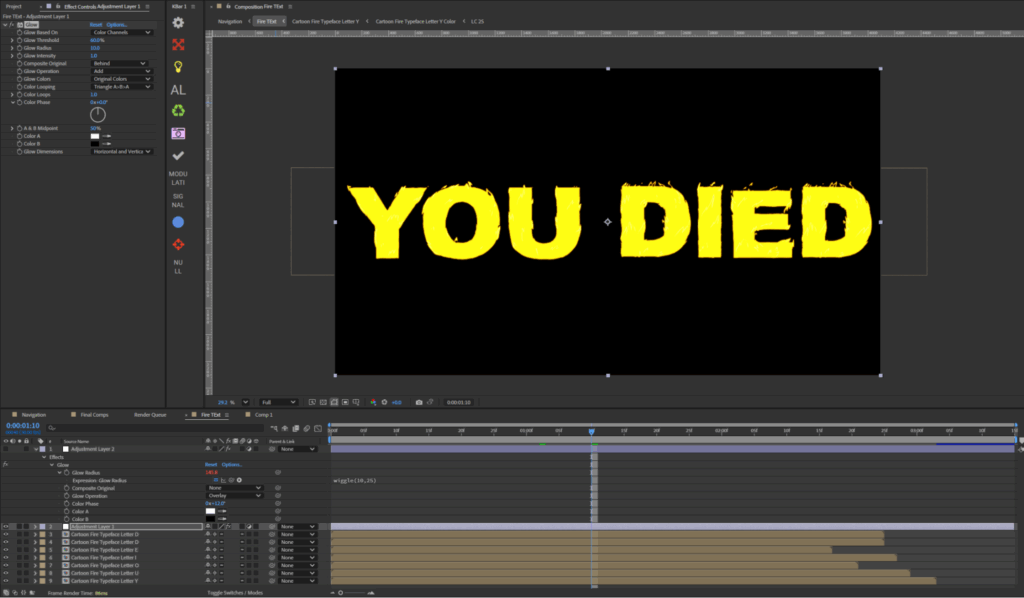
To fix this, we need to review the parameter settings and identify which ones correspond to the issue. As with most effects with multiple sliders, you need to adjust each slider differently depending on your base footage.
2. Adjust the settings of your glow effect
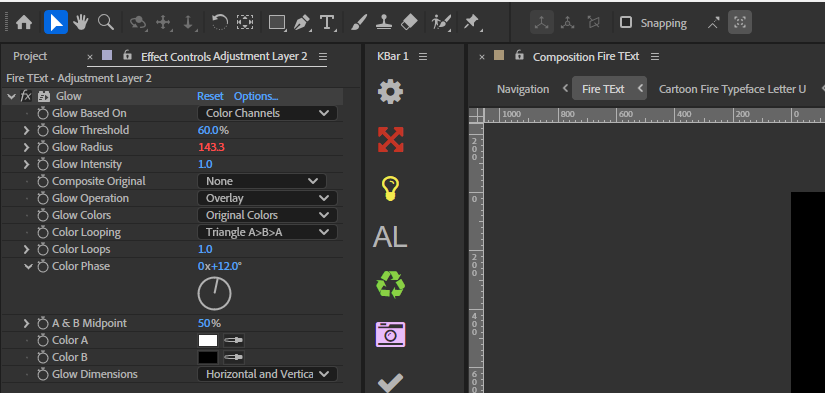
Each slider represents the following function:
- Glow Based On: Determines which part of the image/layer the glow effect is calculated from.
- Glow Threshold: Sets the brightness level (percentage) above which pixels start to glow.
- Glow Radius: Controls the distance the glow spreads outward, creating a softer or tighter effect.
- Glow Intensity: Adjusts the brightness/opacity of the glow effect itself.
- Composite Original: Specifies how the original layer is blended with the glow effect (e.g., Behind, On Top).
- Glow Operation: Defines the blending mode used to mix glow colors with the underlying image.
- Glow Colors: Determines whether the glow uses the layer’s Original Colors or the user-defined A & B Colors.
- Color Looping: Applies a color transition pattern when using Color A and Color B.
- Color Loops: Specifies how many times the color transition defined by Color Looping should repeat across the radius.
- Color Phase: Shifts the starting point of the color transition/looping.
- A & B Midpoint: Controls where the transition point between Color A and Color B occurs.
- Color A / Color B: The two user-defined colors that the glow effect will use and blend between.
- Glow Dimensions: Determines the spatial direction of the glow.
In this instance, I need to adjust the Composite Original & Glow Operation so the glow appears only around the edges of the text, not over it.
To imitate the glow falloff you would get from flickering flames, we have to adjust the Glow Radius. First, we increase the size, so it looks like this.
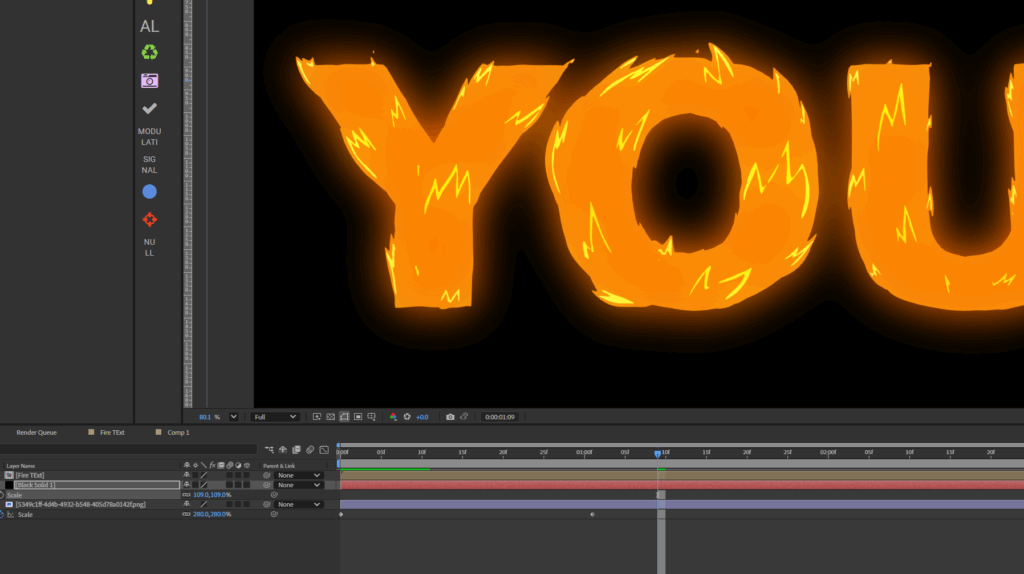
Add an expression to the glow radius
Next, we want to make the glow radius fade in and out. We could do this by selecting the stopwatch to set a keyframe, changing the radius by 10, moving a few frames ahead, then adjusting the radius by -15, and repeating this process until your fingers fall off. But it would be too tedious.
Instead, right-click on the stopwatch and input an expression. The expression that we’re working with here is a Wiggle expression. In this specific instance, I’m using the expression wiggle(10,25). You can find more about expressions in our in-depth guide here.
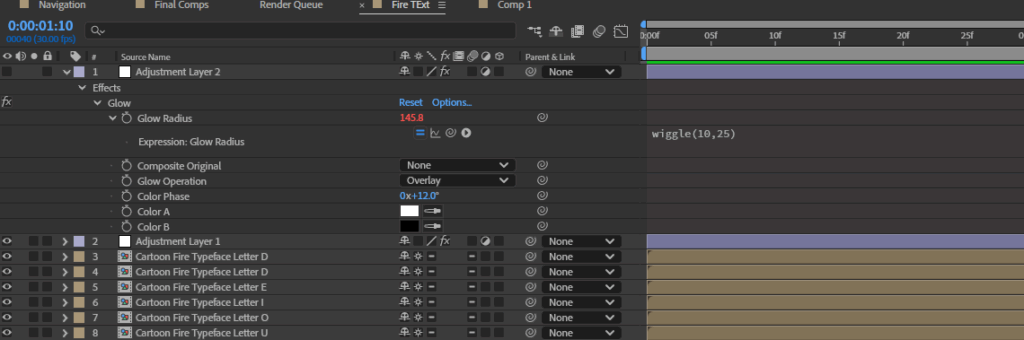
If you’re unsure what this means, 10 is the Frequency (Wiggles Per Second), which sets the rate of random changes. And 25 is the Amplitude (Amount of Wiggle), which controls the intensity or strength of the movement. So, this expression automatically changes the radius without any user keyframe input.
Now, when I click play, the flames generated by the template are hot and dangerous, reinforcing the message of the lost fight in this video game.
Animating a glowing neon line
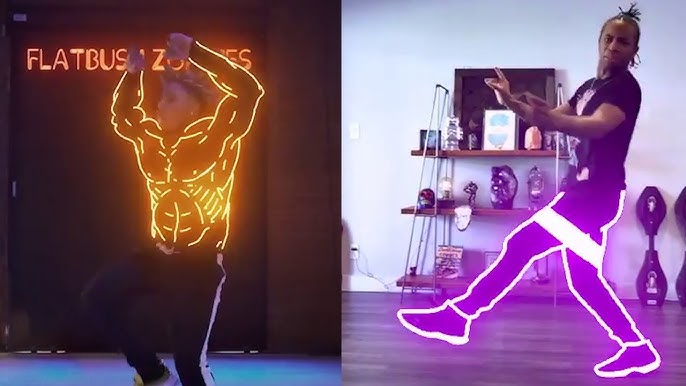
A few years ago, the sketch-like glowing lines took social media by storm, and here’s how you can do just that!
1. Duplicate your footage layer and name it
With your footage added to a new composition, select the footage layer by clicking it, then duplicate it by going to Edit > Duplicate. You can also copy a layer by selecting it, then pressing Ctrl + d on Windows, or CMD + d on Mac.
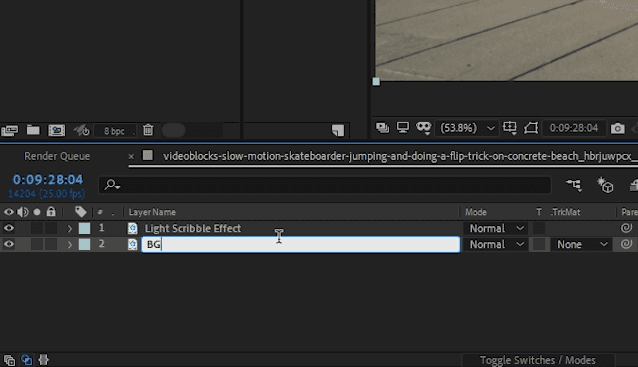
When creating duplicate layers, it’s always worth naming each layer individually. You can do this by pressing the Enter key on Windows or the Return key on Mac, then typing your desired layer names. I’m naming mine ‘BG’ (stands for background) on the bottom layer, and ‘Light Scribble Effect’ on the top layer.
2. Select the Brush tool and adjust the settings
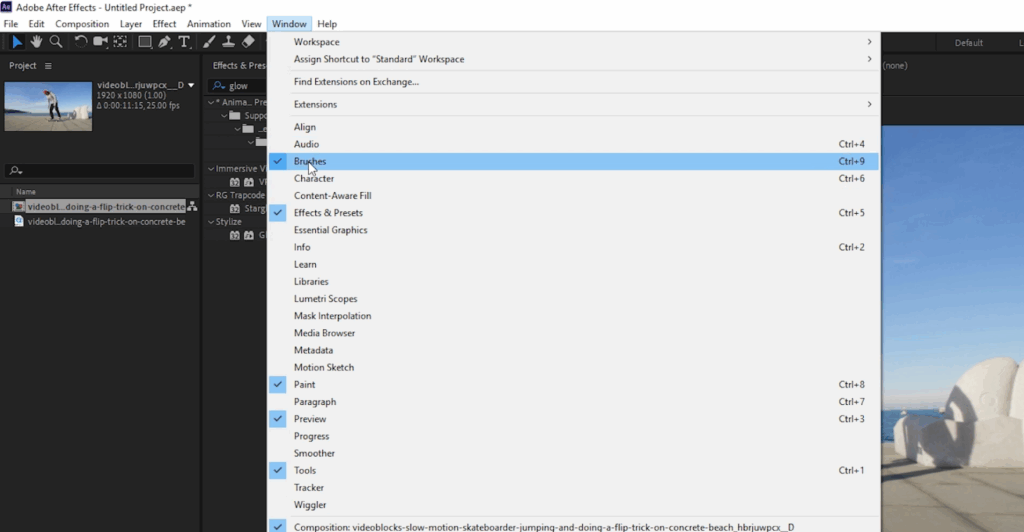
Next, let’s open up the Paint and Brushes panel windows by going to Window > Brushes and Window > Paint.
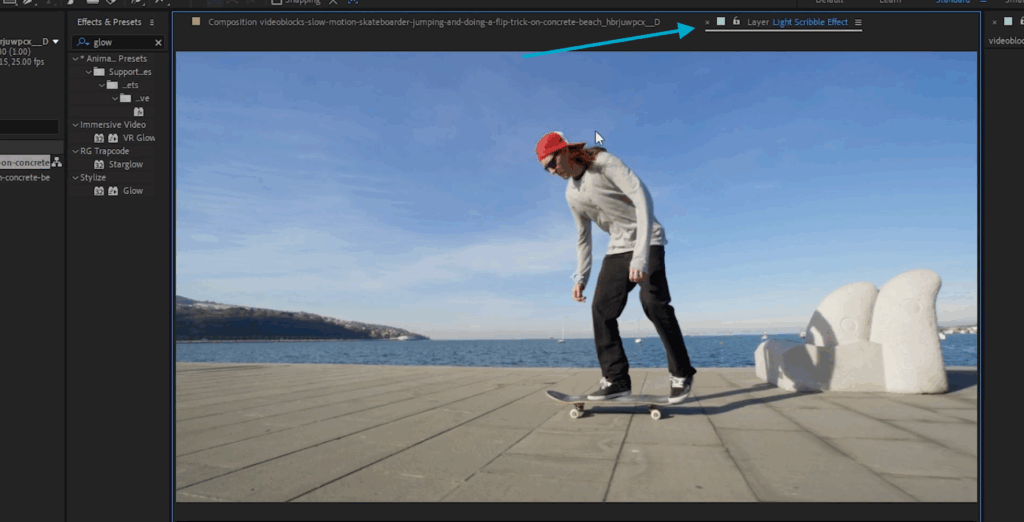
Select the ‘Light Scribble Effect’ layer in your composition, then double-click on it. This will open the footage in the Layer panel. This is where After Effects lets you use the Brush Tool to paint on the footage.
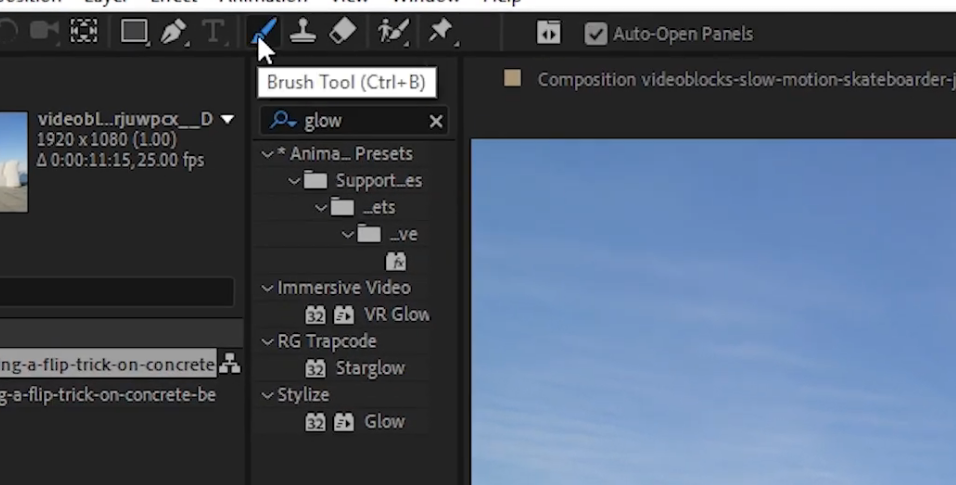
Next, select the Brush Tool from the tool options at the top of your toolkit. This is the tool we will use to create the paint effect.
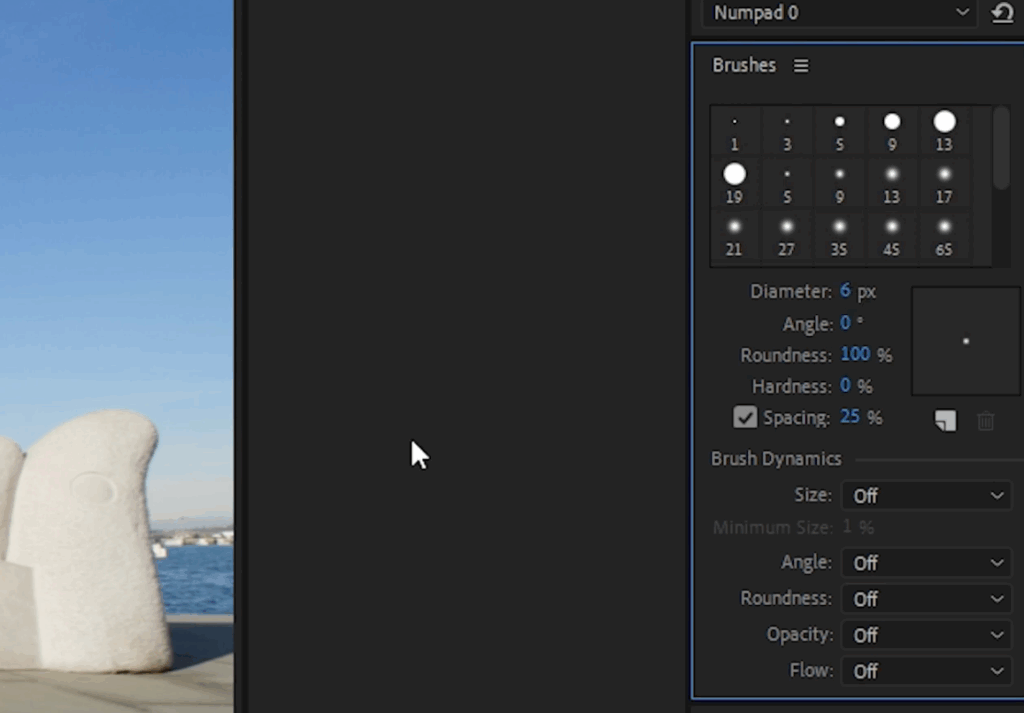
Within the Brushes panel window, change the diameter to 6px, and under Brush Dynamics, change the Size to Off. Depending on the footage you’re working with, a thinner or thicker diameter may be better. It depends on the base footage you have.
3. Set the Duration to Single Frame, then paint your lines on each frame
Next, in the Paint panel, set the Duration to Single Frame. Since we’ll be painting frame by frame, we need each brush stroke to appear only on the specific frame where it’s drawn.
If we leave the Duration set to Constant, the paint would appear on every frame, which isn’t the effect we want.
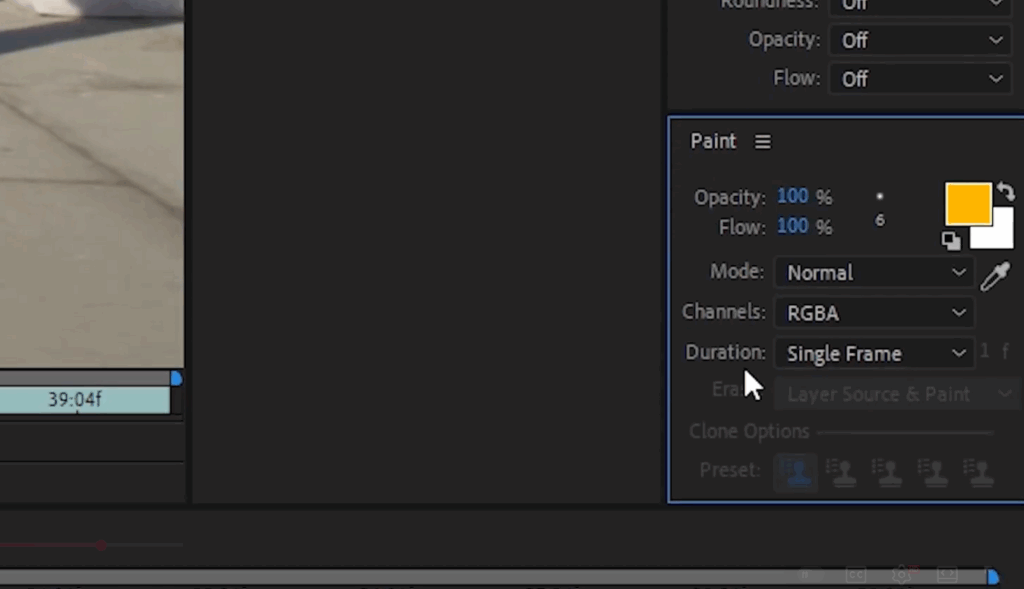
Here’s the easy but tedious part. Next, navigate in the composition to the first frame that you’d like to paint. While on that frame, start to draw what will be on this frame.
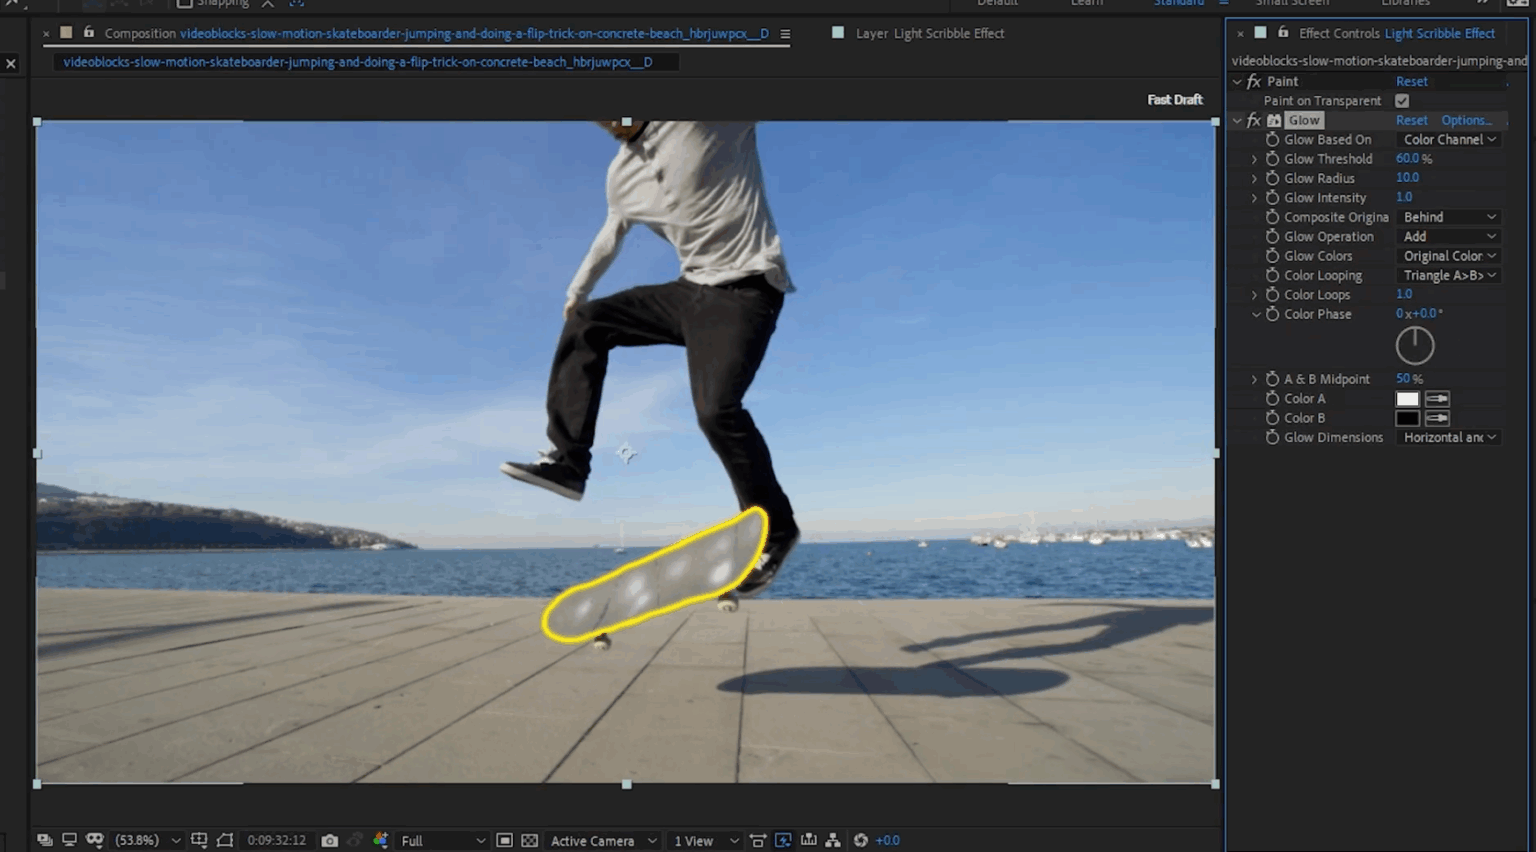
In our example, we will be outlining the skateboard. If you make a mistake, you can go to Edit > Undo.
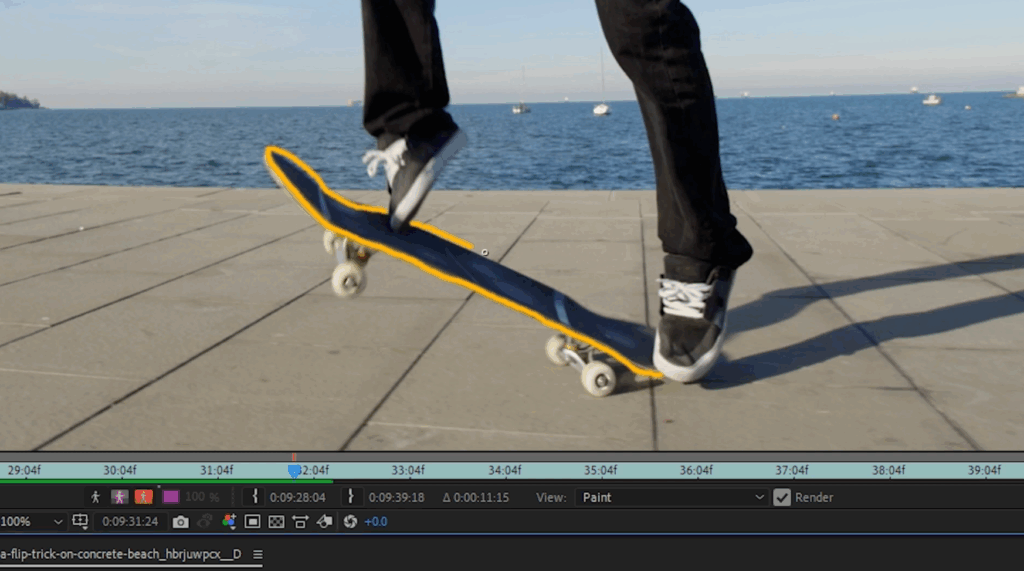
Continue drawing on this frame until it is complete.
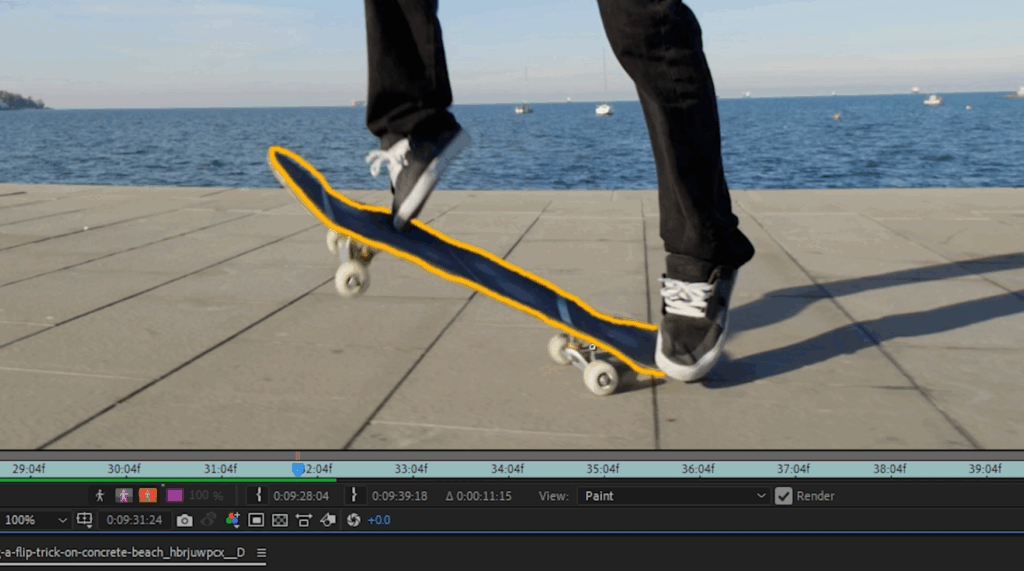
From here on out, you will repeat this frame by frame to complete the effect. Hence, the tedious part. This could take from a few hours to a few days, depending on the object size and frame length. That’s why we recommend applying this effect to smaller objects and in cuts that only last only a few seconds.
4. Turn on Paint on Transparent setting
Once you are satisfied with your entire painting animation, select the ‘Light Scribble Effect’ layer that the paint effect was applied to, and within the Effect Controls panel window, check the box to turn on the Paint on Transparent option.
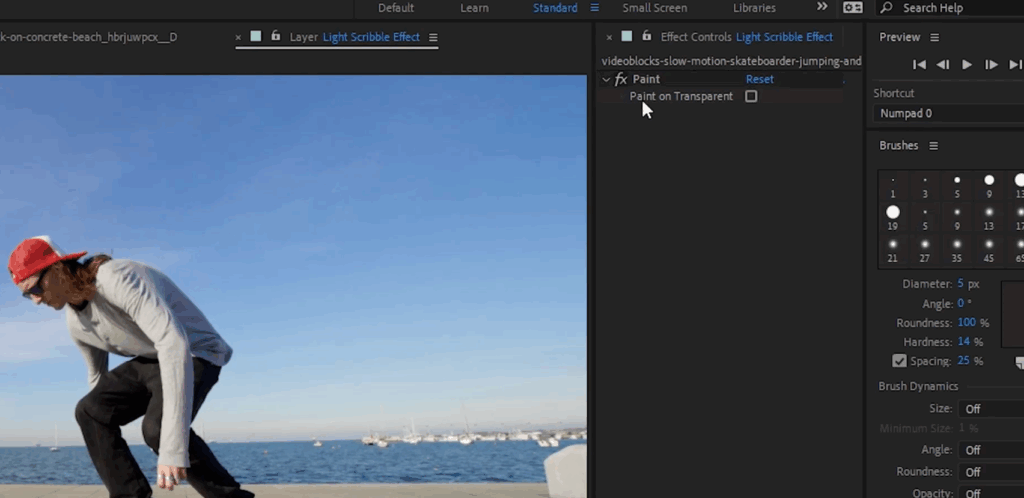
This will remove the footage from this layer, leaving only your paint effect visible. This is why we duplicated the footage in Step 3: to use the bottom layer as the footage and the top layer as the paint effect.
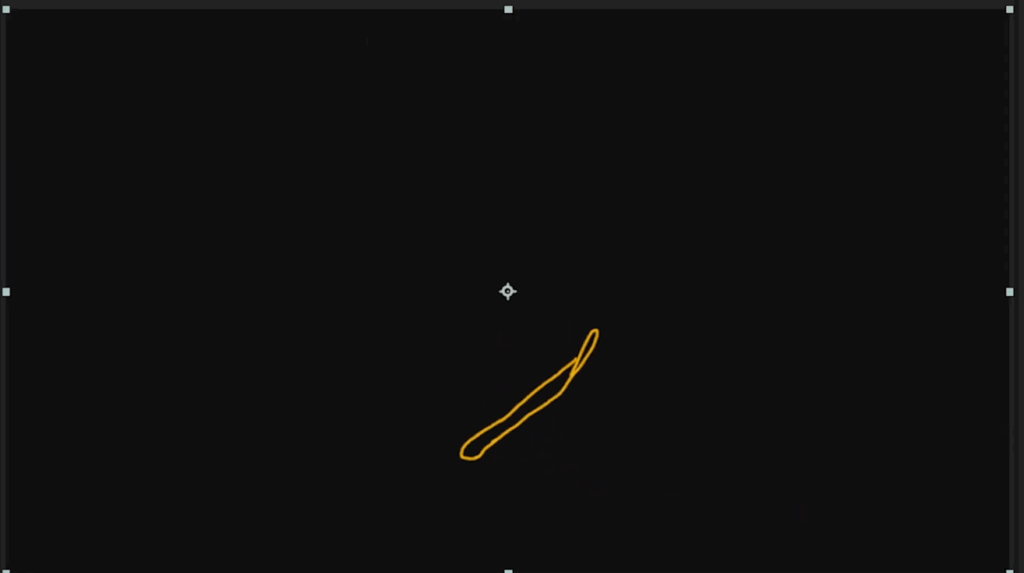
We are now finished in the Layer window. Now, let’s navigate to the Composition window.
5.Add a Glow effect to your painted layer and adjust the settings
With the ‘Light Scribble Effect’ layer selected in the composition, open the Effects & Presets panel and type “glow.” Choose the Glow effect, then drag and drop it onto the ‘Light Scribble Effect’ layer in your composition.
This will enhance the paint effect by adding a subtle glow.
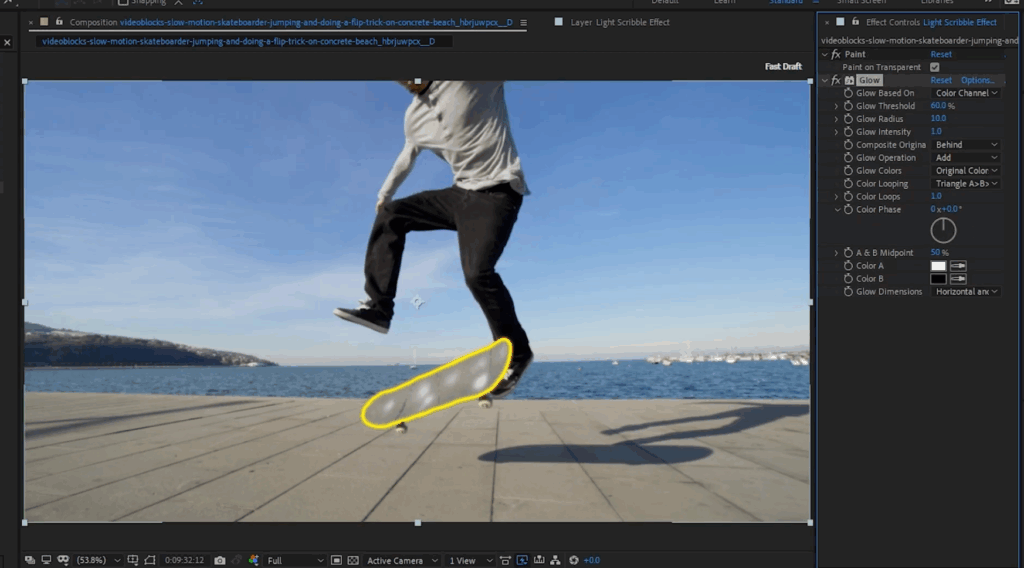
In the effects control panel, you can adjust parameters to achieve a more realistic glow on the paint layer. You can experiment with these settings to your liking. In this instance, I’m applying the following settings:
- Glow Threshold: 52.5%
- Glow Radius: 16.0
- Glow Intensity: 7.3
- Glow Colors: A & B Colors
- Color A: Red (We used a bright red color)
- Color B: Darker Red (We used a dark red color)
You’ve now finished creating the glow animation effect in After Effects, whey hey!
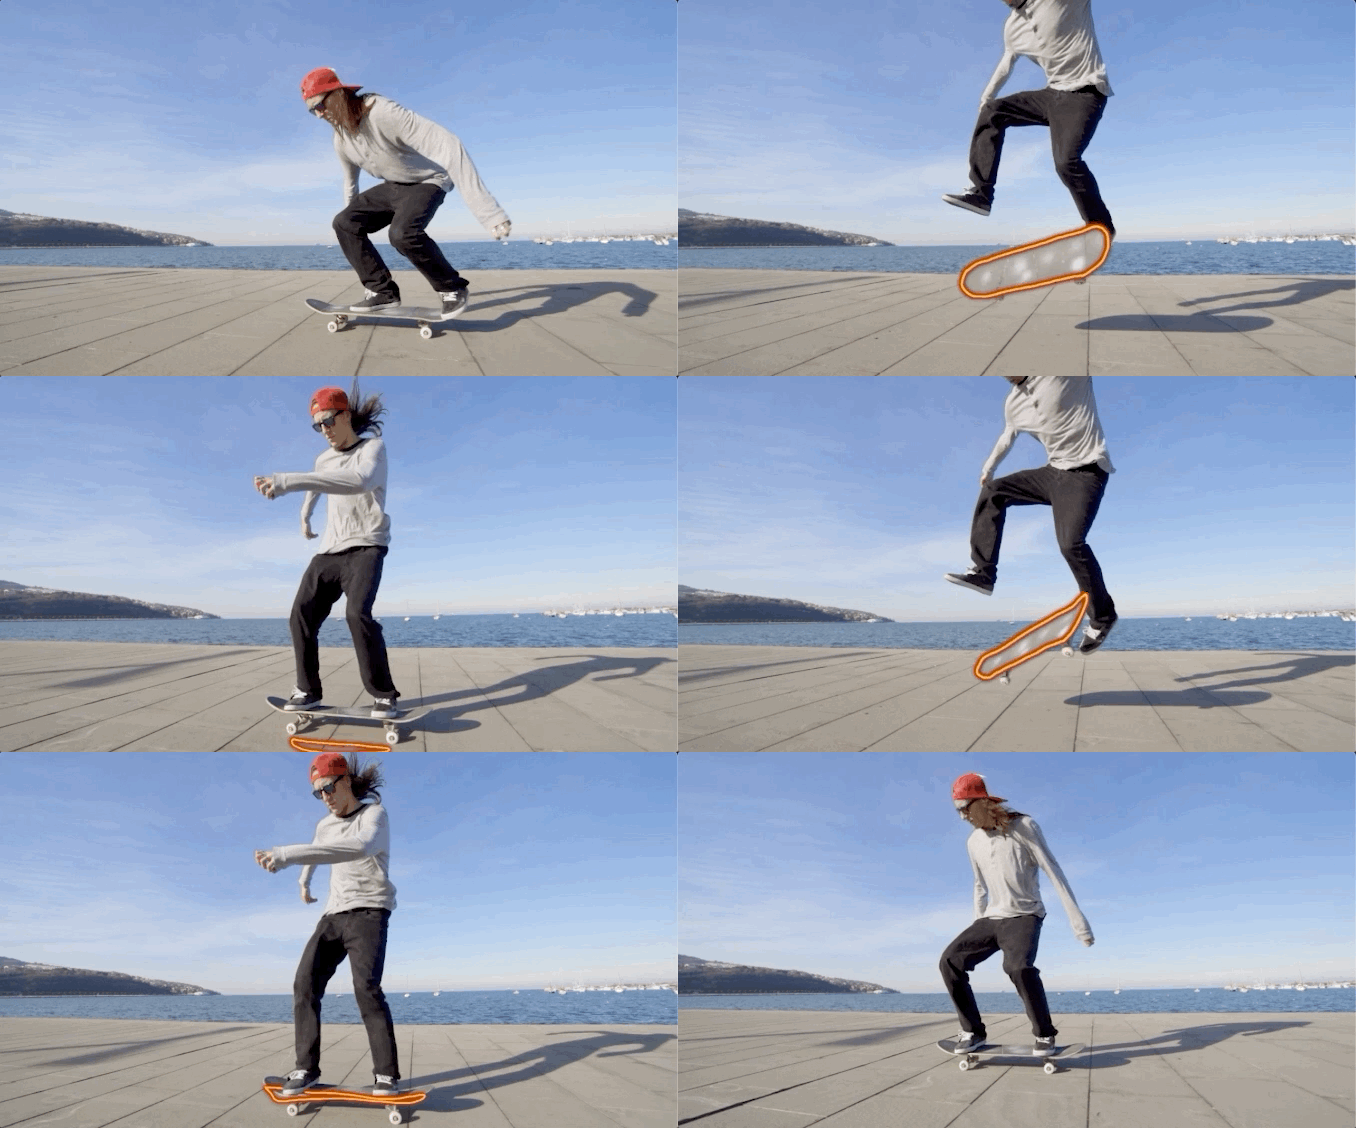
Want more glow? Get the Deep Glow plugin
As a side note, I do have to say that I personally find After Effects’ built-in Glow effect to be somewhat lackluster. It often doesn’t give me the desired effect until I’ve spent about fifteen to twenty minutes tweaking the parameters, and even then it’s not as bright as I would like it to be.
In this case, I recommend the Deep Glow plugin from Plugin Everything.
This is a $99.95 plugin, so it is certainly not on the cheap side of third-party After Effects tools. However, the instant “glow up” effect that you get from just applying this is unparalleled.
For example, if we compare the standard text here with the After Effects’ native Glow and Plugin Everything’s Deep Glow:
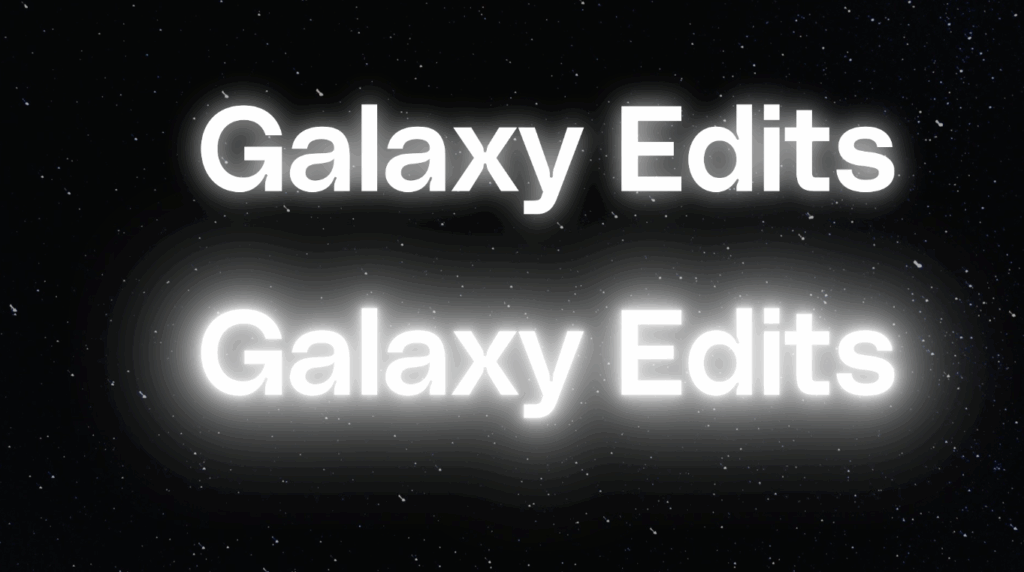
We can see an astronomical difference. Likewise, the parameters and adjustable settings are far more intricate with this plugin.
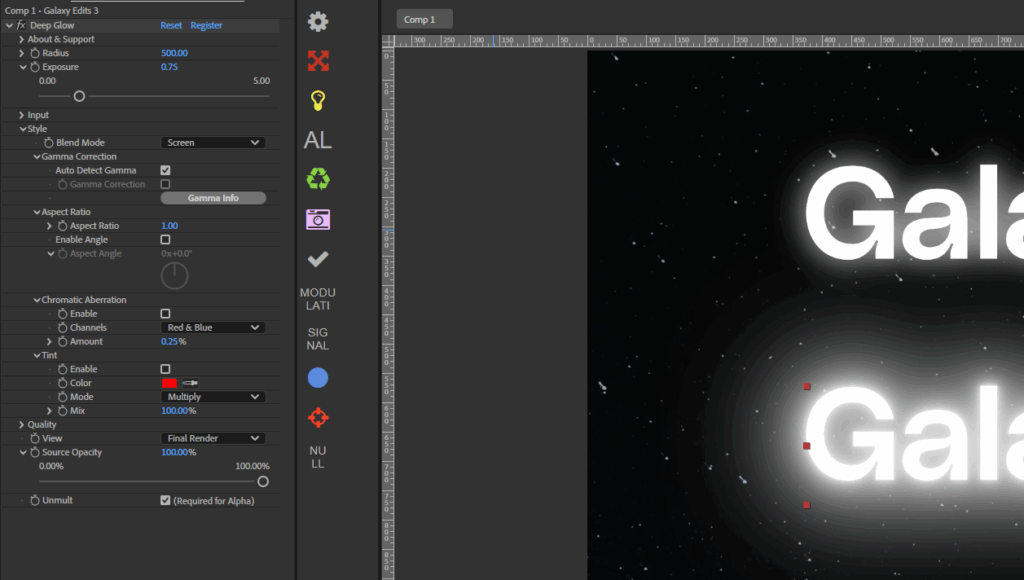
The settings here are from Deep Glow V1; Deep Glow V2 offers even more customizable parameters. If you find yourself using the Glow tool frequently, consider investing in Deep Glow.
It is highly regarded in the community for its realistic, physically accurate, and beautiful out-of-the-box glow. No notes on this one! There are lots of great After Effects plugins that you can download to improve effects, workflow, and more in the platform – check out my top recommended ones here.
Explore more glow templates and footage
These are just two examples of what you can create with this effect; there are truly unlimited results you can achieve by implementing the glow effect within your motion design. From animated characters to glowing highlights, this effect is sure to make your videos pop.
Need a clip or template to get started on your next glowing project? Check out Storyblocks’ library of over 10 million royalty-free stock assets, including 4K and HD footage, music, After Effects templates, and more to help you experiment to your heart’s content!