Social media icon overlays help guide the viewers toward your other socials and accounts without interrupting your video. They sit quietly in the frame and reinforce your presence across channels. In this tutorial, we’ll learn how to create social media icon overlays for your videos using After Effects, both with pre-made templates from our very own library, and from scratch!
The goal is to give you control over the look, timing, and feel so everything visually and aesthetically aligns.
Using pre-made After Effects templates
Using pre-made templates is the fastest way to create social media icon overlays in After Effects. These templates are designed to be flexible, so you can quickly adapt them to fit whatever branding you need. Instead of building animations from zero, you start with a finished system and adjust it to fit the project!

1. Download your template and review the composition inside After Effects
Start by downloading a template from Storyblocks and opening the project file in After Effects. For this tutorial, I’ll be using this illuminated social lower thirds template, but there’s hundreds of others to choose from in the Storyblocks library.
Once inside, take a moment to understand the layout. Most templates include a main composition that holds the final animation, along with several pre-compositions that control text, icons, and color. This eliminates any bit of disorganization or confusion with how your project is structured.
Everything is organized in a way that allows you to see the big picture but make tweaks in areas you want fixed without affecting the whole timeline.
2. Update any text, logo, and color layers to match your brand or channel
Next, locate the composition that controls the Text and Logos. This is usually labeled pretty clearly, and it’s where you will replace the default handles and platform names.
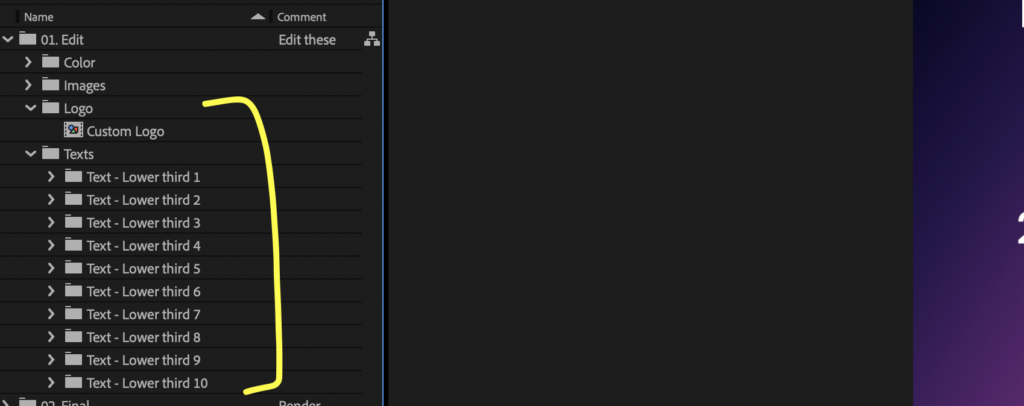
Update the text layers with your own usernames, brand names or calls to action. Remember to keep the wording short so it reads quickly on screen. These overlays work best when they feel effortless.
After updating the text, swap out the icons if needed. Some older templates may include outdated platform logos. You can import updated icons as vector files and drop them into the existing compositions. Make sure to scale them evenly so the animation remains smooth. Consistency matters more than style here!
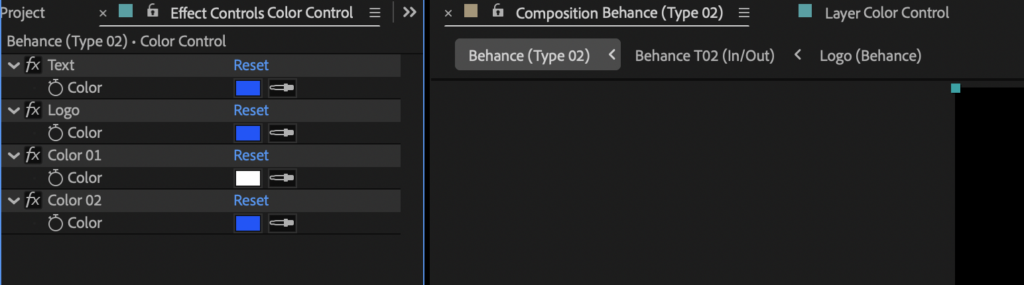
Now adjust the color palette to match your brand. Many templates include a control layer with color settings called Color Control.
If you click on the layer, you’ll see in the Effects Controls panel that the options for individual elements to be changed is very straightforward. This allows you to update multiple elements at once.
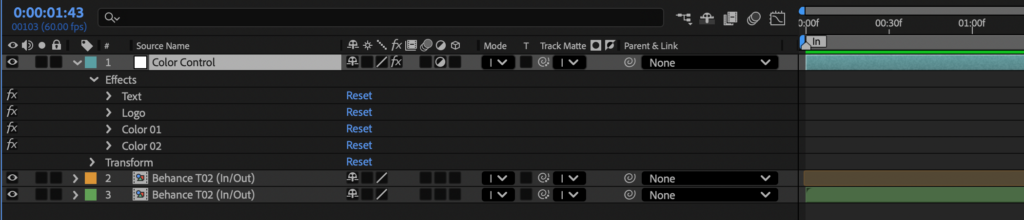
If you don’t want to edit the colors in the Effects Control panel, then you can also just expand the Effects tab and you’ll find the same options underneath.
3. Update the timing of the animation keyframes to fit your edit
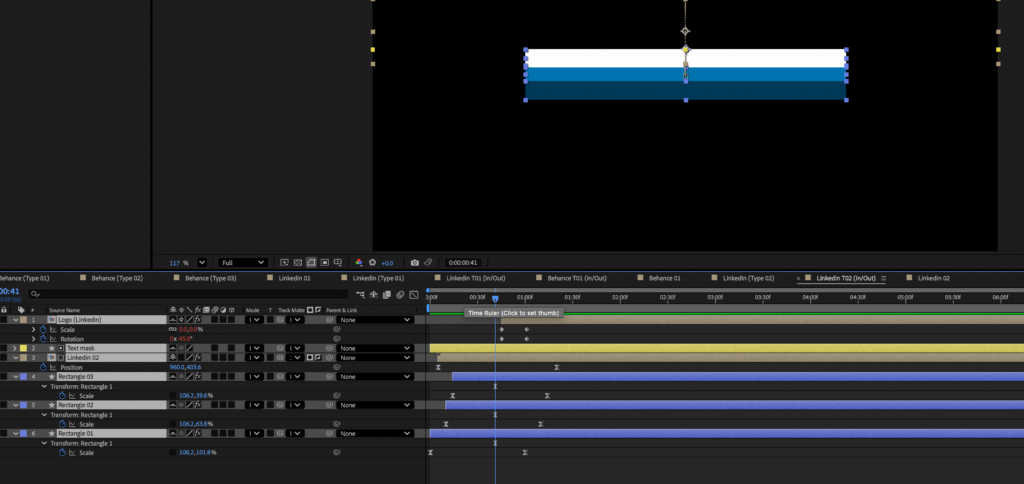
Animation timing is the next step. Scrub through the timeline and preview how the overlay enters and exits the frame. You can shorten or extend these keyframes to better fit your edit. If your video moves quickly, keep the animation tight. If your pacing is slower, allow the motion to breathe.
If you’re having a hard time finding where to expand the layer to see all of the individual keyframes, be sure to click the Shy switch, which has hidden the layers. Once you’ve done this, you’ll find every keyframe created for the animation (see below).

This is where you can adjust the speed at which the animation of the lower third plays out. This is important for your ability to get extremely specific with timing of the video and overall look and feel of the video.
4. Render and export your social media icon overlay as a transparent file
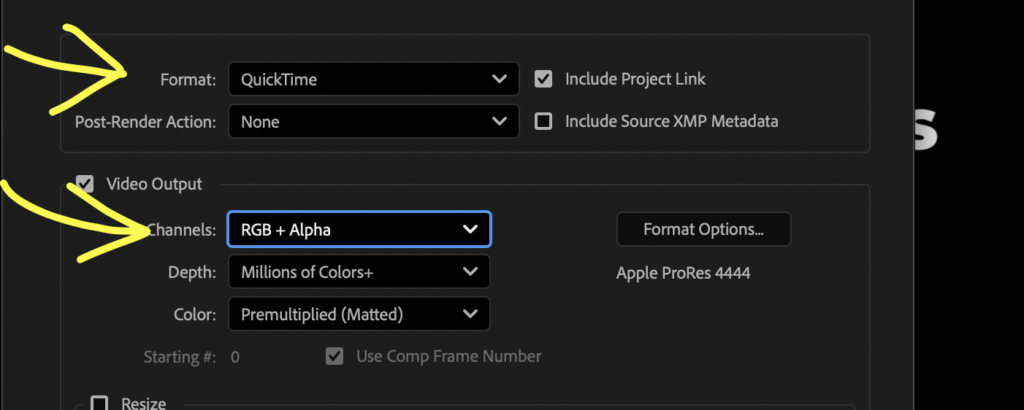
Finally, to render the lower third as a transparent file, be sure to select QuickTime for the Format, and change the Channel to RGB + Alpha.
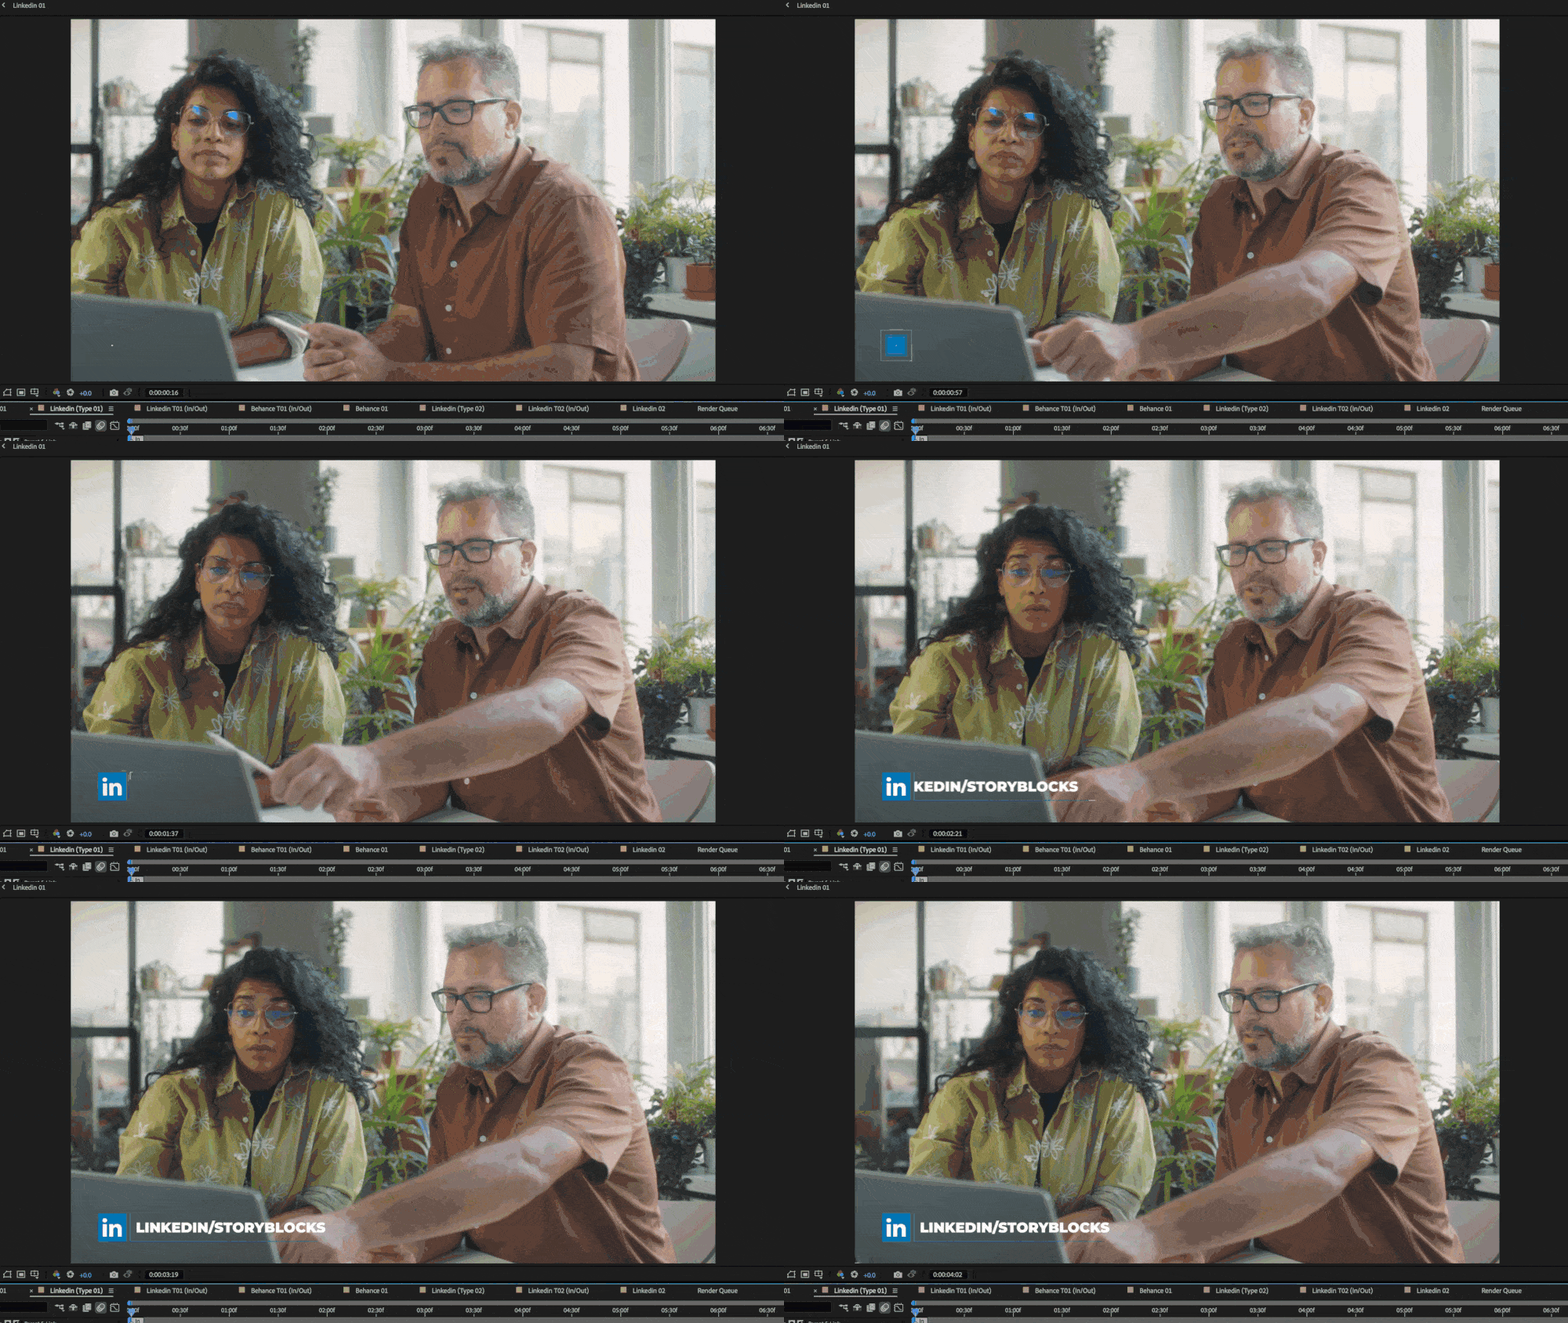
Export using a format that supports transparency, then import it into your editing software. Once placed, position it in a corner that does not compete with your subject. The overlay should feel like part of the frame, not an interruption. Like so:
Creating your own overlays
Now, let’s talk about making your overlays. Creating your own social media icon/logo overlay gives you full control over the style and motion. This approach takes more time, but it allows you to build something that feels completely your own. Instead of working around a template, you are defining the system from the ground up.
When building your own overlay, it’s best to make it in the center of the screen, as large as you can, so you can easily see every aspect as you’re creating it. Then once you’ve rendered it out, you can scale it down and place it in a different part of the screen.
As far as the actual animation goes, you don’t need to get too fancy for the animation to look legit. It just needs to be clean and not an eye sore. The point of these overlays and lower thirds is to communicate information to the viewer, quickly.
1. Create the elements for your overlay one by one, starting with the icon, then the text
Refine the animation by staggering elements. Let the icon appear first, then bring in the text a few frames later. Create a Shape Layer around the Logo, then change the Track Matte to Shape Layer 1.
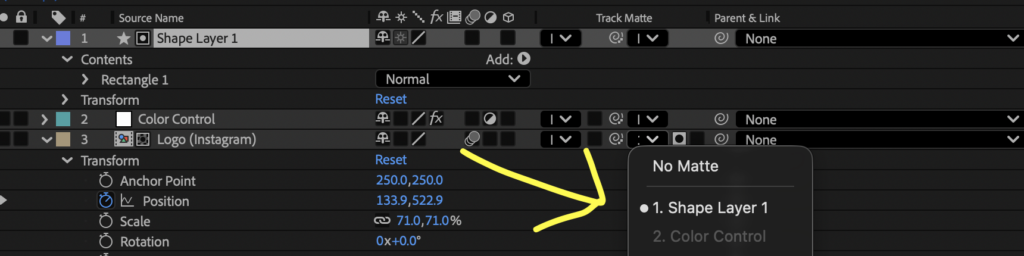
After this, you’ll just move the logo from outside the Shape Layer, move the playhead forward, then place a keyframe to make the Logo magically appear. Then repeat with the Text.
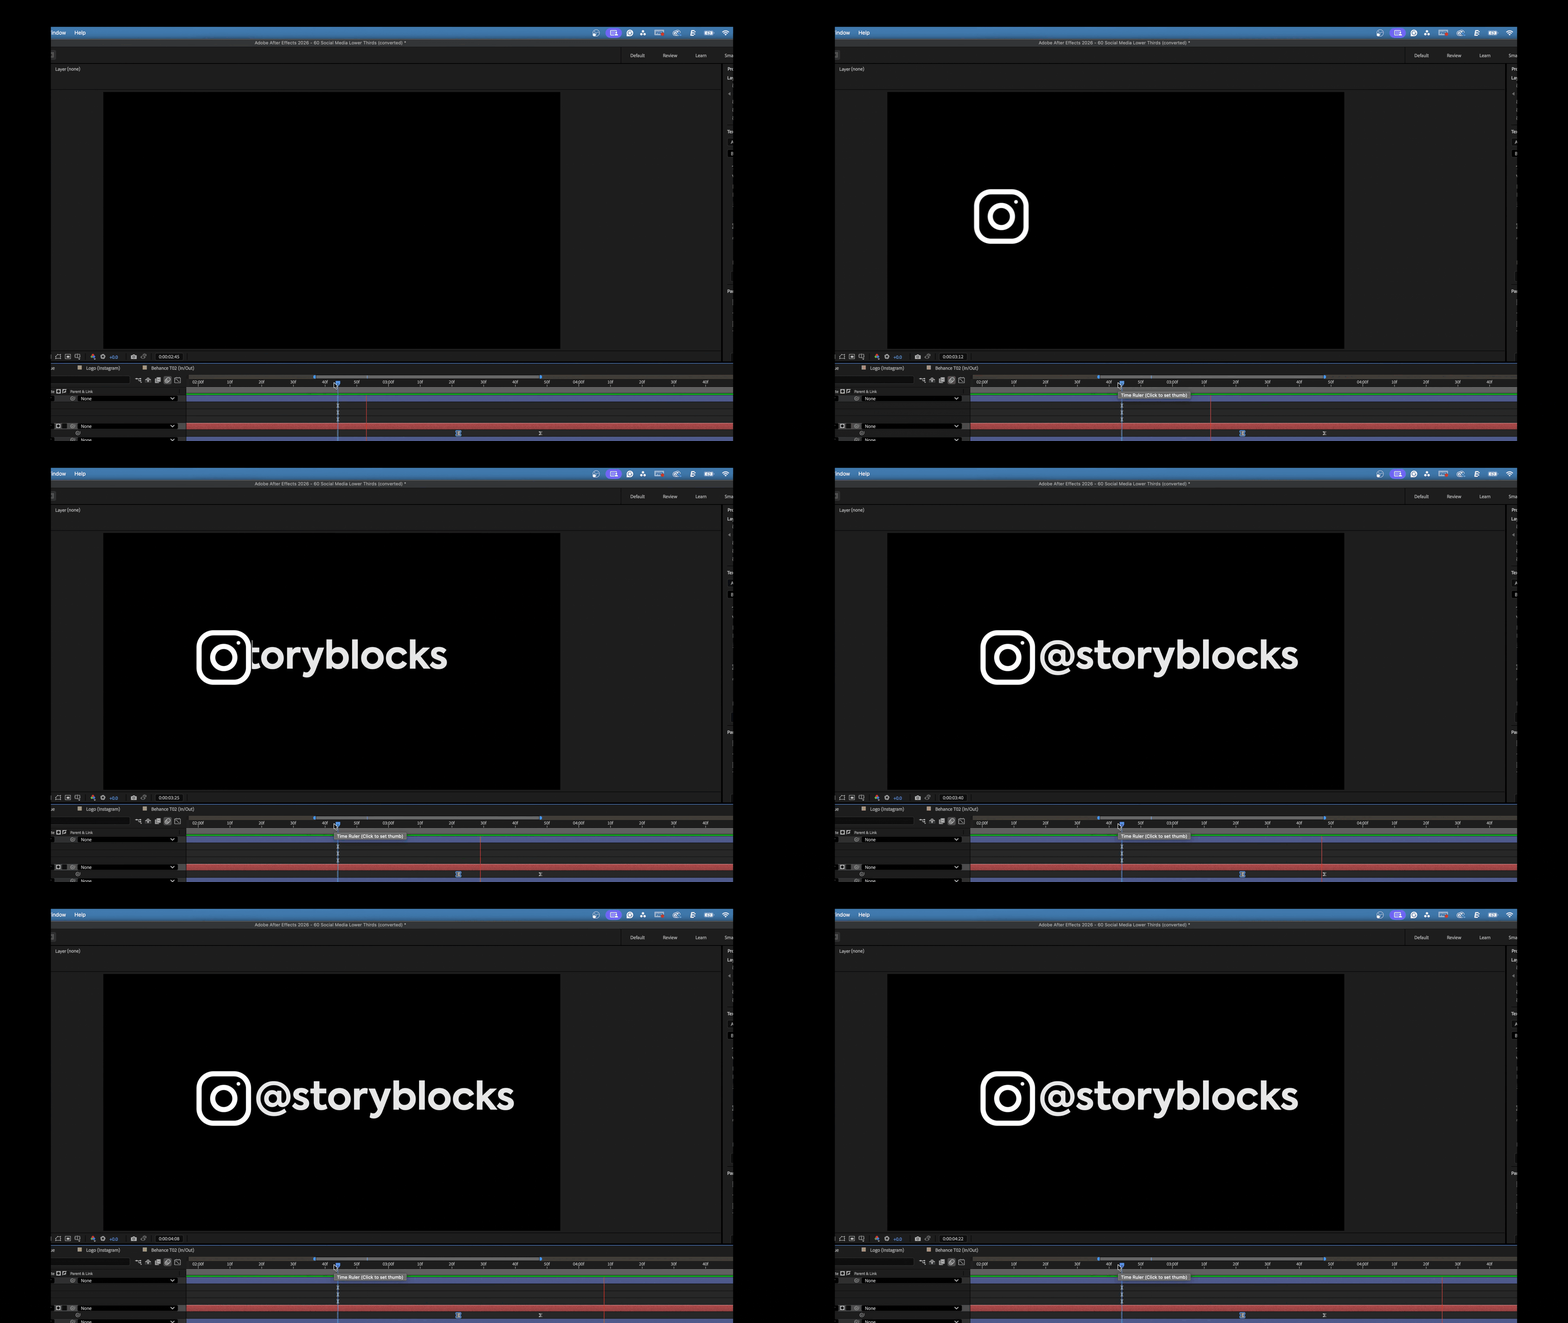
This creates a subtle sequence that feels intentional. You can also experiment with scale or rotation, just keep it subtle. The overlay should support your video, not compete with it.
2. Pre-compose the elements of your overlay to make it reusable
Once the animation feels right, pre-compose the elements so you can reuse the overlay in other projects.
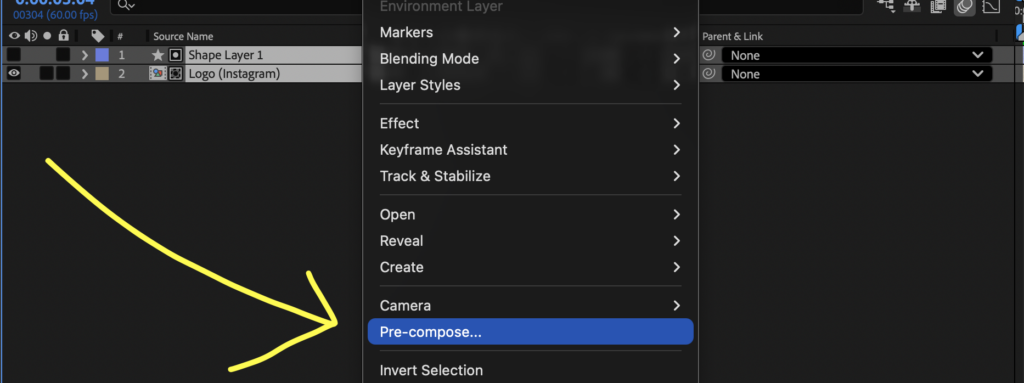
This turns your work into a modular asset. You can drop it into future edits and update the text without rebuilding the animation.
3. Test the overlay over footage, tweak any final details, then export
Before exporting, test the overlay over real footage. This step reveals if the contrast is strong enough and if the timing works in context.
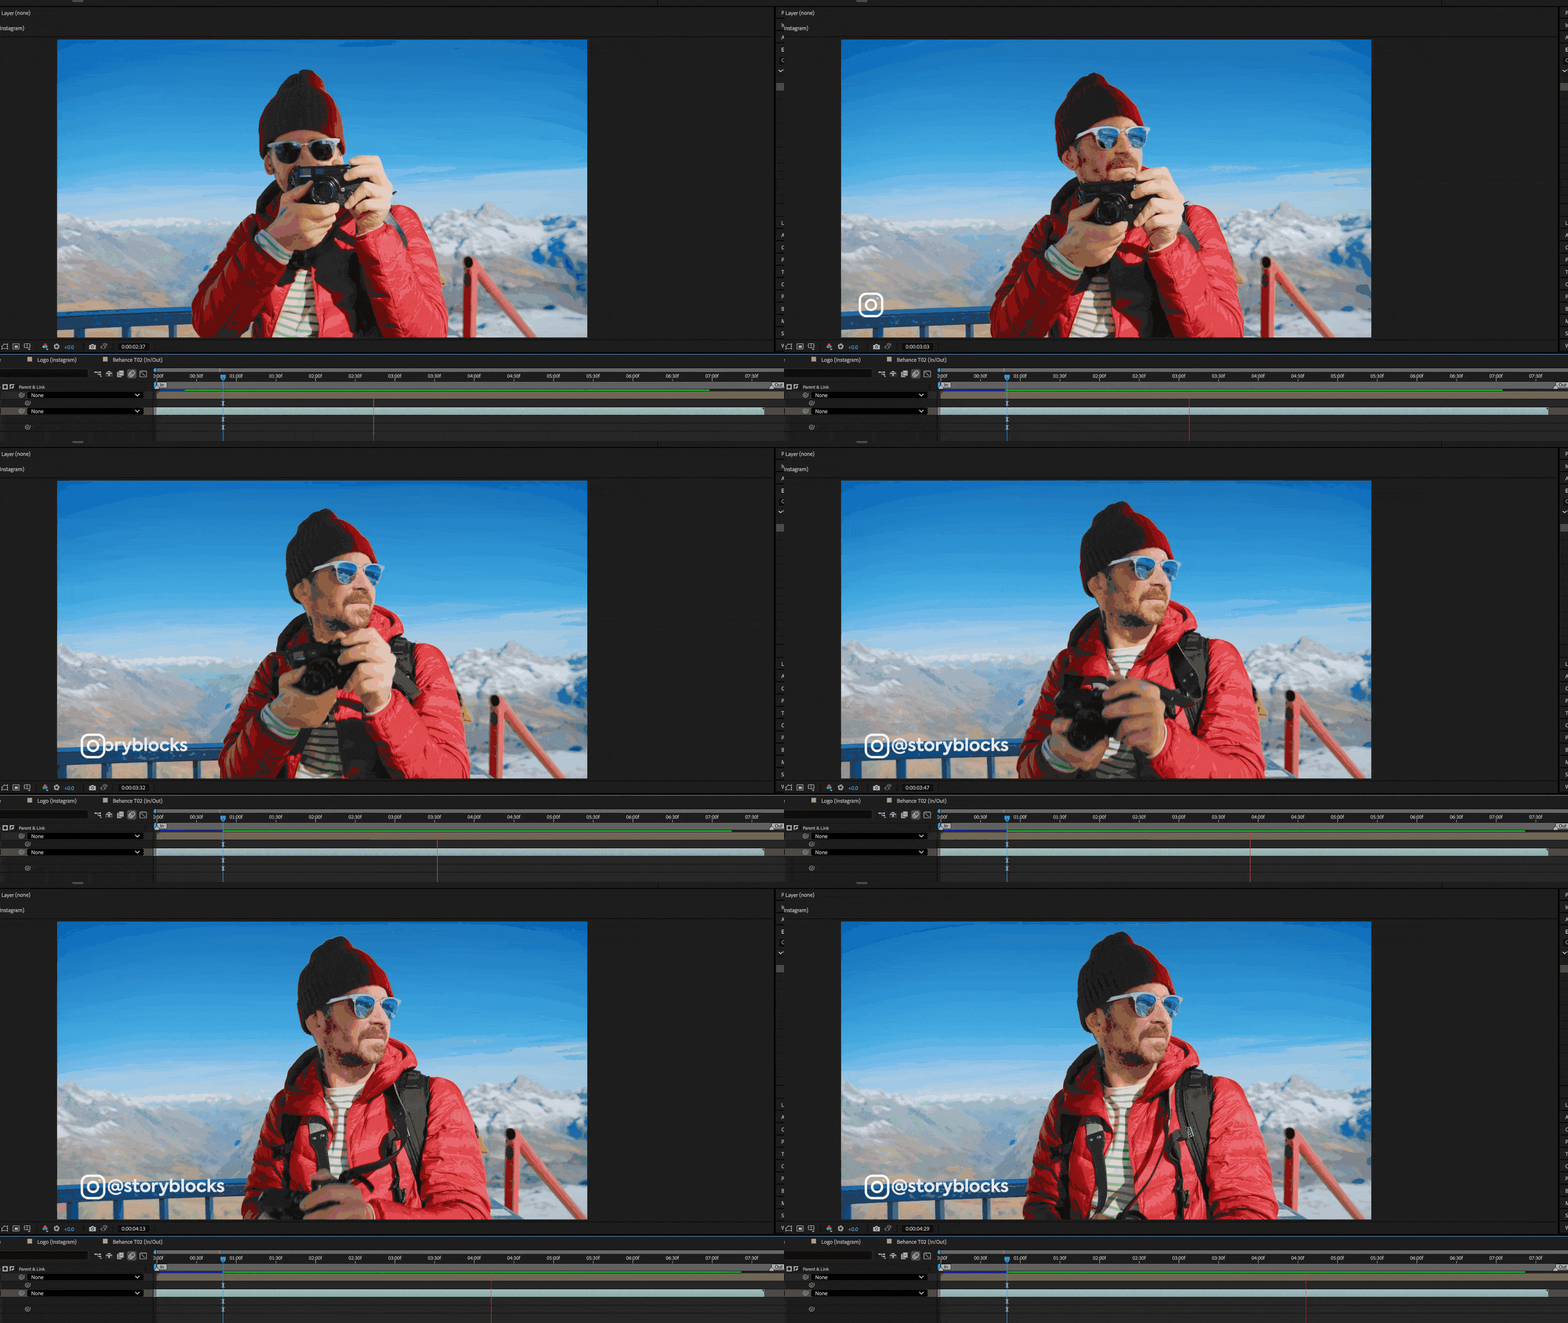
Adjust as needed, then render with transparency so it layers cleanly over your video.
Learn how to do even more in After Effects
Now you’re ready to create social media icon overlays for videos using After Effects, both with templates and from scratch. You learned how to customize text, update icons, refine the color, and control animation timing. These are the same principles used across many video editors workflows.
If you want to keep building your skills and tell better stories, explore more advanced projects that expand on these ideas. Like learning how to animate logos or diving deeper into motion design fundamentals with our lower third tutorial. Both of those tutorials build on the same foundation you used here, pushing your understanding of timing, composition, and visual clarity.
But if you’re still learning the ins and outs of After Effects, Storyblocks’ library of thousands of professionally made, fully customizable templates can help you get the results you want fast. With unlimited downloads of high-quality, royalty-free stock assets, workflow tools to help speed up production, and worry-free licensing, one subscription gives you everything you need to create amazing projects.