You can often get away with visual errors when it comes to video editing. After all, continuity errors are all too common with movies or tv shows. But when it comes to audio, jarring transitions can instantly ruin the immersion.
That’s why fading out audio is a core skill you’ll need to know to make your edits sound more seamless. Fortunately, this process is straightforward in DaVinci Resolve. So let’s take a look at how it’s done. You can watch the video tutorial below for a step-by-step guide, or follow along with the written article.
How to fade out audio in DaVinci Resolve
Table of contents
Using audio handles
1. Extend the height of your audio track
With your edit constructed, first go to the audio section of the timeline and extend the height of the tracks by selecting the bottom of the track’s selector and dragging it downward. This reveals the audio waveform.
If necessary, you can also click the timeline view options and adjust the audio track height to modify all audio tracks simultaneously.
We need to do this because, to fade out audio using the default handle method, you’ll need to make sure the waveform is visible. Once that’s done, simply hover over any audio clip. When you do, white handles will appear at the clip’s ends.
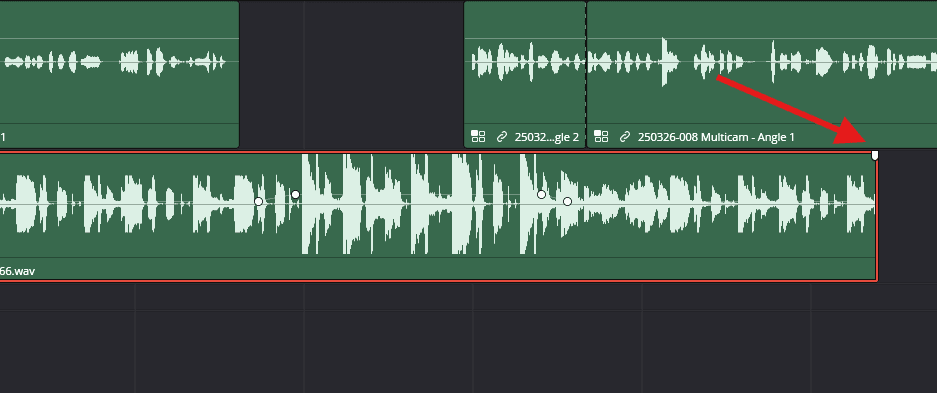
2. Drag the audio handle
Click and drag the handle inward to create a fade. The further you drag, the longer the fade out will be. It can last for just a few frames or extend the full length of the clip.
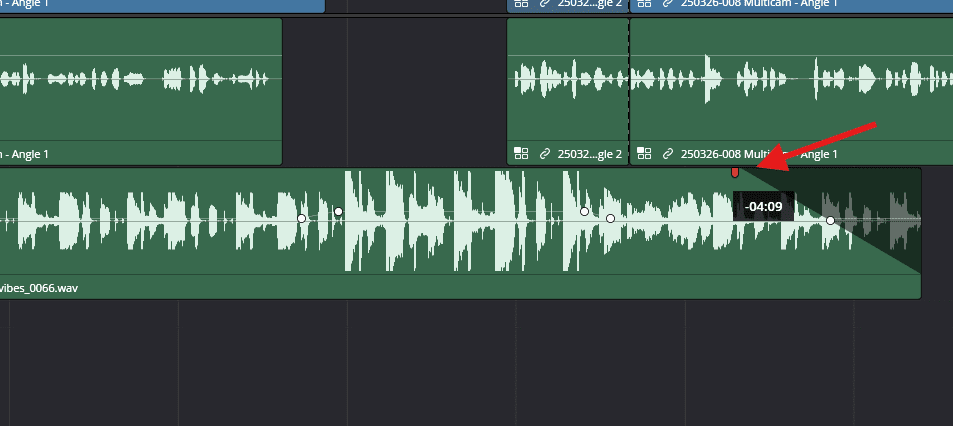
3. Apply a curve (optional)
Once you introduce a fade-out using the handles, you’ll also notice a white dot in the center of the fade line. This dot allows you to apply a curve to the transition. All you need to do is simply click and hold the white dot, then drag it up or down to adjust the intensity of the fade. You can also move the dot left or right to fine-tune the fade’s timing.
This method offers a lot more flexibility as you can control how abrupt or gradual the fade-out feels at different points of the transition. It’s particularly useful for when you need to quickly fade out an audio clip just before someone starts speaking their next line.
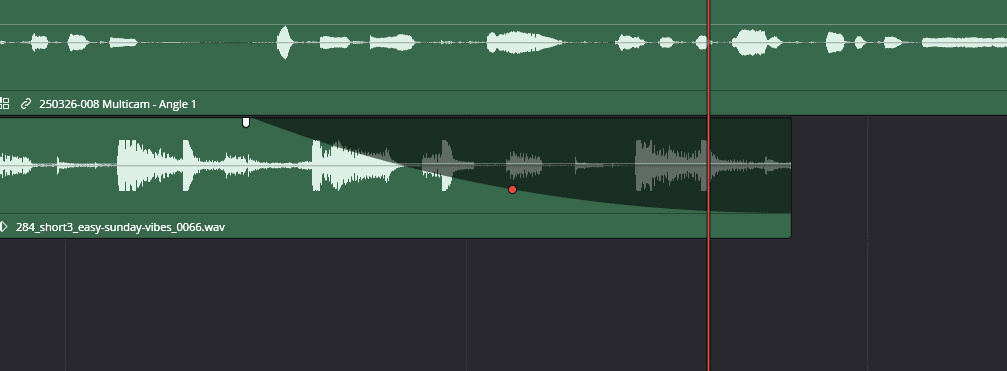
These handles are great for fading out audio that’s already been cut to a specific length. But what if we want to remove audio from a clip without affecting the following sections? Well, there’s a way to do that, too.
Using Keyframes to fade audio from a specific point
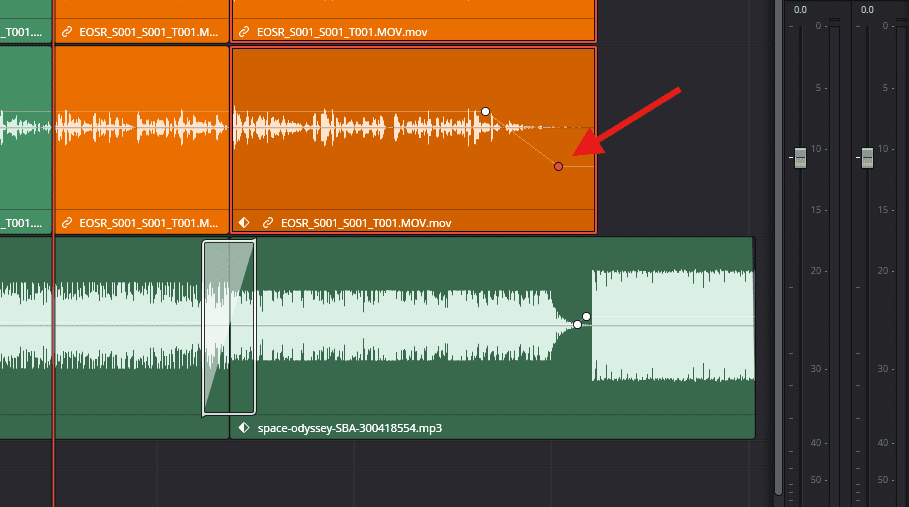
If you want more control and need the fade to begin at a specific point in the clip, we can add a keyframe. Make sure the audio waveforms are visible, then look for the solid white line running through the audio clip, the level line.
Hold Alt (or Command on a Mac), then click the line to add a keyframe. Move forward in the timeline and click again to add a second keyframe. From there, you can lower—or, if needed, increase the volume.
It’s essential to set an anchor keyframe first. Otherwise, you’ll adjust the volume for the entire clip instead of just from that point onward, like this:
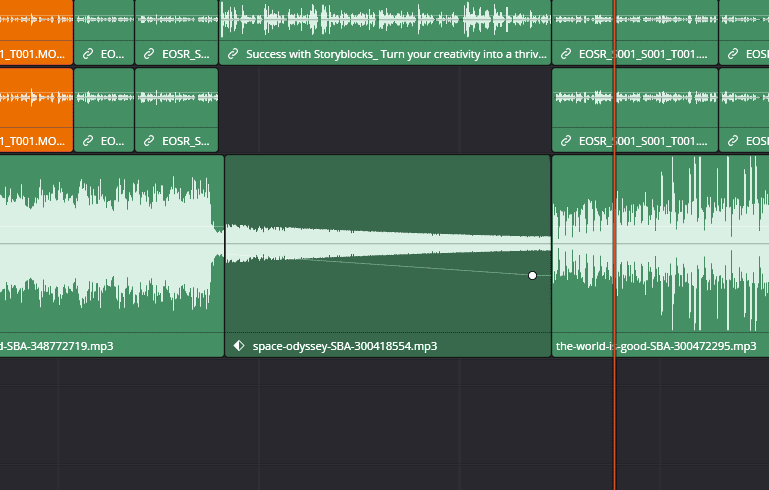
Like the handle method, keyframes can be extended and moved up or down to change the volume level.
Using multiple keyframes to adjust volume in certain sections
While we’re on the topic of keyframes, it’s also worth noting that you can add multiple keyframes throughout a clip to quieten or amplify specific sections as needed. Visually, it looks something like this.
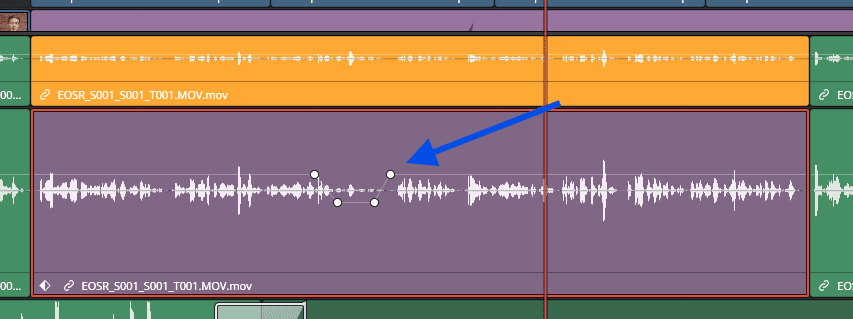
In this example, I’ve placed two anchor keyframes before and after an overly loud section. Then, I’ve added two additional keyframes just inside those anchor points. By dragging this inner section down or up, I can decrease or increase the volume only in that specific portion.
Because the anchor keyframes lock off the surrounding audio levels, any adjustments you make will apply solely to that isolated section, leaving the rest of the clip unaffected.
Using the Inspector for precision
Using the audio level line to adjust keyframes can be a bit finicky, especially if you’re trying to keep specific audio level limits. For more precise adjustments, we can make use the Inspector panel.
Open the Inspector in the top-right corner. Under Volume, click the white diamond icon to add a keyframe. Move forward in the timeline, add another keyframe, and lower the volume slider. For more precision, you can also enter a specific dB value into the numerical box.
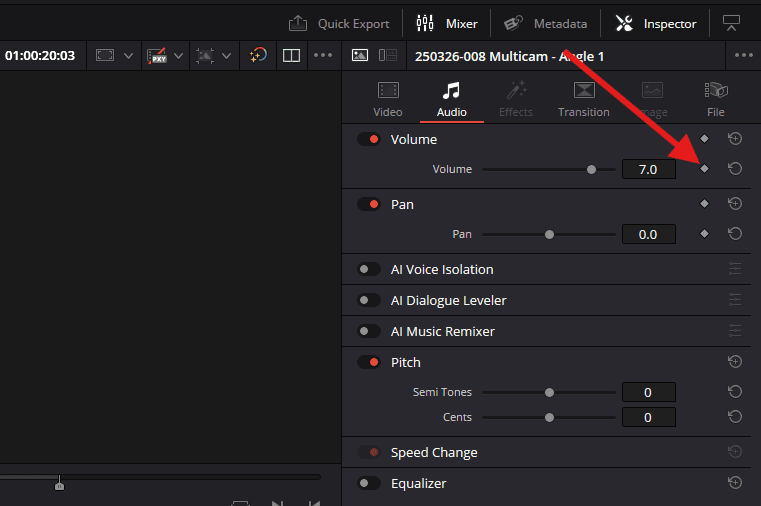
This method requires a few extra steps but offers precise control over your audio levels.
Adding a cross-fade transition
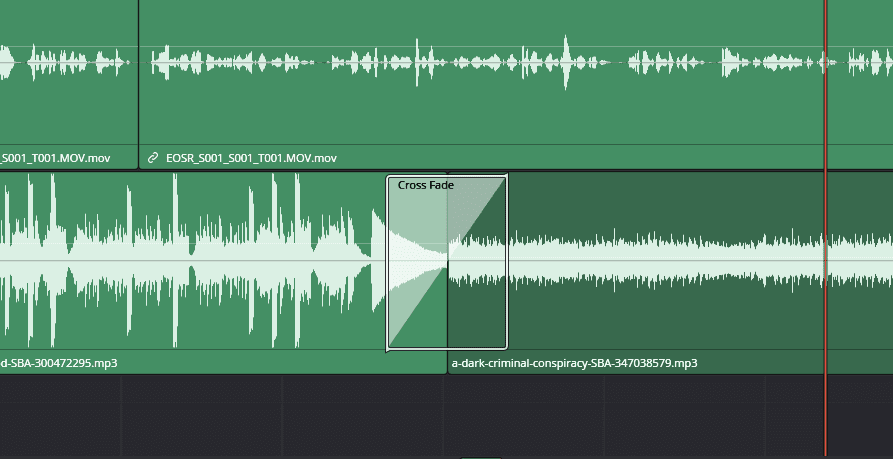
Now, if you want to fade in and out between two audio clips, don’t worry about using handles, keyframes, or the Inspector. What you need here is a cross-fade transition. These built-in audio transitions allow two clips to smoothly fade into each other, just like a DJ mix.
Just click between two audio clips so the edit point highlights green, then press keyboard shortcut Ctrl + T to automatically apply a cross-fade transition. From there, you can extend or shorten the fade as needed by selecting the edge of the cross fade box and extending outward (or inward to decrease the fade length).
Recapping your audio fade options
Ok, we just covered quite a few methods on how to fade out audio in DaVinci Resolve. Here’s a bite-sized breakdown of each method so you can quickly choose the one that best fits your edit.
Using the Fade-Out Handles
- Expand the Track Height: Go to the timeline and expand the track height by selecting the bottom of the track on the track selector and dragging it downward. This reveals more of the audio waveform.
- Apply a Fade: Hover over the audio clip. You’ll see two white handles appear at each end. Then, click and drag the front or rear handle inward to create a fade.
- Adjust the Fade Curve: With the fade applied, adjust the curve of the transition:
- Click and hold the white dot in the center of the fade line.
- Drag up or down to change the intensity of the fade.
- Move the dot left or right to refine the fade’s timing.
Fade Out With Keyframes
- Locate the audio level line (a white horizontal line across the clip).
- Hold Alt (or Command on Mac) and click the line to add a keyframe.
- Move forward in the timeline and add another keyframe.
- Lower the volume between the two points to create a custom fade-out during a clip section.
Fade Out With Inspector
- Open the Inspector from the top right corner.
- Under Volume, click the white diamond icon to add a keyframe.
- Move forward, add another keyframe, then lower the volume slider.
Learn how to do even more in DaVinci Resolve
For more on DaVinci Resolve, check out our articles on how to record audio, adding subtitles, and how to export your projects. To enhance the audio of your projects, you can find thousands of royalty free music tracks and sound effects in the Storyblocks library. With one subscription, you can get unlimited downloads of over 10 million high-quality stock assets, from 4K footage to pre-made DaVinci Resolve templates, images, and more.
And if you’re just starting out with video editing, check out our YouTube channel. We upload beginner-friendly tutorials related to video creation every month, with plenty more on the way.