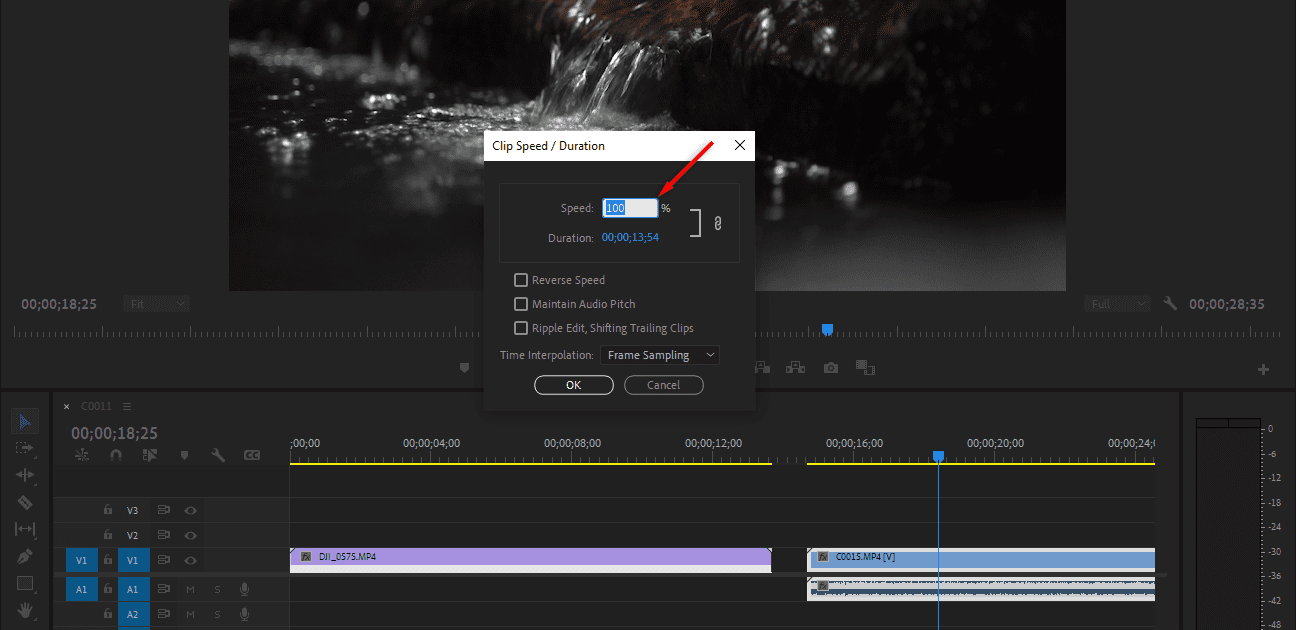
Speeding up footage is a great way to sync content to music, add excitement to scenes, or condense lengthy clips. Whether you’re creating a fast-paced montage or aligning visuals with the rhythm of your soundtrack, mastering this technique can enhance your videos.
In this tutorial, we’ll walk you through how to speed up video in Premiere Pro in three different ways.
3 ways to speed up video in Premiere Pro
In Premiere Pro, there are three methods to speed up your video footage, whether you’re aiming for quick adjustments, seamless transitions, or precise control. Here’s how to speed up a clip in Premiere Pro using these options:
Using the Speed/Duration command
The easiest way to speed up a clip is by using the Speed/Duration tool. This tool adjusts the duration of your clip, cramming more frames into a shorter period of time and speeding up the playback.
Here’s how to speed up clips in Premiere Pro using the Speed/Duration tool:
1. Import your clip onto the Timeline
Drag and drop the clip you want to speed up onto your Timeline. Once you’ve imported it, select the clip in the Timeline.
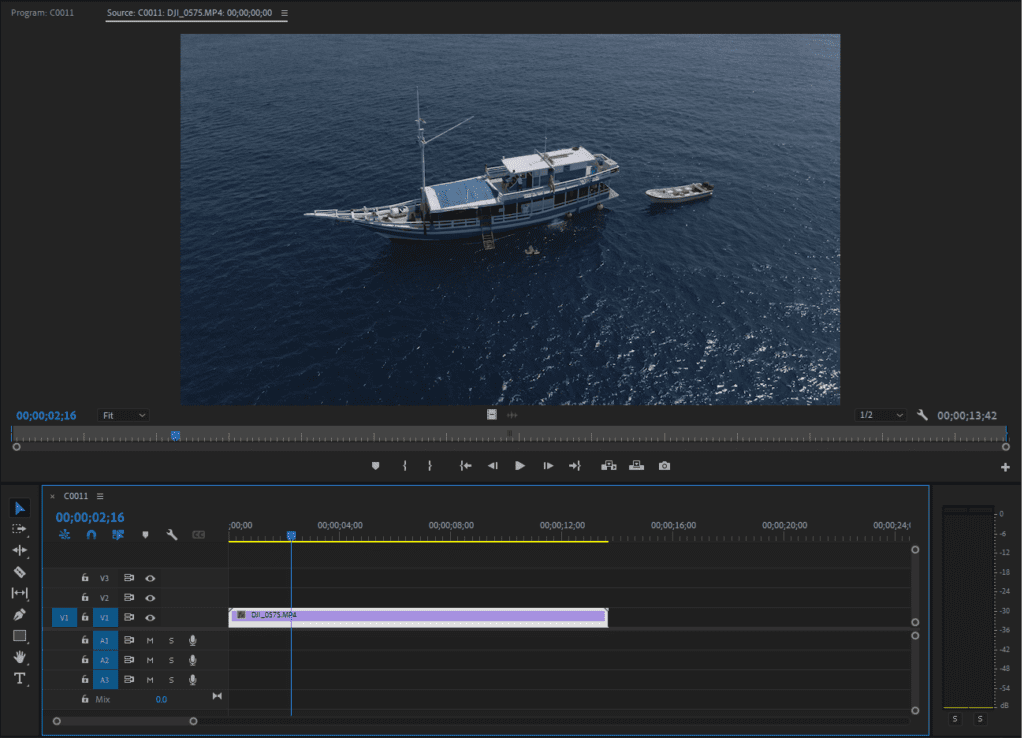
2. Use the Speed/Duration tool
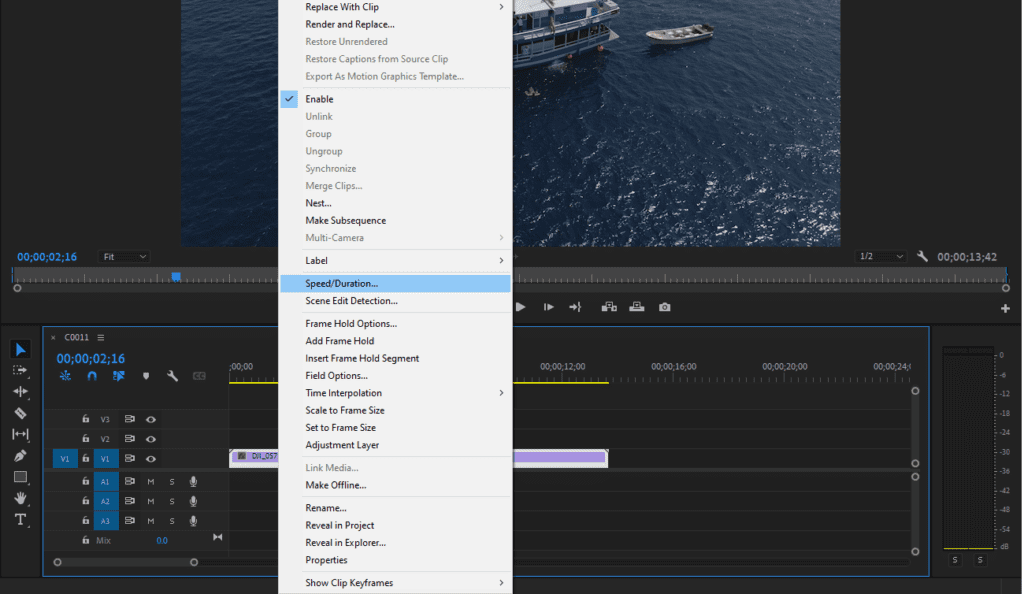
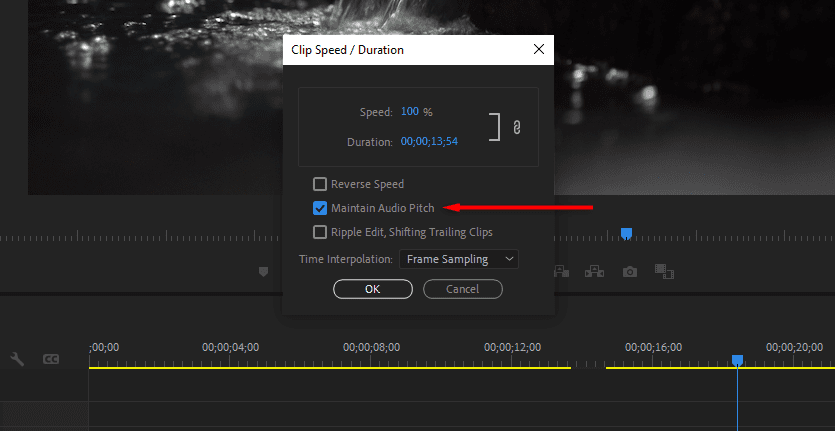
Right-click your clip in the Timeline and press Speed/Duration. A Clip Speed / Duration window should open. Alternatively, you can use the keyboard shortcut Ctrl/CMD + R.
3. Increase the playback speed
In the Clip Speed / Duration window, increase the Speed percentage until you’re happy with the results. For reference, 100% is the original video speed, while 200% is two times faster.
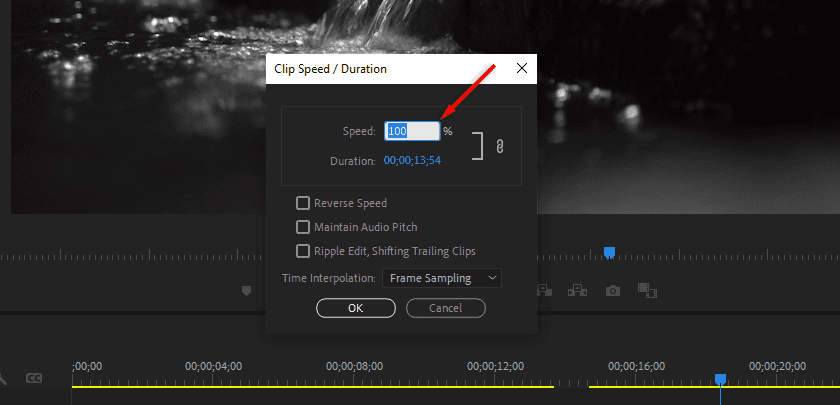
Note: Speeding up the video will also speed up the audio, making it higher pitched. To speed up the video without altering the pitch of the audio track, toggle on Maintain Audio Pitch in the Clip Speed / Duration window.
Using the Rate Stretch tool
The Rate Stretch tool is another simple feature that lets you change a clip’s speed by dragging its edge in or outward. You can use the Rate Stretch tool to fill gaps in your sequence by adjusting the speed of a clip to fit the desired duration.
Here’s how to speed up a video in Premiere Pro using the Rate Stretch function:
1. Select the Rate Stretch tool
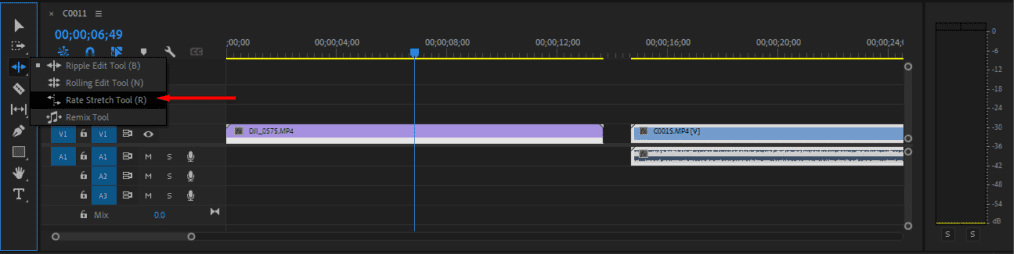
Press R on your keyboard to open the Rate Stretch tool. Alternatively, long-click the third tool from the top of your toolbar and select it from the drop-down menu.
2. Extend your clip
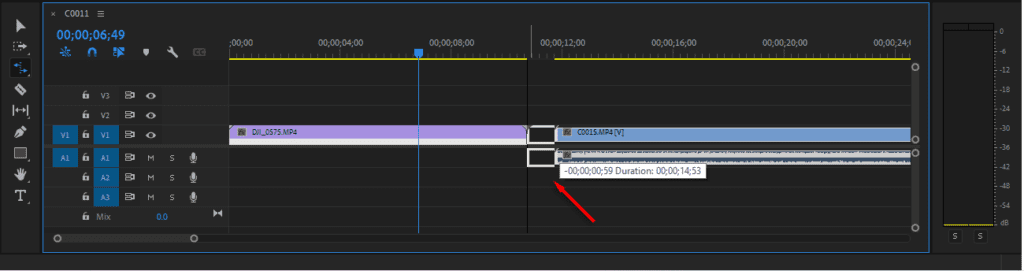
Using the Rate Stretch tool, click and drag inward from the edge of your clip. Shortening the clip condenses its frames into a shorter period of time, making it play back faster.
Using Time Remapping
The Time Remapping tool is a simple feature that lets you adjust the speed of your clips. You can use it to selectively speed up or slow down specific sections of your video (rather than the entire clip), giving you better control over pacing and flow.
Here’s how to speed up a clip in Premiere Pro using Time Remapping:
1. Expand the video track
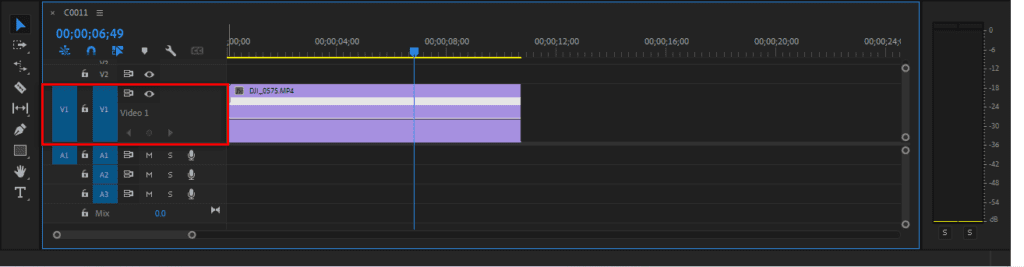
Double-click the video track to expand the track height. A horizontal rubber band will appear through the center of the blue clip.
2. Turn on clip keyframes
Right-click your clip and select Show Clip Keyframes > Time Remapping > Speed in the drop-down menu.
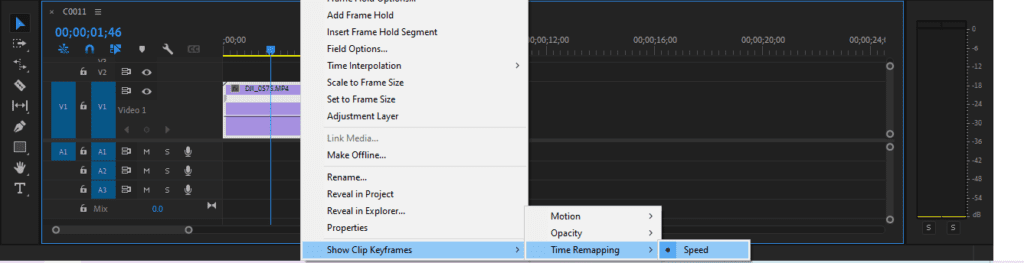
3. Adjust your clip speed
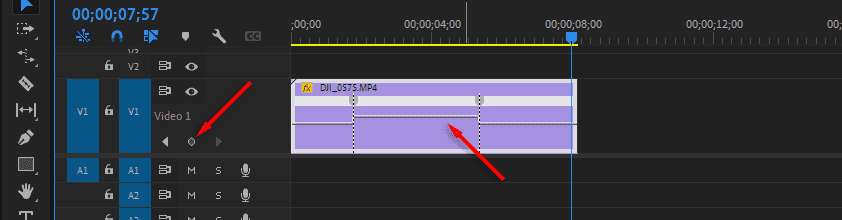
Select the bar going through your clip in the Timeline and drag it upward to speed it up.
If you only want to speed up part of your clip, create keyframes on either side of the part you want to speed up by aligning your Playhead and selecting Add Keyframe. Then, drag the portion of the line between those keyframes upward to speed up that section.
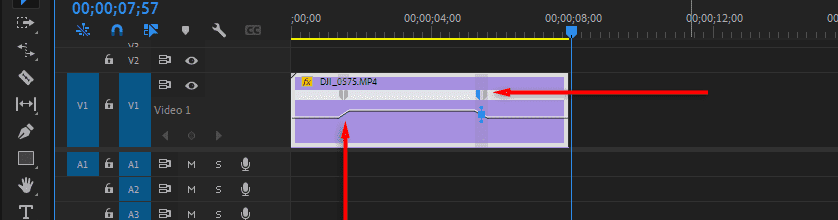
To create a smooth transition between normal speed and fast speed footage, you can create a ramp by splitting your keyframes. Click and drag your keyframe to the right or left to create a gradual transition to the new speed.
Understanding the difference between video play speed and frame rate
Play speed is how fast a video plays back. It changes how quickly the content displays without changing the original recording settings. If you speed up a video, it’ll run faster than its original pace, condensing the duration. If you slow down a clip, it’ll extend the playtime.
Frame rate, on the other hand, is the number of frames shown in one second of video playback. Measured in frames per second (FPS), It affects how natural and fluid the motion appears. Unlike play speed, you determine the frame rate when you record or render the video.
Adjusting the playback speed doesn’t change the frame rate. If you speed up or slow down a clip in Premiere Pro, you’re altering how quickly the frames are shown, not the number of frames per second. This means that the original frame rate remains constant.
Ways to use sped-up video
Speeding up video can add a unique flair to your content, helping you bring attention to key scenes or make fast-paced clips more compelling. Here are some creative ways to use sped-up footage:
- Creative storytelling. Use sped-up video to quickly summarize lengthy processes or journeys, keeping viewers engaged during what would normally be long scenes.
- Transition scenes. Speed up walking or traveling shots in vlogs to smoothly transition between locations, maintaining viewer interest in more boring parts of your footage.
- Rhythmic editing. Accelerate clips to sync with the beats per minute (BPM) of a song and create a visual rhythm for music videos and similar projects.
- Fast-paced montages. Create montages to convey the passage of time or rapid activity as part of the visual storytelling in your video, adding urgency or a sense of progress.
- Comedic effects. Speed up actions so that they look humorous. For example, you could show someone cleaning or dressing, exaggerating the chaos and adding an entertaining touch.
Learn how to do even more in Premiere Pro
Speeding up clips in your videos is just one way that you can leverage video editing to make your videos stand out and tell stories in your own unique way. Now that you’ve mastered speeding up video in Premiere Pro, take your creativity further by combining it with effects like glitches, motion blur, or freeze frame using our step-by-step tutorials.
Need footage for your videos? Access over 10 million royalty free stock assets—including b-roll, music, sound effects, and Premiere Pro templates—with the Storyblocks library. One subscription offers unlimited downloads and access to Premiere Pro and After Effects plugins that bring our library right into your editor, helping you work faster.