Color grading video, especially if you’re new to editing, can be intimidating. It requires a lot of patience, practice, and skill to become a pro, which isn’t the best for beginner or time-strapped editors. Thankfully, LUTs are a faster way to quickly add a color grade to your Premiere Pro projects in just a few short steps. In this article, we’ll walk you through how to import and use LUTs in Premiere Pro.
Continue reading to learn how, or watch our video tutorial below!
What are LUTs?
A LUT, which stands for lookup table, is a preset file that lets you apply a specific color grade or transformation to your footage. With LUTs, you can quickly and easily alter the color of a clip without going through the lengthier process of color grading manually.
Not all LUTs are created equal though – there are two main types that you can use, and they have very different use cases.
Input LUT
An input LUT is a lookup table that’s used to convert footage from your camera that’s been filmed in a LOG color profile to a standard, viewable color space like REC 709.
Creative look LUT
On the other hand, we have creative look LUTs. These are your color grading shortcuts, with lookup tables that are designed to enhance the style and mood of a clip. Like with regular color grading, these are applied after primary color corrections.
How to import LUTs into Premiere Pro
There are two ways that you can add LUTs in Premiere Pro – through the Effects panel or using the Lumetri Color panel.
Using the Effects panel
1. Add Lumetri Color onto your video clip
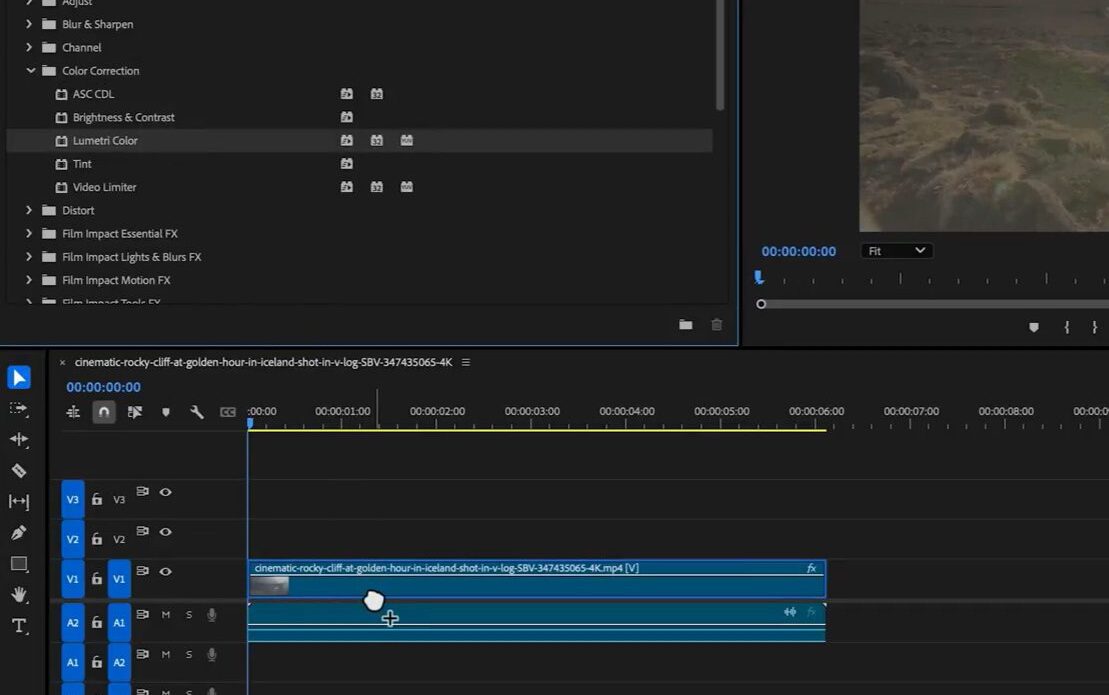
With your project open and your footage imported, open the Effects panel by navigating to Window > Effects. Then, go to Video Effects > Color Correction > Lumetri Color. Once you have that open, drag Lumetri Color onto your clip.
2. Open the Effects Control panel and select your LUT
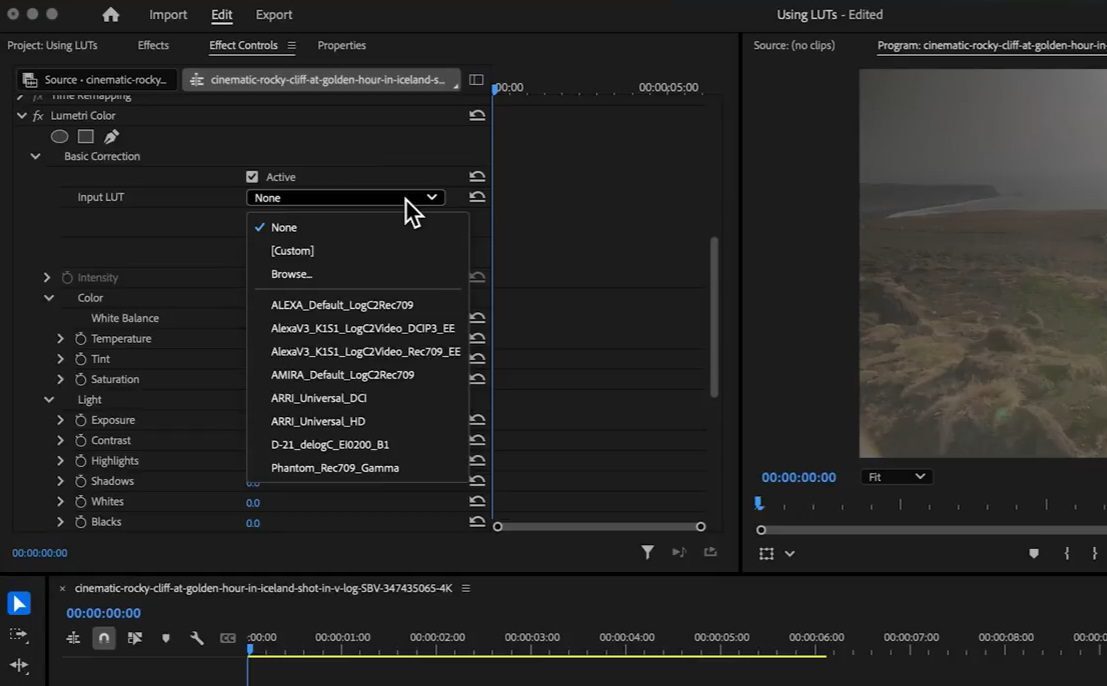
Next, you’ll need to open the Effects Control panel (Window > Effects Controls). Once you do that, you should see the Lumetri Color effect active inside the control panel. From here, select Basic Correction.
You should see a dropdown menu for Input LUT. This is what you’ll use to apply the first type of lookup table we discussed in the beginning, that converts LOG footage to another encoding profile. If that’s the LUT you’re using, click on the drop-down menu, choose Browse and then select your file.
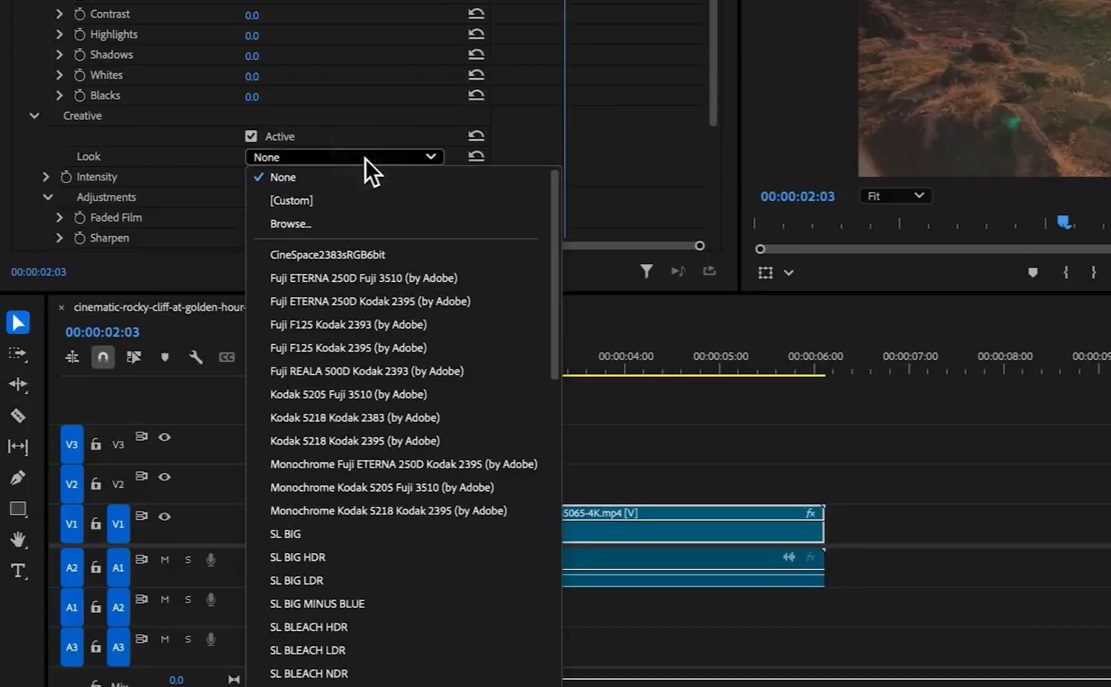
To apply a creative LUT, expand the Creative menu and open the Look menu. You’ll see a selection of LUTs that Premiere has included in the software, but to install your own, click into the drop-down menu, select Browse and then navigate to your downloaded LUT file.
Using the Lumetri Color panel
To install a LUT using the Lumetri Color panel, you’ll just need to open the panel (Window > Lumetri Color). Once you do, the window should appear on the right. From here, you can add your LUT the same way as described in step 3 from the section above.
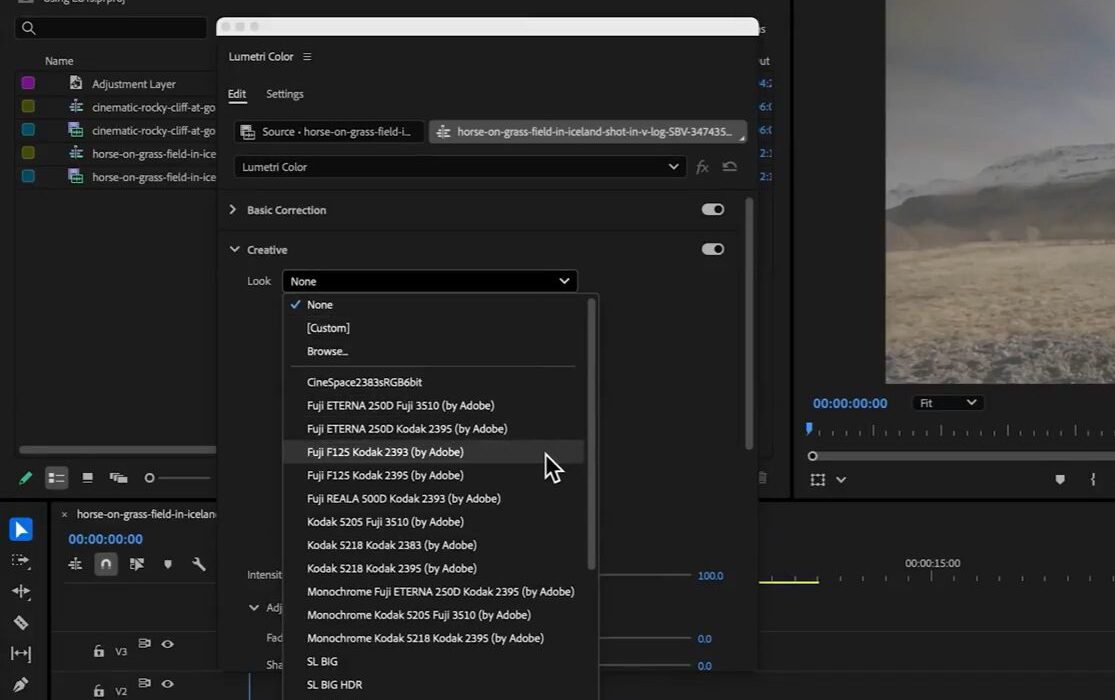
This approach is faster than using the Effects panel, but both are pretty straightforward.
Explore creative LUTs for Premiere
You can find dozens of LUTs for Premiere inside Storyblocks’ library, along with color presets and other templates. Below are just a few examples of the many Premiere Pro templates you can download and use to speed up your editing process!
Cinematic LUTs pack

With 25 different cinematic LUTs to choose from, you can easily make your videos look like a major motion picture.
Urban color LUTs

Get 20 different unique and professional grade LUTs in this template to quickly take your videos from basic to bold.
Learn how to do even more in Premiere Pro
Now that you’re an expert on how to add LUTs to enhance the visual look and feel of your videos with LUTs, you can take your time learning how to manually color grade with our tutorial. We have articles that teach you how to do tons more in Premiere, including how to add a glitch effect to your videos, how to add subtitles, how to add text effects, how to color correct, and much more.
If you’re creating videos and editing with Premiere Pro and don’t already have a Storyblocks subscription, you’re missing out on tons of time-saving tools. From thousands of pre-made, customizable templates for Premiere Pro to our Adobe plugin that brings our entire stock library right into the software, there’s tons of ways you can use Storyblocks to help you work faster and create better video. Explore our plans and sign up today to start!