If you want to give your video a unique, eye-catching twist (pun intended), distort effects in After Effects are your best friend.
These tools and effects can stretch, bend, ripple, and reshape your footage to add visual energy or create surreal transitions that make a scene feel alive. Its the secret behind warped dream sequences, rippling heat haze, melting transitions, or even subtle lens corrections that make footage look more natural.
In this article, we’ll walk through the most popular distort effects in Adobe After Effects, how to use them step-by-step, and how to combine them for creative results that stand out. We’ll also cover the Displacement Map effect and tips for combining effects and avoiding rookie mistakes that make your videos stand out in a bad way.
What are distort effects and why use them?
Distort effects are built-in tools in After Effects that let you warp or manipulate the pixels in a layer. They don’t just change colors or brightness – they fundamentally change how the image or asset moves or operates. So think shifting, twisting, stretching, warping and… distorting!
These effects and applications we’re going to talk about can be applied to footage, but they’re also a perfect way to animate logos and vectors in specifically unique ways to fit whatever brief your client has given to you.
Used well, distort effects can add movement and professionalism to otherwise boring footage as well as simulate waves, smoke, or a heat shimmer. They can also create stylized, dreamlike, or glitchy transitions. You can even fix optical distortion from wide-angle lenses.
Think of these as After Effects’s way of breaking the rules of physics, so you can reimagine them for creative storytelling and put your own twist on things.
Popular distort effects in After Effects
Below are some of the most-used distort tools in After Effects, complete with what they do and how to use them.
Turbulent Displace
Simply put, Turbulent Displace is meant to emulate organic (not seemingly controlled by an editor), wavy motion. It’s perfect for simulating water surfaces, heat haze, or the shimmer of a mirage.

How to create the Turbulent Displace effect
1. Select your layer and adjust settings for Turbulent Displace
First, select your layer. Go to Effect > Distort > Turbulent Displace. In the Effect Controls Panel, adjust these main settings. Amount controls how extreme the distortion is.
Try somewhere between 20–50 for subtle warps, or 100 and more for weirder, more abstract looks.
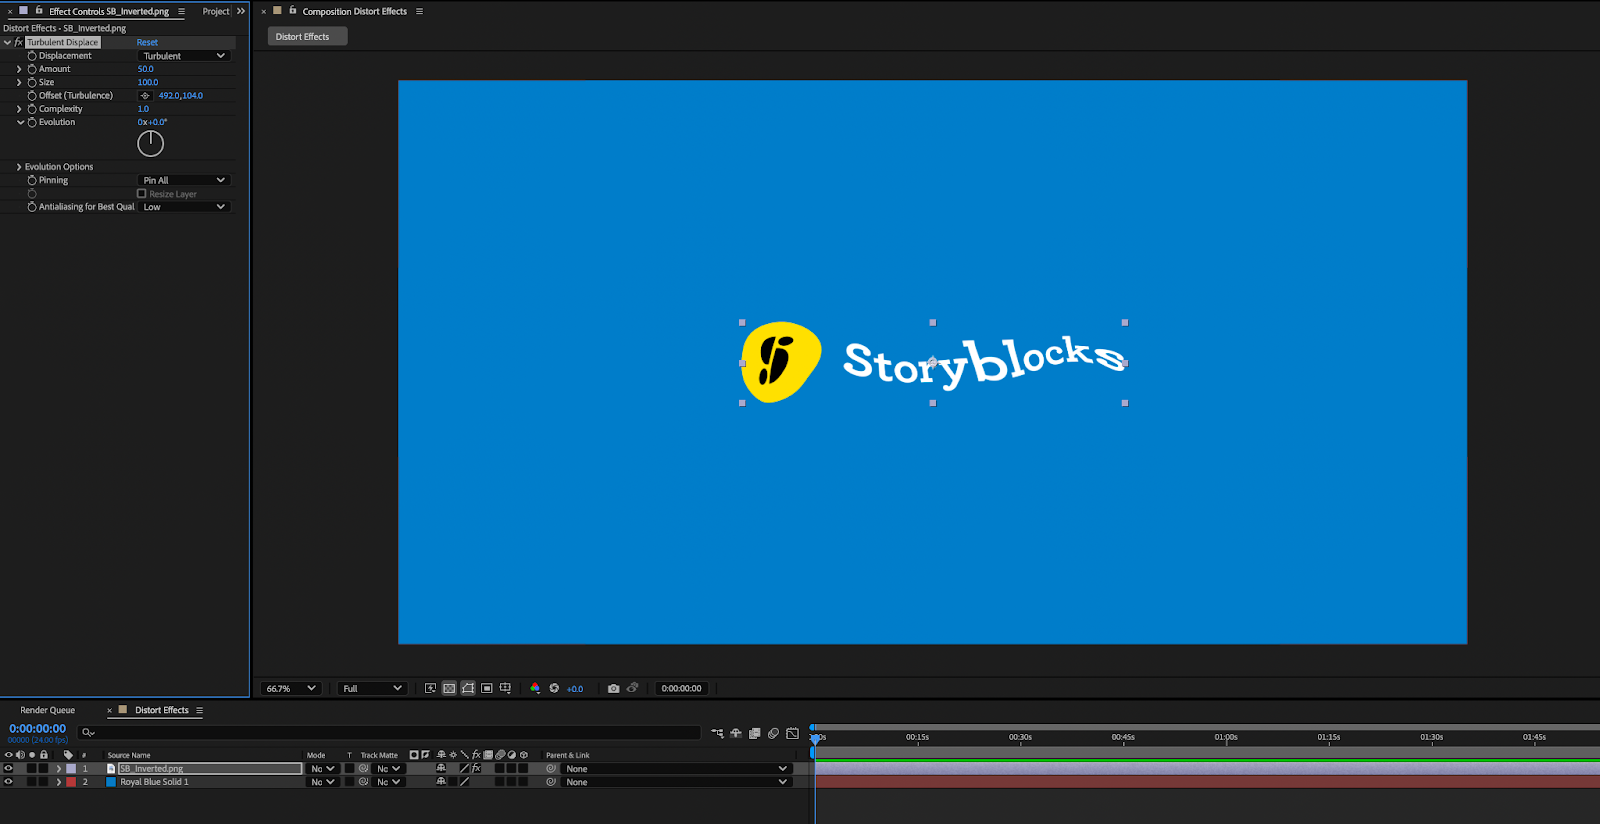
Adjust the scale of the turbulence pattern. Larger sizes give slower, rolling movement. Animating this value over time (using a keyframe or expression like “time*100” makes the distortion move dynamically.
2. Add a mask and add Repeat Edge Pixels
Add a mask around your subject, then click “Repeat Edge Pixels” to keep edges clean. Make it even greater by adding Glow or Directional Blur to make the turbulence look like refracted light or heat waves or even like halation from a film strip.
Wave Warp

Wave Warp creates repetitive wave (shocking I know) patterns across your layer. It’s great for water, flag motion, or audio-reactive animations.
How to create the Wave Warp effect
1. Select your layer, add the Wave Warp effect, then adjust your settings
Select your layer. Go to Effect > Distort > Wave Warp. Adjust key settings like wave type, wave height, wave width, direction, and wave speed.
- Wave Type: Choose from Sine, Square, Triangle, etc. Sine gives smooth motion, Square gives choppy distortion.
- Wave Height: Controls the amplitude of the wave. Start with 10–20 for realism.
- Wave Width: Controls the wavelength. Bigger numbers means slower, gentler waves.
- Direction: Rotate to change the wave direction (90degrees for vertical, 0 degrees for horizontal).
- Wave Speed: Animate this (1.0–2.0 is a good starting point) to make the waves move. To make the wave affect only part of the frame, use a mask or track matte.
Stack multiple Wave Warp effects with different speeds and directions and just see what happens!
Mesh Warp
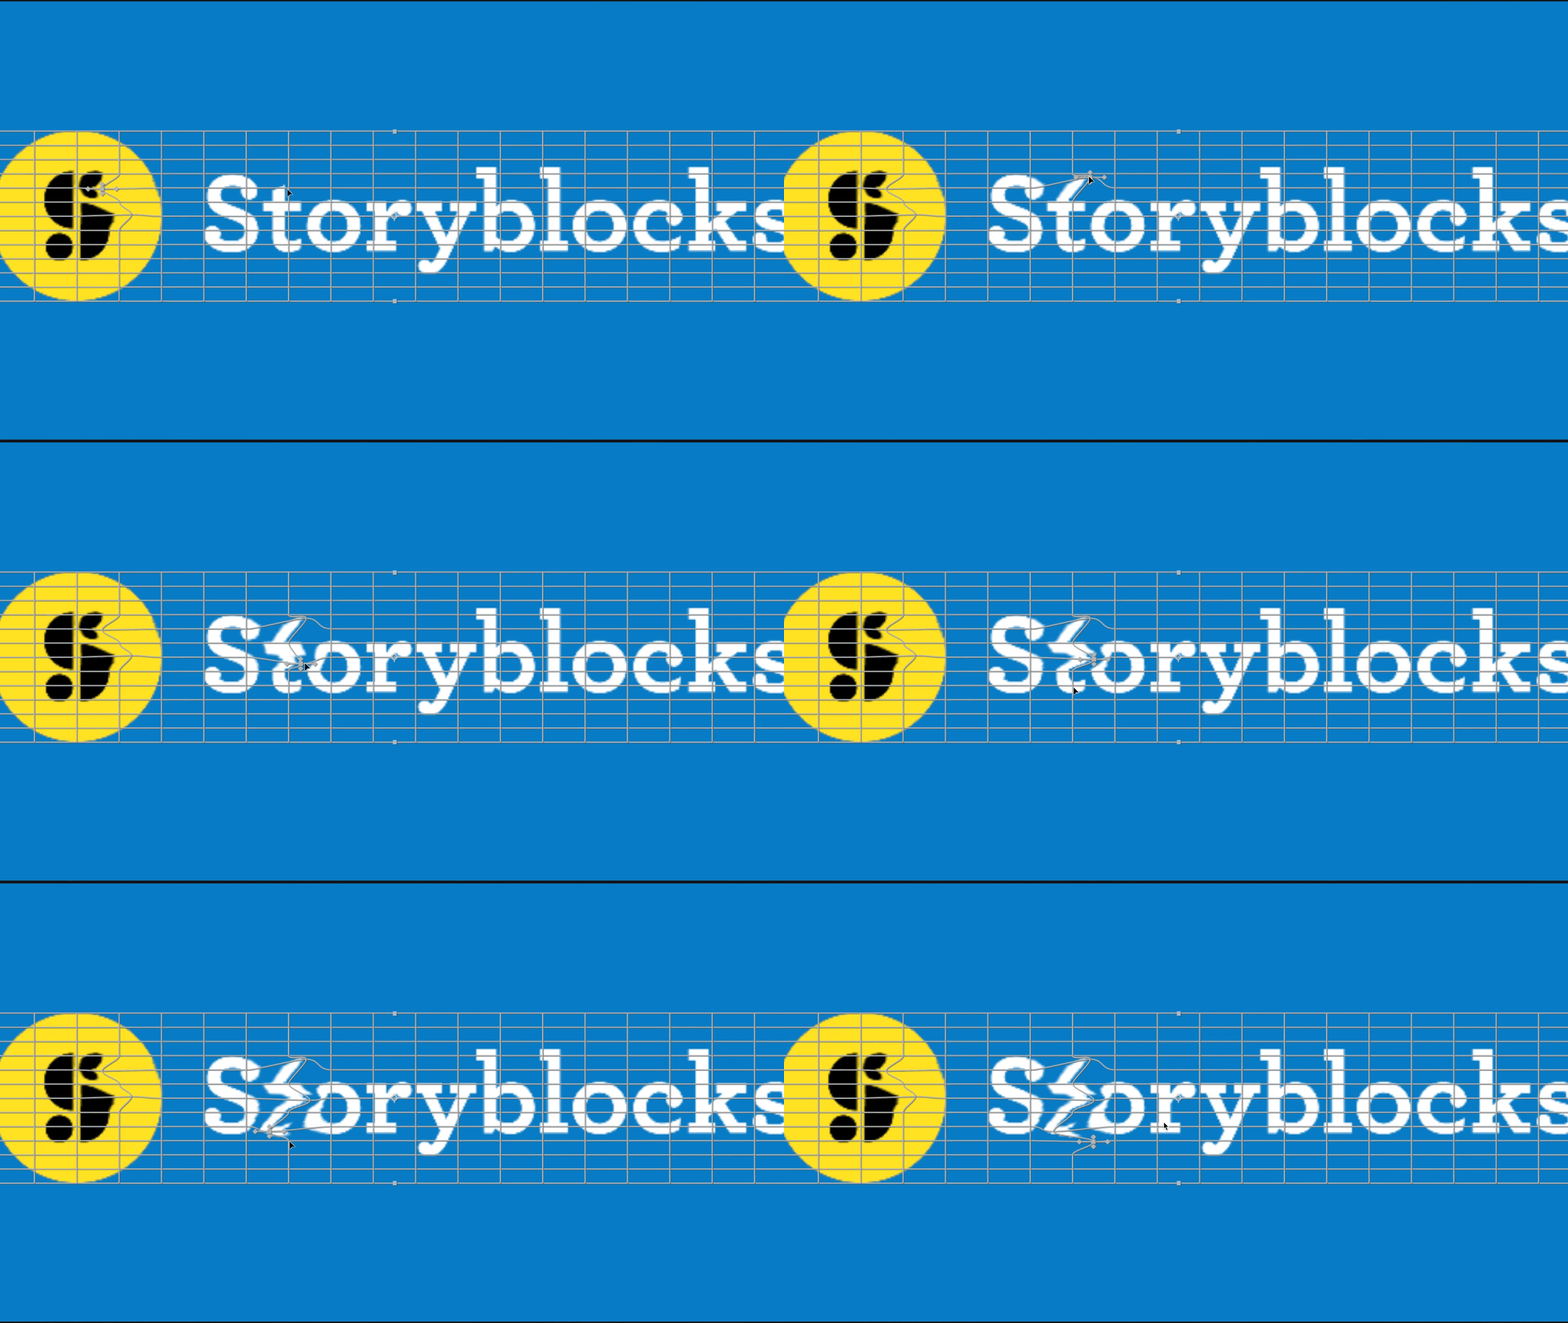
Mesh Warp divides your layer into a grid you can manually warp. It’s ideal for precise distortions like bending a logo onto a curved surface or animating subtle little character movements.
How to create the Mesh Warp effect
Go to Effect > Distort > Mesh Warp. Then, adjust the Rows and Columns to create your grid. Essentially, the best way to think about is, more points = more flexibility, but slower renders.
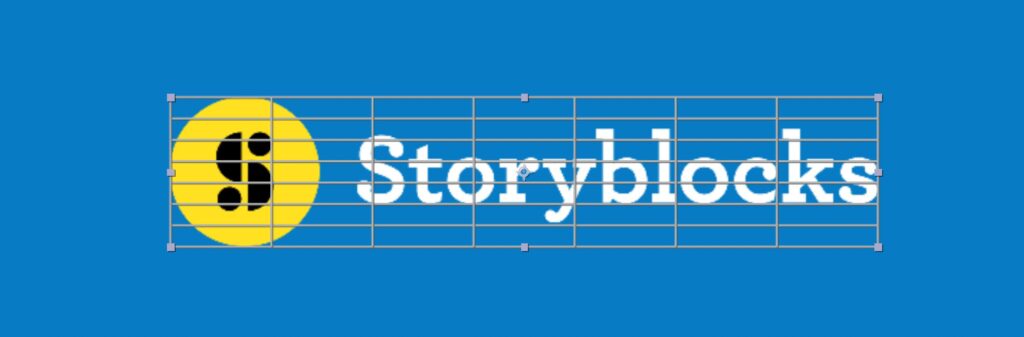
Click and drag the control points directly in the Composition panel to distort your image. You can keyframe control points positions over time to animate the “warp” (for example, bending a flag in the wind).
This basically just allows you to tweak, and move very specific parts of the image giving you complete control.
Optics Compensation

Optics Compensation simulates or removes lens distortion, like barrel or fisheye effects. It’s especially useful for footage shot on GoPros or wide lenses that a client needs fixed.
I can’t tell you how many times a client has sent me footage that needs to be incorporated into the edit and for one reason or another the footage was shot super wide with a GoPro, or the optic view just needs to be fixed in some way.
How to use the Optics Compensation effect
Using it is a piece of cake. Select your layer, then go to Effect > Distort > Optics Compensation. Click Reverse Lens distortion if you want to fix lens distortion.
Increase the Field of View (FOV value to exaggerate distortion outward (like a fisheye). Decrease field of view for a more subtle curvature.
When stabilizing or camera tracking distorted footage, apply Optics Compensation first, check “Reverse Lens distortion,” track the footage, and then reapply the distortion afterward for the most accurate results.
CC Lens / CC Power Pin / CC Smear
These three effects are part of the “CC” family of distortions: CC Lens, CC Power Pin, and CC Smear.
- CC Lens adds a convex or concave lens-like distortion, similar to a bubble or magnifying glass.
- CC Power Pin lets you stretch and corner-pin an image which is perfect for screen replacements or angled projections.
- CC Smear pushes and smears parts of the image as if you were stretching clay or “smearing”.
How to use CC Lens

This effect is exactly how it sounds, giving you the perspective through a glass lens that distorts the edges of the frame in a circle.
Go to Effect > Distort > CC Lens. Adjust Size to set the radius of the distortion and Convergence to control how curved it appears.

How to use CC Power Pin
Go to Effect > Distort > CC Power Pin. In the Composition panel, drag each corner pin to align your layer (like a phone screen replacement). Keyframe the corner points for tracked or animated motion

How to use CC Smear:
Go to Effect > Distort > CC Smear and behold, my personal favorite distortion effect. I’ll explain.
There’s something so fun about the way this effect works, giving you the power to click and change the image. It’s like an invisible paintbrush that smears at your command. Somehow it feels like the most customizable way to change your footage or vector/logo.
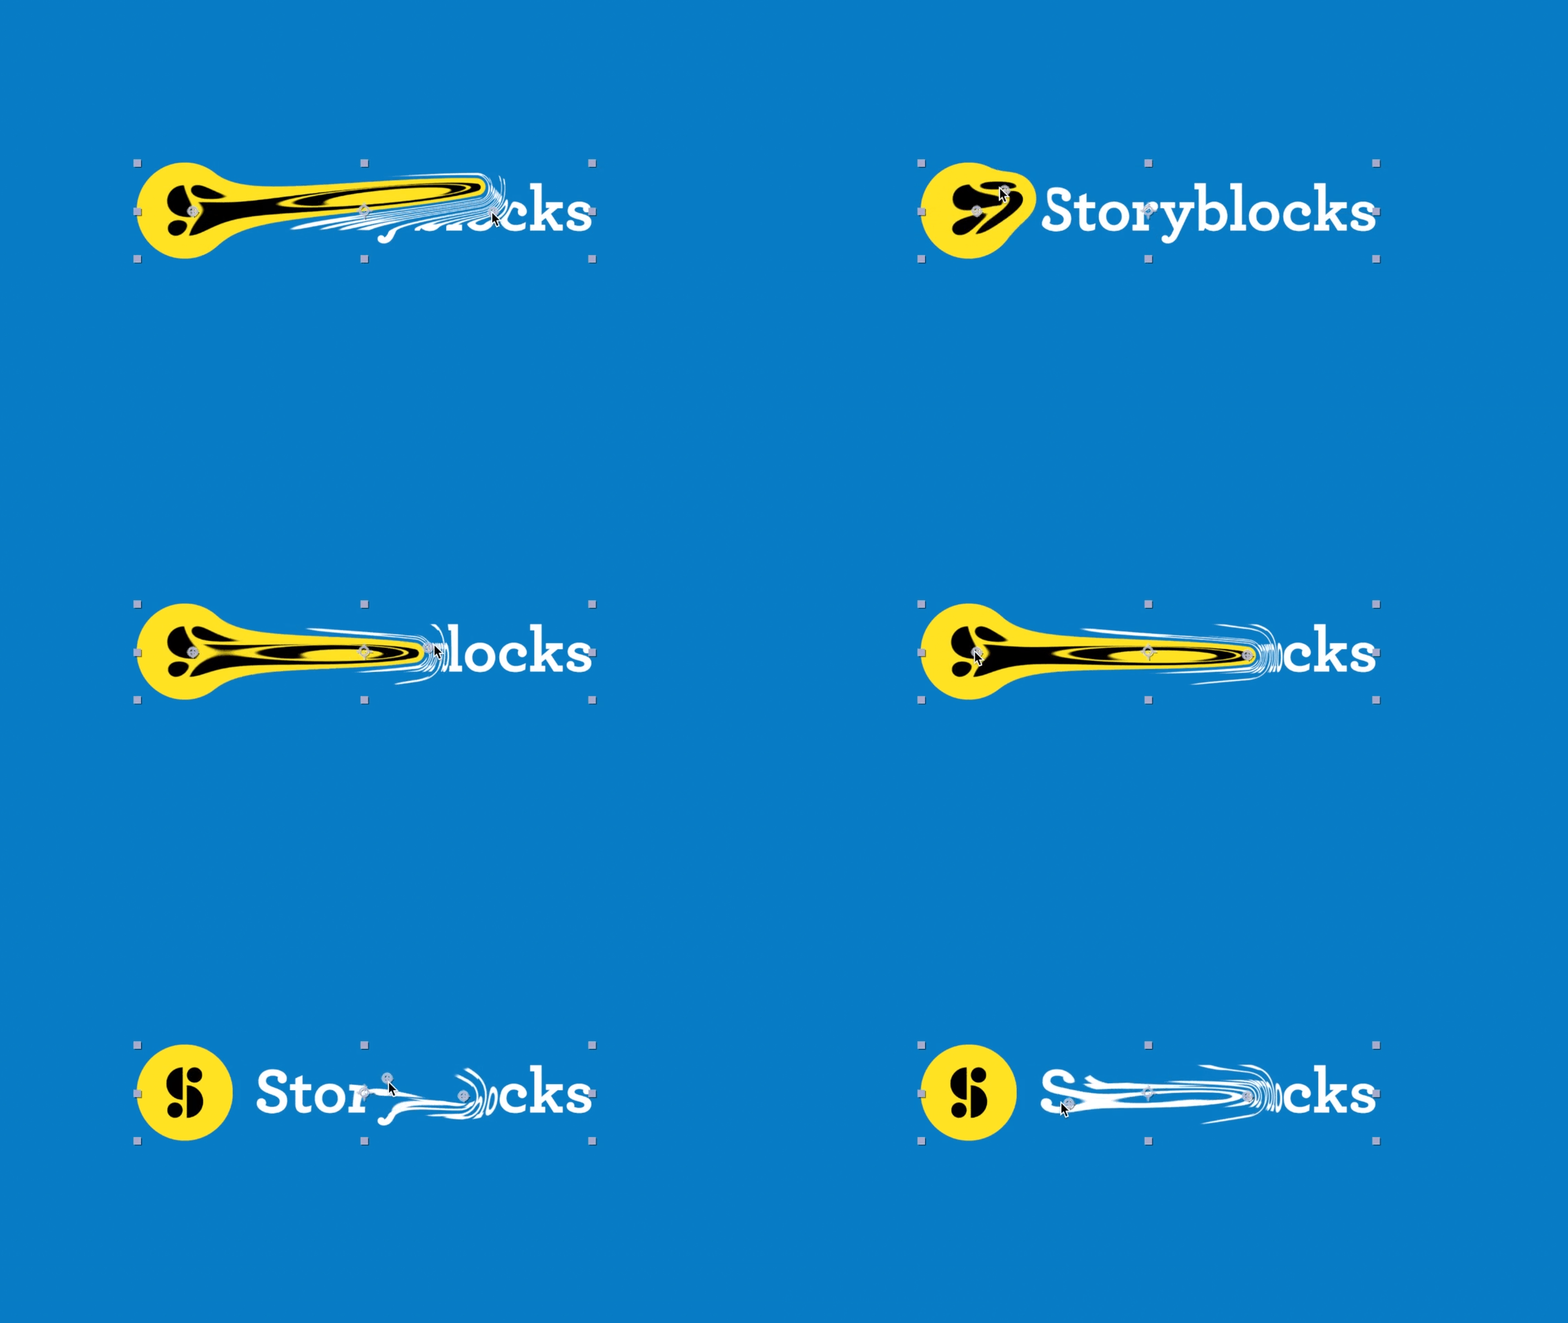
Go to Effect > Distort > CC Smear and behold, my personal favorite distortion effect. I’ll explain.
There’s something so fun about the way this effect works, giving you the power to click and change the image. It’s like an invisible paintbrush that smears at your command. Somehow it feels like the most customizable way to change your footage or vector/logo.
Liquid effect

Liquify lets you manipulate and reshape parts of your image as though you were pushing or pulling wet paint. It’s commonly used in beauty retouching or surreal animation.
Using it simply go to Effect > Distort > Liquify.
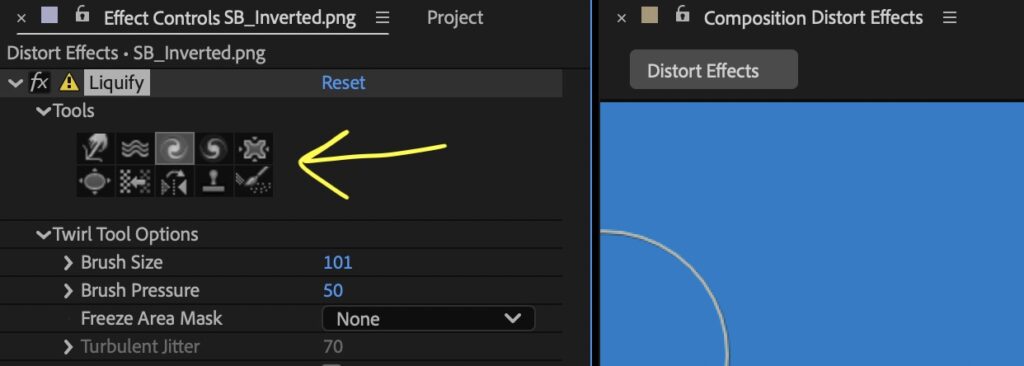
In the Effect Controls, choose a tool (like Warp, Pucker, Bloat, or Twirl). Adjust Brush Size and Pressure before painting directly on your image in the Composition panel.

Click and drag to distort the object or image. To animate, set keyframes for Distortion Mesh and make gradual adjustments over time. Like most of these distortion effects, keep the Liquify Effect subtle when working with faces. Small movements go a long way.
How to use the Displacement Map effect in After Effects
The Displacement Map effect is one of the most powerful tools for creating realistic texture-based distortion. Like making a logo appear to ripple with water or conform to the surface of fabric. Technically speaking, you are displacing the pixels of whatever you’re applying the effect to.
The displacement map is typically used for “glitchy” effects. For this article, let’s just go over the basics of creating a general glitch effect.
First, go to Effect > Distort> Displacement Map and add it to your layer that you want the effect applied to. Then add a Solid Layer to your timeline, above your footage or image. Next, add Turbulent Noise to that layer.
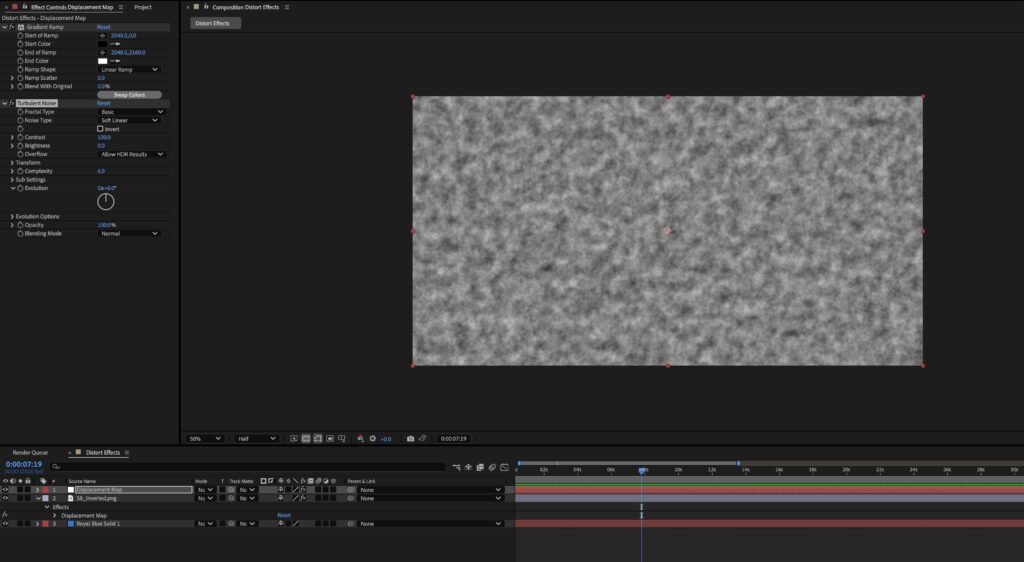
Next, change the Noise Type to Block.
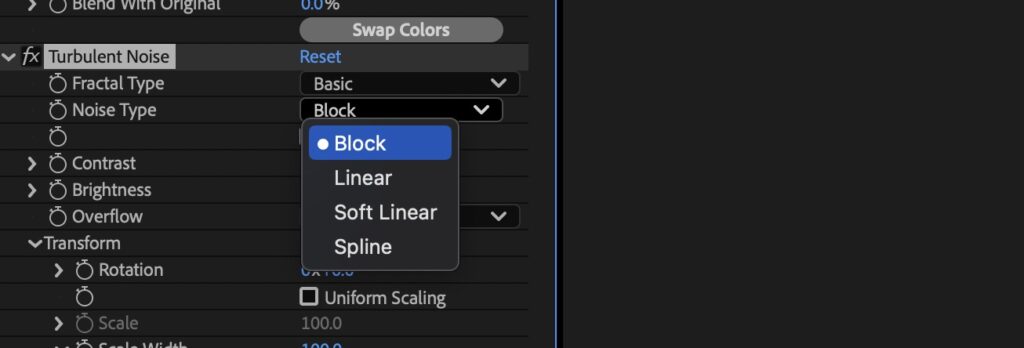
Turn off Uniform Sampling under Transform and stretch out the “blocks” by changing the Scale Width and Scale Height
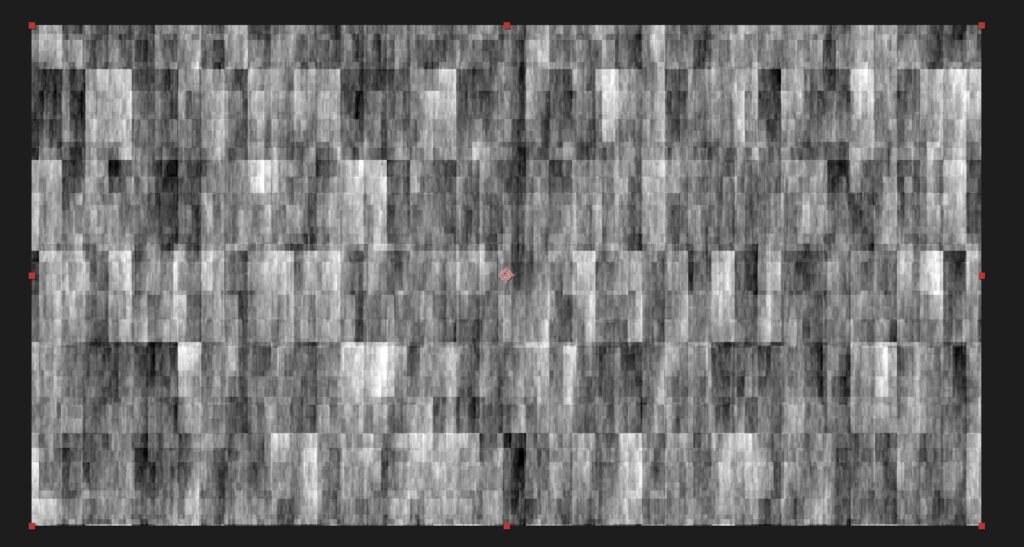
Then go back into your displacement map and change Max Horizontal Displacement or the Max Vertical Displacement to any number. Finally, set some keyframes and you’ll get some datamoshing, glitch-type effects.

Creative examples of distortion in action
Distortion effects are everywhere once you start noticing them. So let’s talk about some common real world examples.
The wavy transitions in music videos often use Turbulent Displace or Displacement Maps. An example of this can be found in the music video for “Tranz” by Gorrilaz.
Dream or flashback scenes in films use Liquefy and Mesh Warp for fluid, surreal visuals. One semi-recent example is from 2018’s Annihilation with the “shimmer” wall.
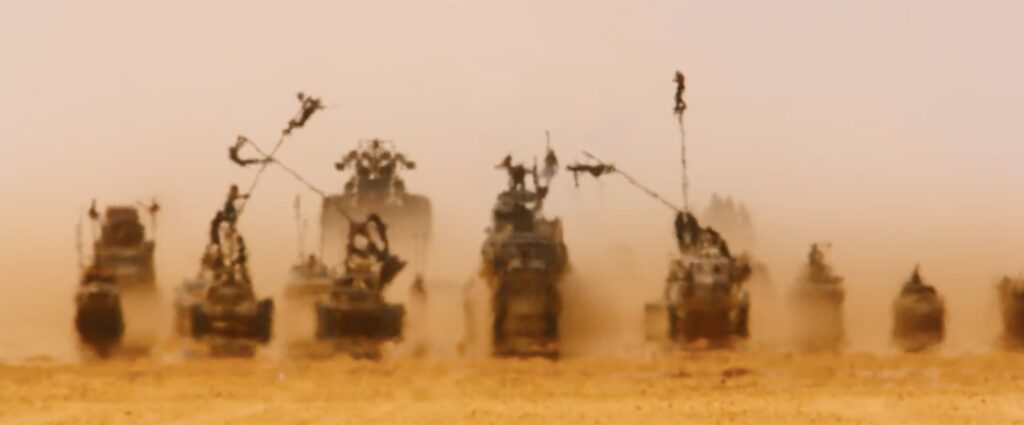
The heat shimmer in action movies often comes from Wave Warp with a slight blur. A perfect example of this can be found in Mad Max Fury Road, using a telephoto lens and the wave warp effect.
If you were to take a telephoto lens and aim it at the horizon, the focal compression would naturally create a heat shimmer to the eye (if it was hot enough). So to create one on your own, you need only a longer lens to create the compression so you can add the shimmer in post.
The curved reflections on phone screens or chrome surfaces use Optics Compensation or CC Lens. Experimenting In AE with the distort effects help you understand their natural look and when to exaggerate for impact.
Tips and mistakes to avoid with distort effects
Here are some quick dos and don’ts to keep your results clean and professional:
Do: Use masks or track mattes to isolate distortion only where you need it.
Don’t: Overdo the intensity! It’s easy to push too far and make the footage unreadable or distracting.
Do: Combine with similar effects like Glow, Directional Blur, or Tint for richer results.
Do: Animate with keyframes for subtle, controlled movement instead of static distortion.
Don’t: Forget to turn on Motion Blur! If your distortions move fast, it helps sell the realism.
Do: Add sound effects! If a logo or object is moving, the audience needs to hear what it’s doing.
Do: Be sure to preview in smaller resolutions., Choose Half, Third, or Quarter resolution since some of these effects and renders will slow down your workflow.
Experiment with distort effects in your next project
Distortion effects in After Effects open up endless creative possibilities, whether its realistic environmental motion to bold, abstract transitions and glitches.
Once you’re comfortable with using the effects and tweaking the images here and there, try stacking two or three distortion effects together. Combine Turbulent Displace with a Displacement Map for a layered ripple look, or use Liquefy with Wave Warp for melting text animations. Go wild! The key is experimentation – every small tweak changes the personality of the final product.
If you want to save time and jump straight into using pre-made distortion templates, check out the After Effects templates in the Storyblocks library. Templates are a great way to add advanced effects and motion graphics to any project quickly. And if you’re new to After Effects, breaking down how a template works is a great way to get familiar with the program.