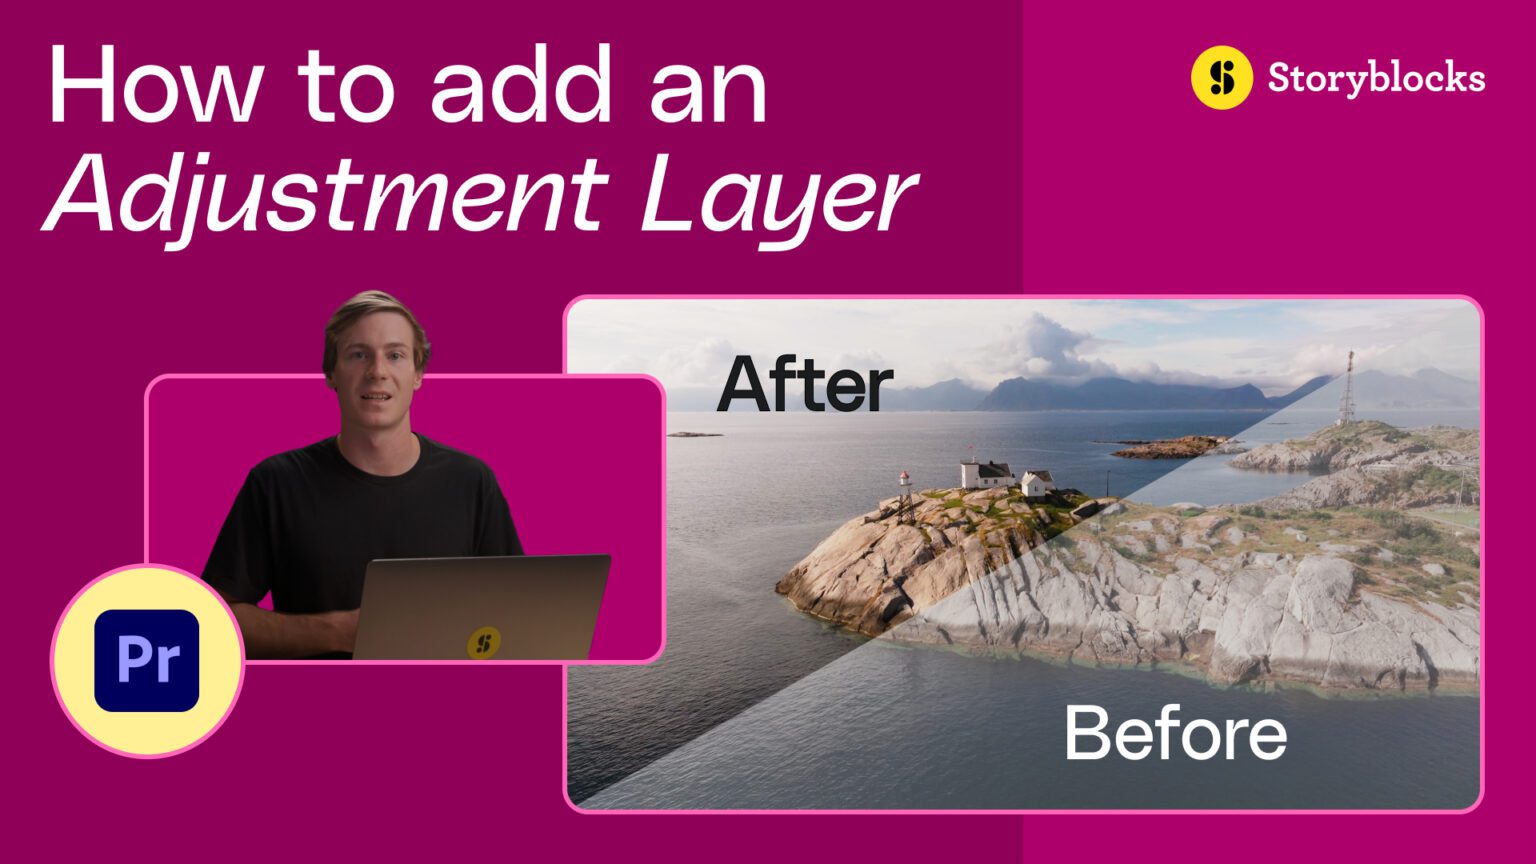
Whether you’re adjusting colors, tweaking contrast, or adding effects, adjustment layers save you a ton of time and effort by streamlining the process.
If you’re learning or just getting started with learning how to edit in Premiere Pro, adjustment layers are an essential tool to know how to use. Whether you’re adjusting colors, tweaking contrast, or adding effects, adjustment layers save you a ton of time and effort by streamlining the process.
In this post, we’ll go over what adjustment layers are, how to add an adjustment layer in Premiere, and different ways that you can use them. You can follow along with the post, or watch our video tutorial below. Let’s get started!
What is an adjustment layer?
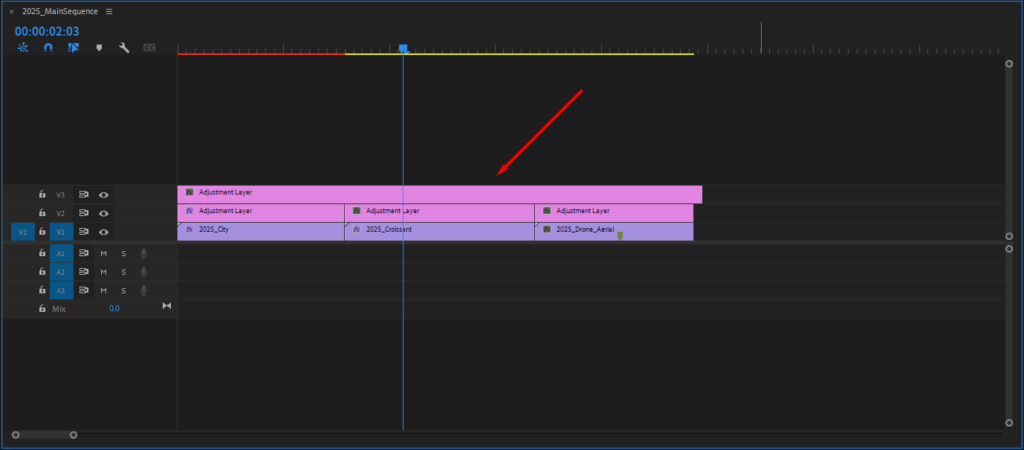
An adjustment layer preserves your original clips and lets you apply changes or effects to multiple clips at the same time. Unlike normal layers, which only apply to a single clip at a time. Your adjustment layer works as a transparent overlay above all of your regular layers within your timeline, and any changes or effects you add to it are applied uniformly to all of your clips.
How to add an adjustment layer in Premiere Pro
Adding an adjustment layer is simple, and just takes three steps.
1. Navigate to the project window
First, locate your project window. If you don’t see it, go to Window > Projects in the top navigation to pull it up. You should also be sure to import and include any video clips you want to use your adjustment layer on. If you have our Adobe plugin, you can easily browse and download clips from our library right in Premiere.

2. Select Adjustment Layer
Find the New Item icon in the bottom right of the window, then select Adjustment Layer.

3. Confirm resolution
Finally, a window will pop up showing the resolution of your new adjustment layer. By default, Premiere will set it to match your timeline. To confirm and apply your adjustment layer, click OK, and it’s ready to use!


How to use adjustment layers
There’s a ton of ways you can use adjustment layers for your projects in Premiere.. Let’s take a look at four key things you can use them for.
1. Correcting and grading colors
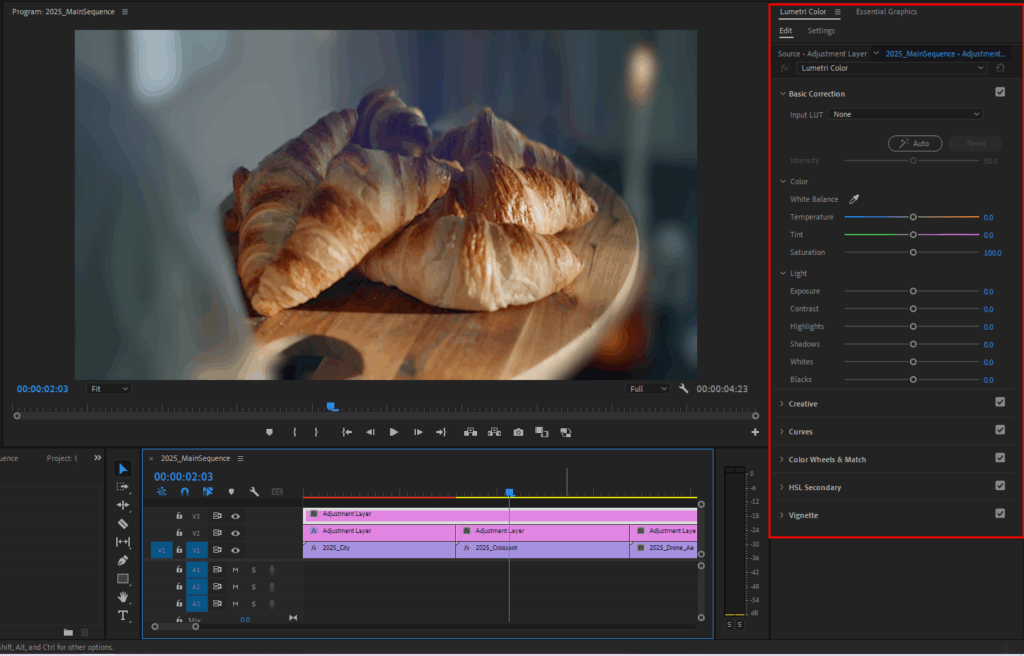
One of the main uses for adjustment layers is to change the color cast of your clips, including color correction, saturation tweaks, or tonal enhancements.
This is especially handy if you want to give your video a cohesive look and feel all the way through without altering the originals or having to add changes to individual clips. Adjustment layers also support blend modes, which opens up even more creative possibilities.
2. Adding effects
You can add a singular effect to all of your clips, or use multiple adjustment layers to stack effects on top of one another for more intricate edits. Adding effects like a Gaussian Blur will create a dreamy look, while a glitch effect will add visual interest and grab your viewers’ attention.
Applying effects with adjustment layers is most effective when you want to add them to the entire project. For instance, you might want vignettes, film grain, or black bars throughout the project. With an adjustment layer, you simply extend it across the whole sequence and it’s done.
3. Stacking multiple adjustment layers
For more detailed edits, you can use multiple adjustment layers to stack effects and get precise control over the intensity of different effects. For example, you might have one adjustment layer for color correction and another for film grain. You can turn each layer off independently, making it easy to test combinations and apply only the layers that match each part of the project.
4. Creating custom transitions
You can also create custom transitions by adding effects to your adjustment layer, then animating it with keyframes. All you have to do is position an adjustment layer between two clips, add an effect like Gaussian Blur, then animate the intensity to transition between the clips.
Here’s an example: For a zoom transition effect, apply the Transform effect to your adjustment layer, create a scale keyframe at your starting point, then increase the scale to about three times the original value at the cut between clips.
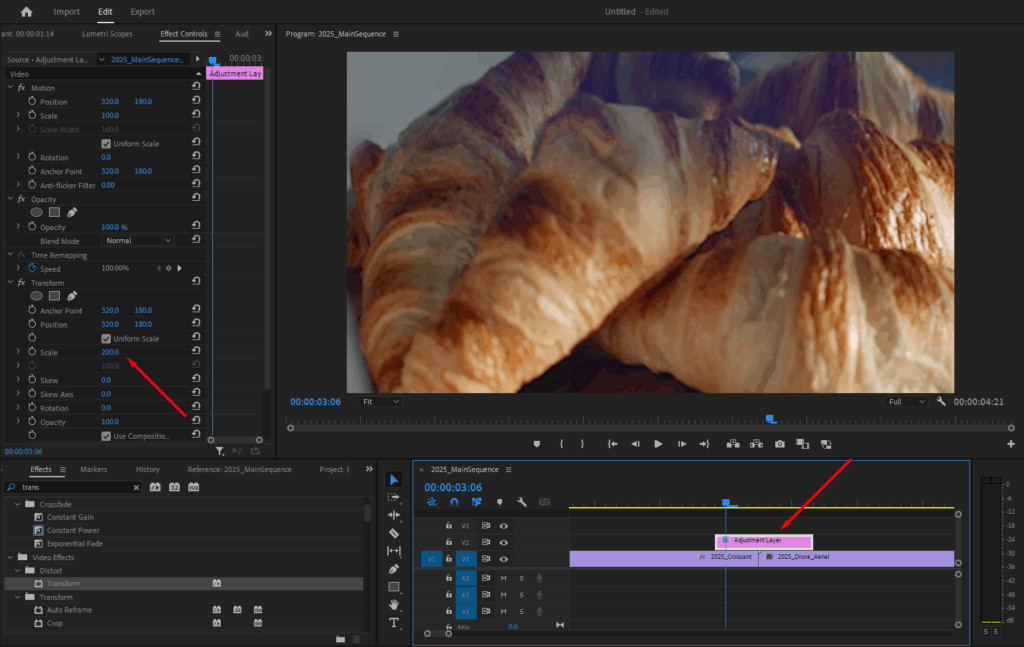
The benefit is that once you’ve created an adjustment layer with filters and keyframes, you can copy and paste it to other sections of your timeline, speeding up editing.
Pro tips for using adjustment layers
Here are six tips and tricks to get more out of your adjustment layers:
- Name your layers for easy reference. As your timeline gets harder to navigate, having descriptive names makes it much easier to find key parts and make changes quickly.
- Manage playback performance. If you add effects on multiple adjustment layers, it’ll slow down playback. If you experience lag with using multiple effects, try prerendering your timeline (Sequence > Render In to Out) or using proxies for smoother editing.
- Use markers to sync effects. Add markers to your adjustment layers so that you can quickly find specific moments in your video, like where the beat hits or a scene changes.
- Consider nesting vs. adjustment layers. Adjustment layers are great for applying effects across multiple clips, but nested sequences might be better when you need to apply time-based effects (like speed changes) or when you want to treat multiple clips as a single unit.
- Duplicate adjustment layers for consistency. If you’ve created an adjustment layer with the perfect combination of effects for one scene, duplicate it (Cmd/Ctrl + D) and use it in other scenes for consistency.
- Target specific areas with masks. If you want to only make changes or add effects to a specific area of your clips, you can move and position your adjustment layers to only cover certain parts. For more precise editing, you can add a mask to your adjustment layer so any changes you make only apply to specific parts of your frame.
FAQs about adjustment layers
Why is the adjustment layer greyed out in Premiere Pro? / Why can’t I add an adjustment layer?
If the adjustment layer option is greyed out, it’s probably because you don’t have a sequence open in your timeline. Create a new sequence or open an existing one, and the adjustment layer option should become available. The resolution of the adjustment layer is based on your sequence settings, so Premiere needs an active sequence to reference.
How do I save an adjustment layer as a preset?
Select the adjustment layer in your timeline, then go to the Effects Controls panel. Right-click on the effect you want to save and select Save Preset. Give it a name, hit save, and you’ll find it in the Presets folder in your Effects panel. You’ll need to save each effect individually, since Premiere doesn’t save all effects on a layer as one preset.
How do I turn off an adjustment layer?
To temporarily disable an adjustment layer without deleting it, click the eye icon next to the video track in your timeline where the adjustment layer sits. This toggles the visibility of that track. Alternatively, you can select the adjustment layer and press the Toggle Effect button in the Effect Controls panel to turn individual effects on or off.
Can I use adjustment layers with Lumetri Color?
Yes. Adjustment layers work with Lumetri Color, and it’s one of the main uses for them. Just select your adjustment layer and open the Lumetri Color panel to start grading.
Do adjustment layers affect audio?
No, adjustment layers only affect video. If you need to apply effects to multiple audio clips at once, you’ll want to use audio track effects or submixes instead.
Learn how to do even more in Premiere
Now that you’re an expert in adjustment layers, try adding them to your next project and get creative. Experiment with different changes and effects to understand how they work. Remember that adjustment layers aren’t just for fun edits or effects – the changes you add can enhance the story and emotional impact of your videos. Try adding things like a Ken Burns effect or a Motion Blur effect to get more comfortable creating in Premiere Pro. Once you learn the ins and outs of Premiere, you’ll be able to edit even more efficiently.
You can also find tons of templates in Storyblocks’ library that let you easily add advanced effects to your projects in Premiere Pro. You can completely customize templates to match your own style or brand – try one out today!