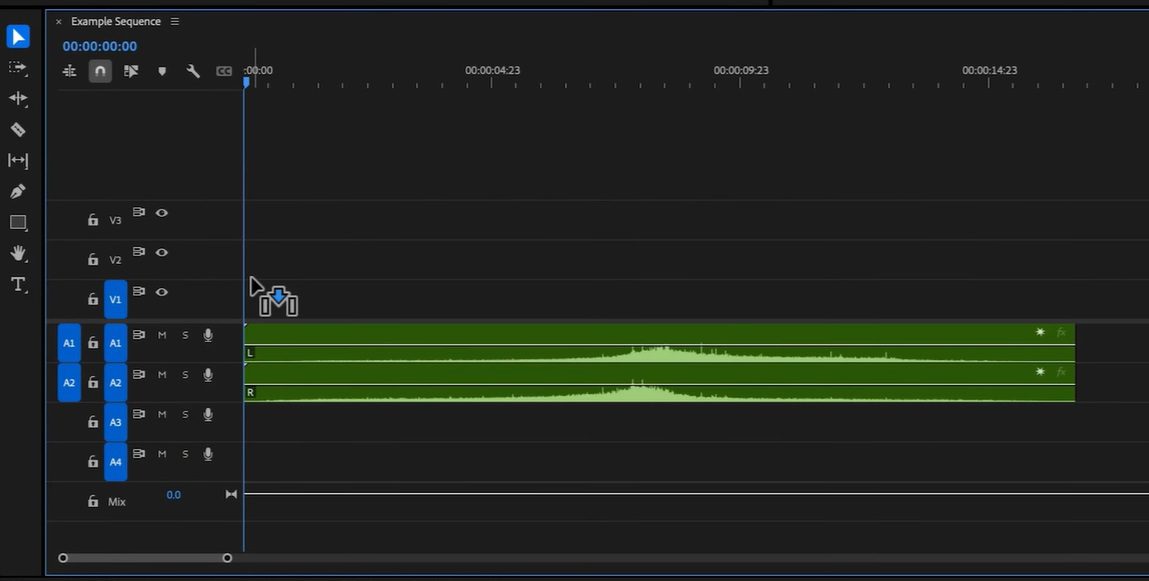
Audio editing can be a labor of love, and understanding how to manipulate your audio tracks is crucial for creating high-quality video content. While stereo audio typically provides a rich, immersive listening experience, there are times when converting a stereo track to dual mono becomes essential.
Keep reading to learn how to convert your stereo tracks to dual mono, or watch our quick video tutorial below.
Why use dual mono?
Stereo tracks offer a seamless soundscape, but sometimes you need more precise control over your audio tracks. Converting to dual mono allows you to:
- Independently adjust left and right audio channels
- Apply channel-specific effects
- Correct audio imbalances
- Pan individual channels
- Troubleshoot audio issues in specific channels
How to convert stereo to dual mono
Step 1: Locate your project panel
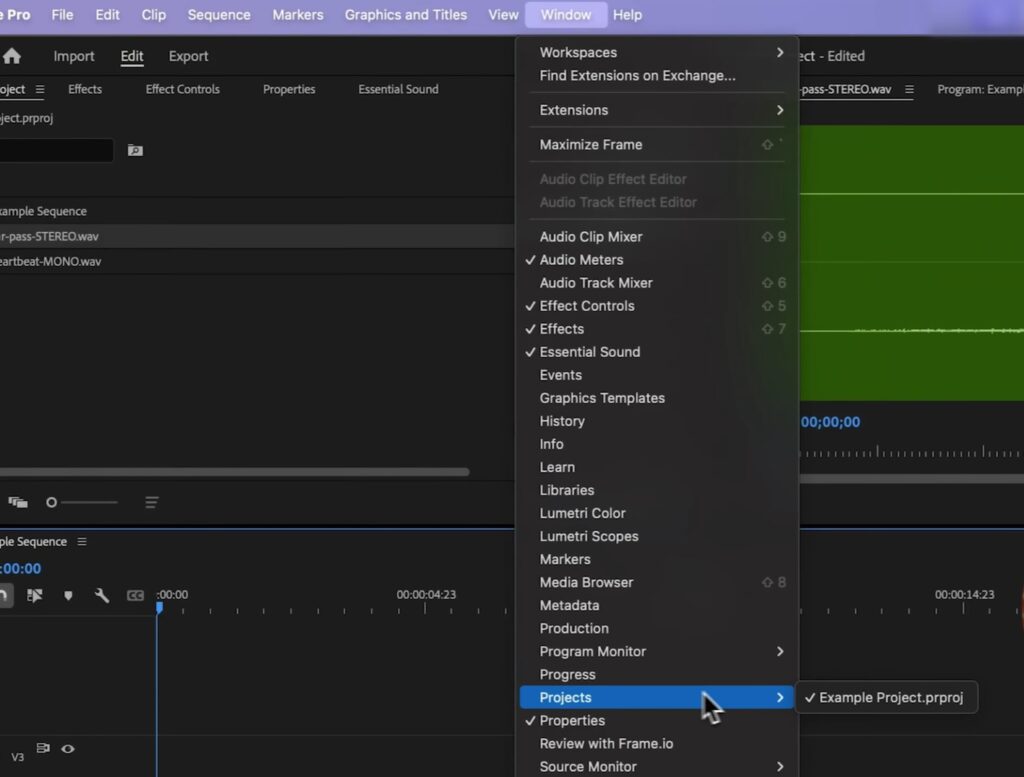
First, navigate to your project panel. If you don’t see it, you can find it under Window > Projects.
Step 2: Select your audio file
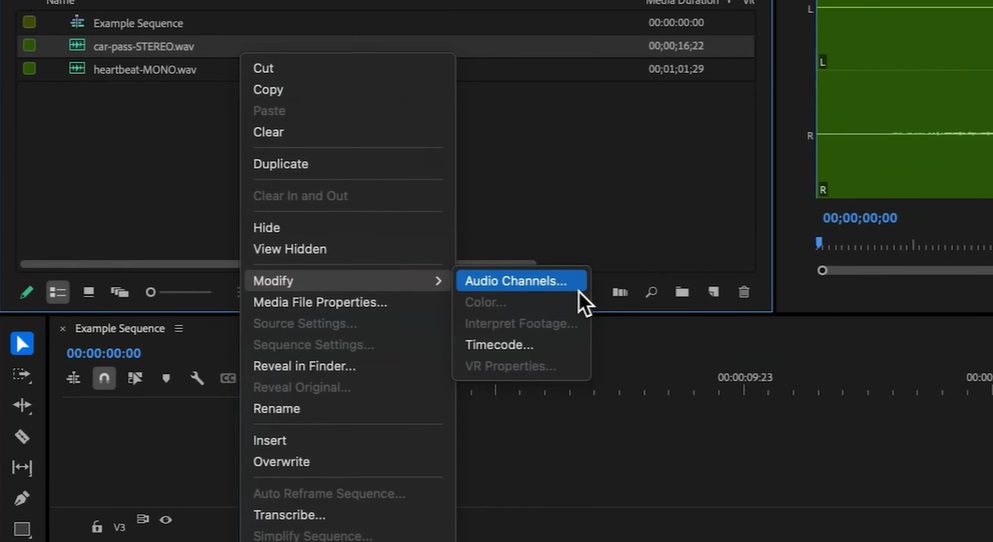
Next, find your audio file in the project panel. Right-click it and select Modify Audio Channels. If you need a royalty free music track or sound effect for your project, we have tons to choose from in our audio library.
Step 3: Change channel format
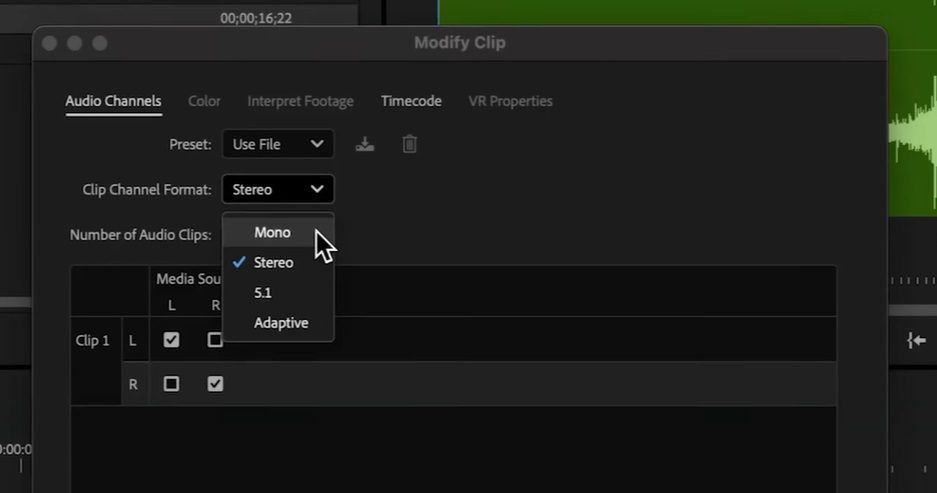
In the Modify Clip window, you’ll see a setting for Clip Channel Format that’s currently set to Stereo. Click the carrot next to Stereo, then select Mono from the drop-down menu options.
Step 4: Configure audio clips
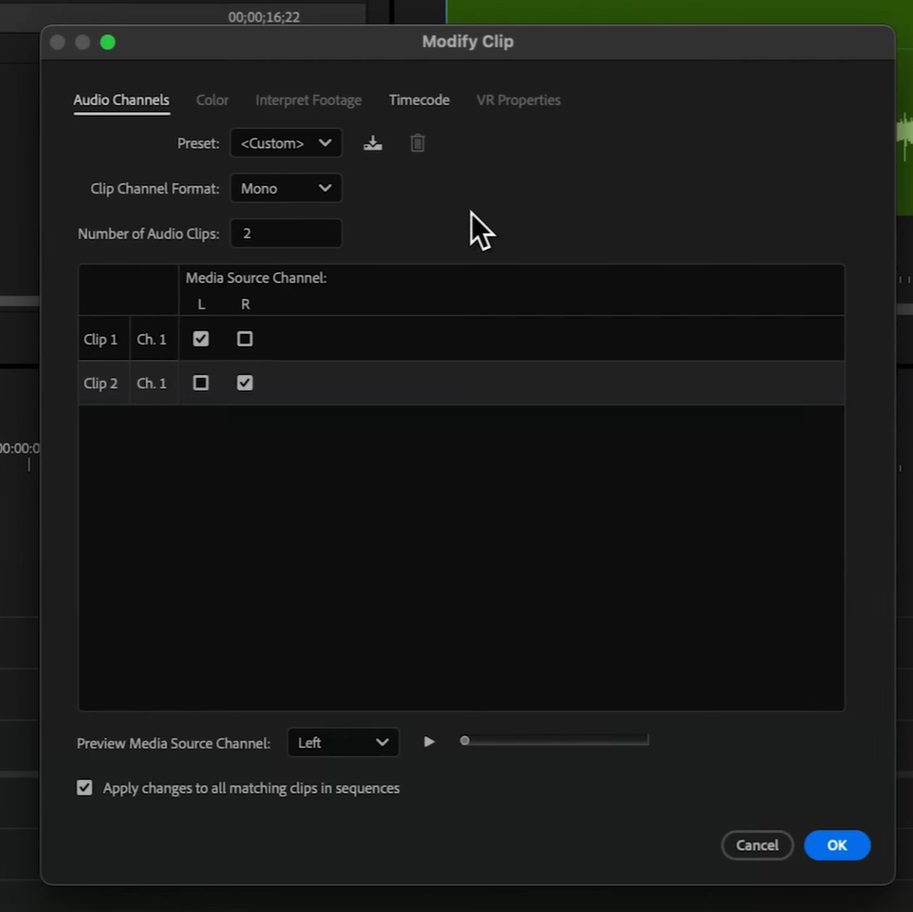
Next, set the Number of Audio Clips to 2 in the field directly below the channel format. Click anywhere on the window to update your selection. Now you should see two rows in the window, one for Clip 1 and one for Clip 2. Make sure Clip 2 has the box for R checked under Media Source Channel.
Step 6: Apply changes
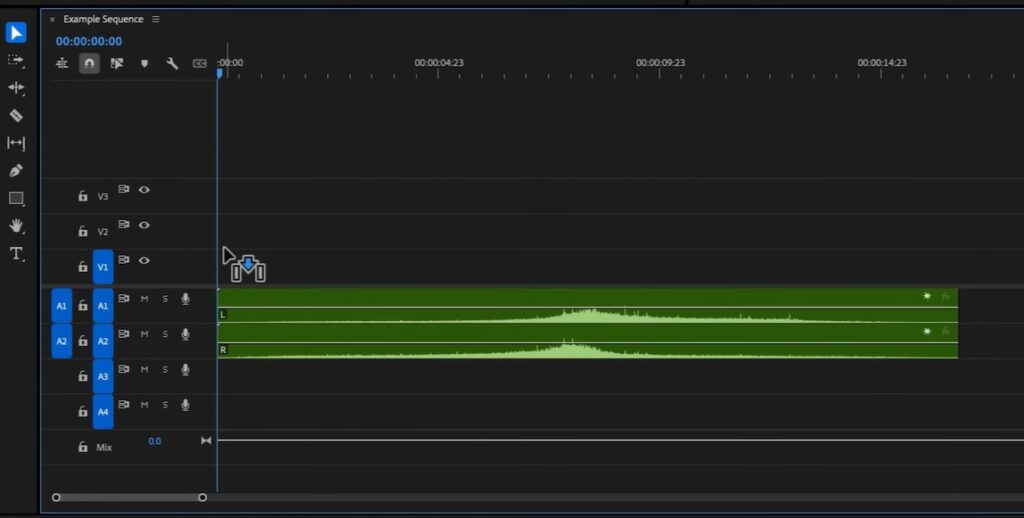
If everything looks correct from the last step, click OK to apply your changes. Now, select your audio clip from the Project window and drag it onto your timeline. You should see two mono channels on two separate tracks, which will let you mix the left and right channels independently of each other.
Pro Tips
- Always work on a copy of your original audio file
- Listen carefully to each channel to ensure no audio quality is lost during conversion
- Experiment with individual channel effects and mixing
Conclusion
Converting stereo tracks to dual mono in Premiere Pro is a straightforward process that opens up new possibilities for audio editing. By following these steps, you can gain unprecedented control over your audio channels, allowing for more precise and professional sound design. Learn how to do even more in Premiere Pro, like fading out your audio, adding sound effects, and more with our selection of in-depth tutorials.
Remember, the key is to experiment and find what works best for your specific project. Each video and audio track is unique, and mastering these technical skills will elevate the quality of your video productions, along with having a Storyblocks subscription. You’ll instantly get access to unlimited downloads of over 10 million royalty free stock assets, including music, footage, images, and more. Sign up today to start downloading!